
Welcome to Finorova
A modern finance management SaaS to track income, expenses, budgets, and reports across multiple accounts and workspaces. This guide walks through every feature available in the Admin and User panels.
Author: Codericks · Support: codericks.envato@gmail.com
Use the search bar in the top right to quickly jump to any feature. The left sidebar tracks your scroll position automatically.
Server Requirements
Before you install Finorova, make sure your hosting environment meets the following requirements. The installer also checks these automatically in Step 1.
PHP Version
PHP 8.2 or later is required. PHP 8.3 is recommended for best performance.
Required PHP Extensions
The following PHP extensions must be enabled on your server:
- pdo
- pdo_mysql
- curl
- mbstring
- openssl
- tokenizer
- xml
- json
- fileinfo
Database
MySQL 5.7+ or MariaDB 10.3+.
Folder Permissions
The following paths must be writable by the web server (typically chmod 775):
.envfile (in the project root)storage/folderbootstrap/cache/folder
On most shared hosts (cPanel, Plesk), you can switch PHP versions and enable extensions from "Select PHP Version" or "PHP Selector" tool.
Installation
Finorova ships with a guided web installer — no command line required. Follow the three steps below.
Prepare the Database (cPanel)
Create a fresh MySQL database for Finorova. In cPanel:
- Log in to cPanel and open "MySQL® Databases".
- Under Create New Database, enter a name (e.g.
finorova_db) and click Create Database. - Under Add New User, enter a username and a strong password. Click Create User.
- Under Add User To Database, select the user and the database, click Add, then grant ALL PRIVILEGES.
- Note down the database name, username, and password — you will need them in Step 3.
cPanel usually prefixes your DB name and username with your account name (e.g. myacc_finorova_db). Use the full prefixed name when configuring.
Upload the Script
- Download the Main Files ZIP from your CodeCanyon downloads.
- Extract the archive on your computer — inside you will find a
script/folder. - Upload the contents of
script/to yourpublic_html/(or a subdirectory, e.g.public_html/finorova/) using cPanel File Manager or FTP. - Set folder permissions to
775on:storage/bootstrap/cache/
- Make sure the
.envfile (or the project root, if.envdoesn't exist yet) is writable.
Point your domain's document root to the public/ folder for production. If your host doesn't allow that, see the cPanel-specific guide in the support area.
Start the Installer
Open the installer in your browser:
https://yourdomain.com/install/The installer walks you through four screens:
- System Requirements — auto-checks PHP version, required extensions, and folder permissions. Fix any red items, then click Continue.
- Purchase Verification — enter your Envato purchase code to activate your license.
- Database Configuration — fill in the credentials you noted in Step 1 (host, port, name, username, password). The installer tests the connection, writes your
.envfile, and imports the schema automatically. - Admin Account — enter your name, email, and a password (minimum 8 characters) to create the first admin user.
After installation completes, the install/ folder automatically renames itself to install_completed_<timestamp>. If that doesn't happen on your server, delete the install/ folder manually for security.
That's it! You can now log in at https://yourdomain.com/login with the admin credentials you just created.
Quick Start
Three steps to get up and running after installation:
- Log in as Admin — visit
/loginwith the credentials created during install. - Configure General Settings — set your app name, logo, currency, timezone and SMTP.
- Create a Plan — define at least one subscription plan so users can sign up.
Default admin credentials are printed in the installer summary. Change the password from Settings → Security immediately after first login.
Cron Setup
Finorova relies on a single server-side cron job to power every recurring task — auto-recording bills, sending email reminders, expiring trials, and flagging overdue debts. The application will appear to "do nothing" automatic until this one cron entry is in place.
You only ever add one cron line. Do not call any URL from cron — the scheduler runs through PHP CLI, not HTTP. A single entry handles every current and future scheduled task automatically.
Why It's Needed
The application uses Laravel's built-in task scheduler. Every minute the scheduler wakes up, checks its internal list of scheduled commands, and runs only the ones whose time has come (e.g. daily at 08:00, every Monday, etc.). Without the cron entry, that "wake up every minute" trigger never fires and nothing automatic happens.
Setup on cPanel
- Log in to cPanel and open "Cron Jobs" (under the Advanced section).
- Under Add New Cron Job, set Common Settings to "Once Per Minute (* * * * *)". All five time boxes should show
*. - In the Command field, paste the line below — replace
/home/youraccount/public_htmlwith the absolute path to your Finorova installation:
* * * * * cd /home/youraccount/public_html && /usr/local/bin/php artisan schedule:run >> /dev/null 2>&1- Click Add New Cron Job to save.
The absolute project path is shown in cPanel's File Manager at the top of the page when you browse into your install folder. The PHP binary path varies by host — common values are /usr/local/bin/php, /usr/bin/php, or version-specific like /usr/local/bin/ea-php83. If unsure, ask your hosting provider for the "CLI PHP path".
Leave the email field blank in cPanel's cron form. Otherwise you will receive an email every minute. The >> /dev/null 2>&1 at the end already silences the output, but cPanel sometimes overrides this.
Setup on a VPS or SSH-enabled Host
If you have shell access (DigitalOcean, AWS, Linode, dedicated server, etc.):
- SSH into the server as the user that owns the web files (often
www-data,nginx, or your deployment user — not root). - Open the crontab for editing:
crontab -e- Append this single line at the bottom (adjust the path to your install):
* * * * * cd /var/www/finorova && php artisan schedule:run >> /dev/null 2>&1- Save and exit (
:wqin vim, Ctrl+O then Ctrl+X in nano). - Confirm the entry was saved:
crontab -lIf you deploy with Laravel Forge, Ploi, or Laravel Cloud, you do not need to edit a crontab manually — toggle the built-in "Scheduler" switch on the server panel and the platform installs the entry for you.
Verify & Troubleshoot
After saving the cron entry, confirm that the scheduler sees all the registered tasks. From SSH (or cPanel's Terminal tool):
cd /path/to/finorova && php artisan schedule:listYou should see the full list of tasks together with their next scheduled run time. If the list is empty or the command errors out, the cron will not work either — fix the path and PHP binary first.
To trigger a manual run (useful for testing without waiting):
php artisan schedule:runIf something doesn't fire when expected, check these common issues:
- Timezone mismatch — tasks marked "daily at 08:00" use the timezone in
config/app.php. If your server is UTC but your users are in another zone, the task fires at UTC 08:00, not local 08:00. SetAPP_TIMEZONEin.envaccordingly. - Wrong PHP version — many hosts have multiple PHP versions installed. Make sure the cron uses the same version your web app uses (8.2+ required). Run
php -vvia the binary path you put in cron to verify. - Wrong user / file permissions — if the cron user can't write to
storage/logs/orstorage/framework/, the scheduler crashes silently. Use the same user that owns the web files. - Cron not running at all — check the server's mail log or run
grep CRON /var/log/syslog(Linux VPS) to confirm cron itself is alive. - Logs — scheduler errors land in
storage/logs/laravel.log. Tail it while running the command manually to surface any error.
For a quick smoke test, temporarily redirect output to a file instead of /dev/null: >> /path/to/finorova/storage/logs/cron.log 2>&1. After confirming entries appear every minute, switch back to /dev/null to avoid an ever-growing file.
What This Cron Does
The single cron entry powers all of the following — you do not register them individually:
| Task | When | What It Does |
|---|---|---|
bills:process |
Daily (00:00) | Records due bills marked auto-record as transactions and advances their next due date. |
bills:send-reminders |
Daily (08:00) | Emails the workspace owner 3, 1, and 0 days before each upcoming bill is due. |
bills:check-overdue |
Daily (08:00) | Sends in-app notifications for manual bills that have slipped past their due date. |
debts:check-overdue |
Daily | Flips active debts past their due date to overdue status. |
debts:send-reminders |
Daily (08:00) | Emails the workspace owner 3, 1, and 0 days before each debt is due. |
subscriptions:expire-trials |
Daily | Flips trialing subscriptions to expired once trial_ends_at has passed. |
subscriptions:trial-ending-reminders |
Daily (08:00) | In-app notification 3 days before a trial expires. |
subscriptions:plan-ending-reminders |
Daily (08:00) | In-app notification 3 days before a paid billing period rolls over. |
As Finorova releases new scheduled features in future updates, they are auto-picked up by the same cron entry — you never need to revisit your server's crontab.
Admin Dashboard
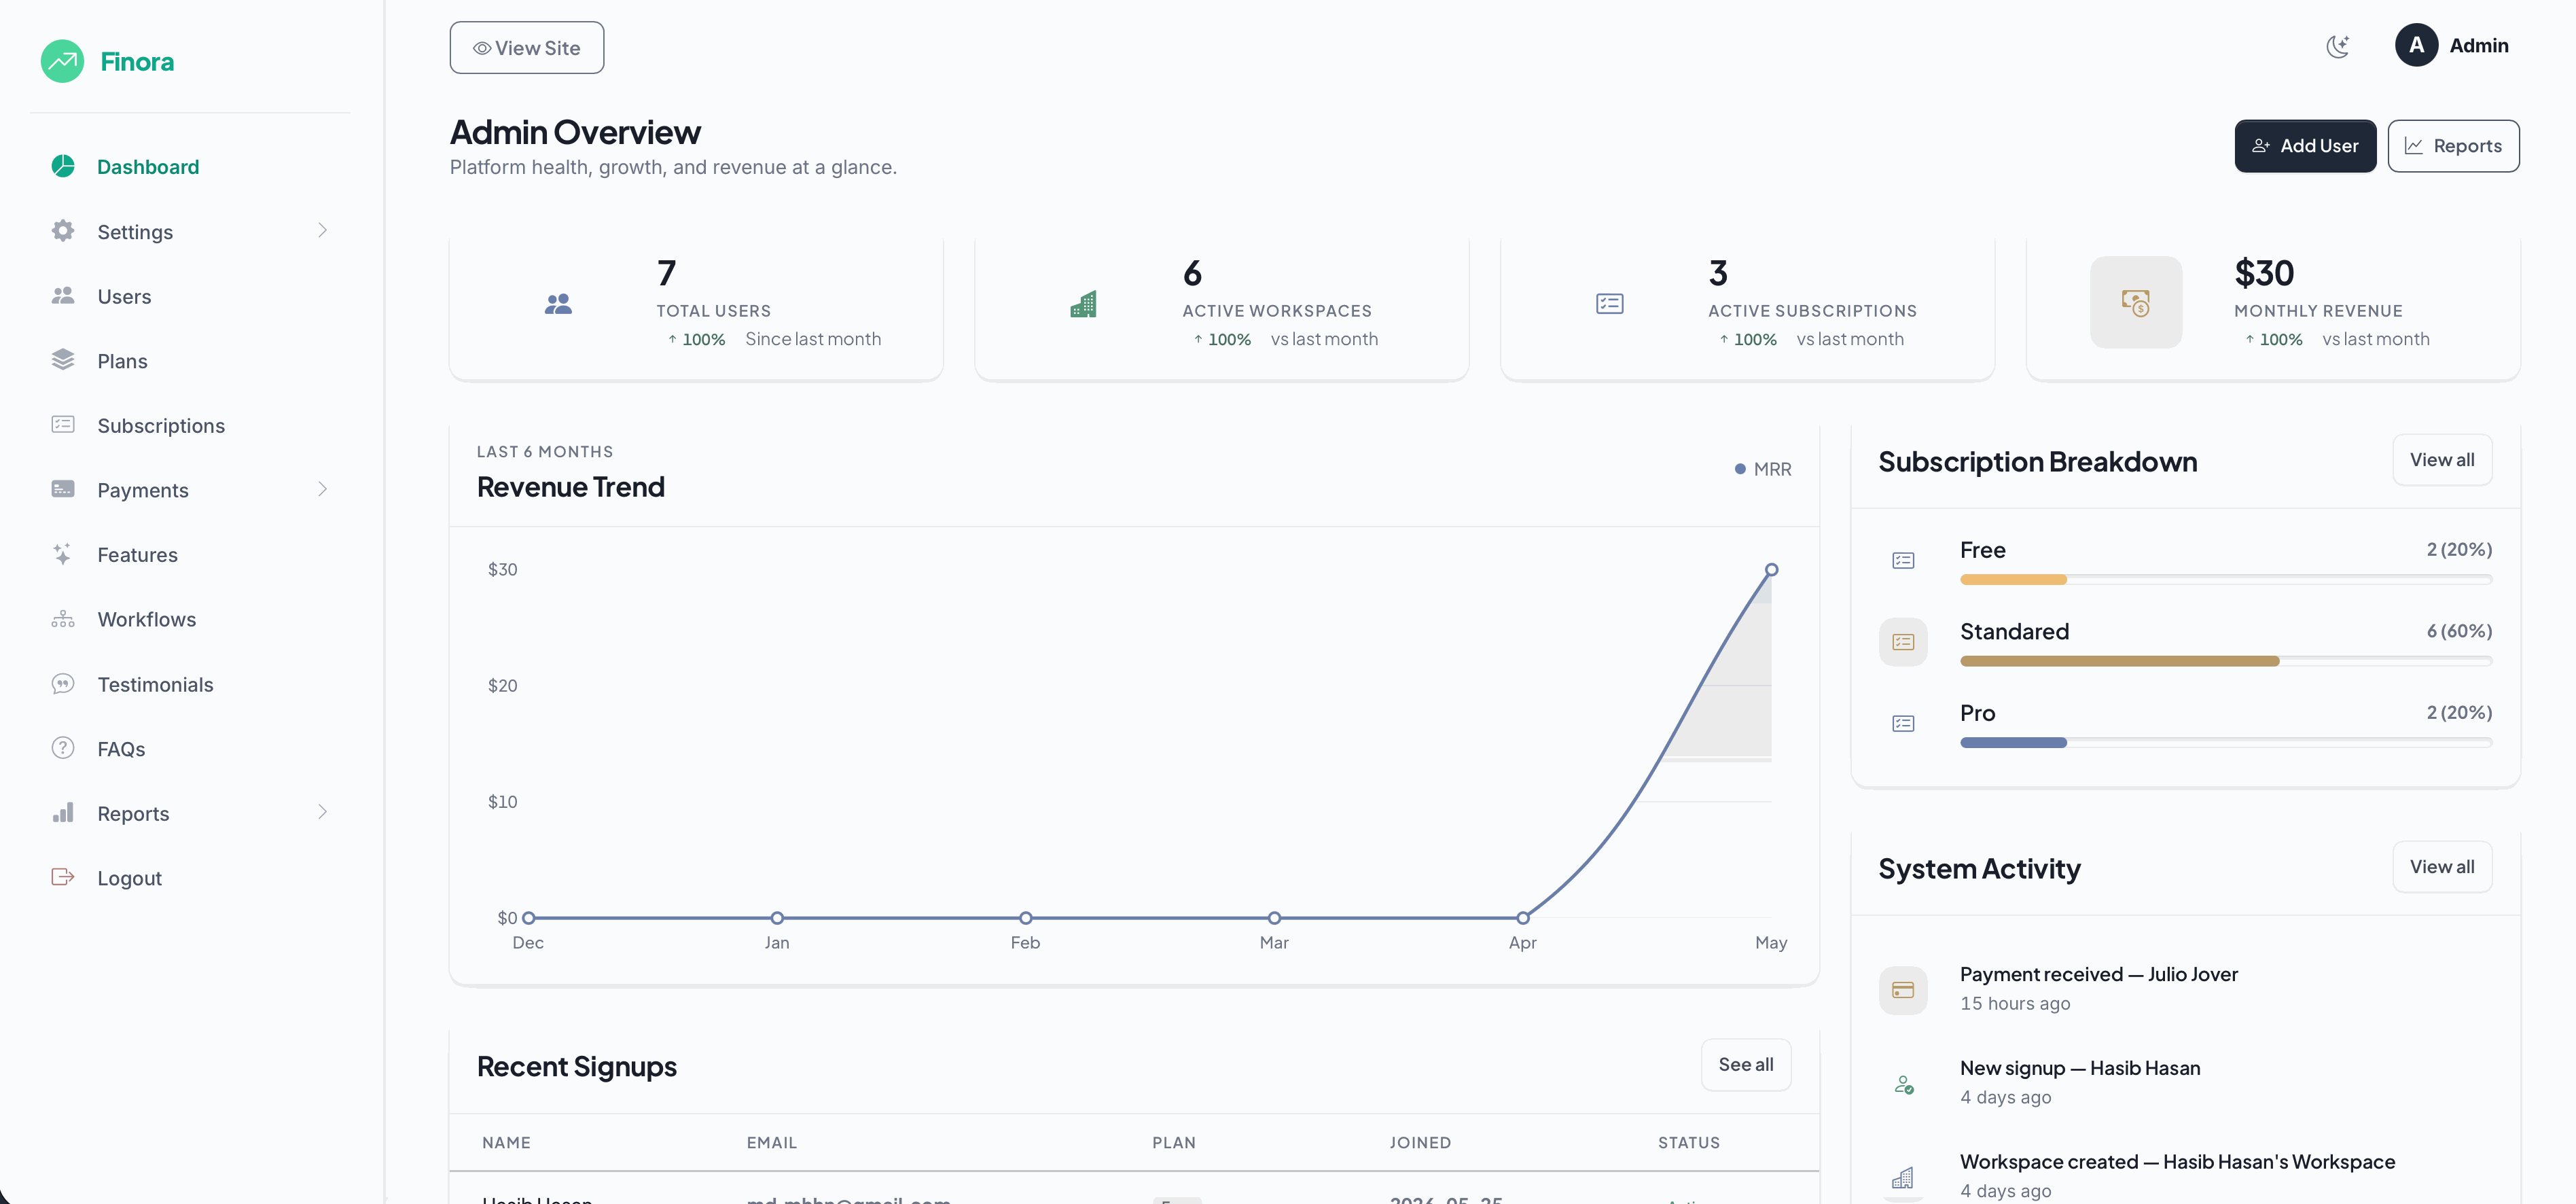
Overview Stats
Top-level snapshot of total users, active subscriptions, monthly revenue, and pending manual payments. Quick links to recent activity.
Settings
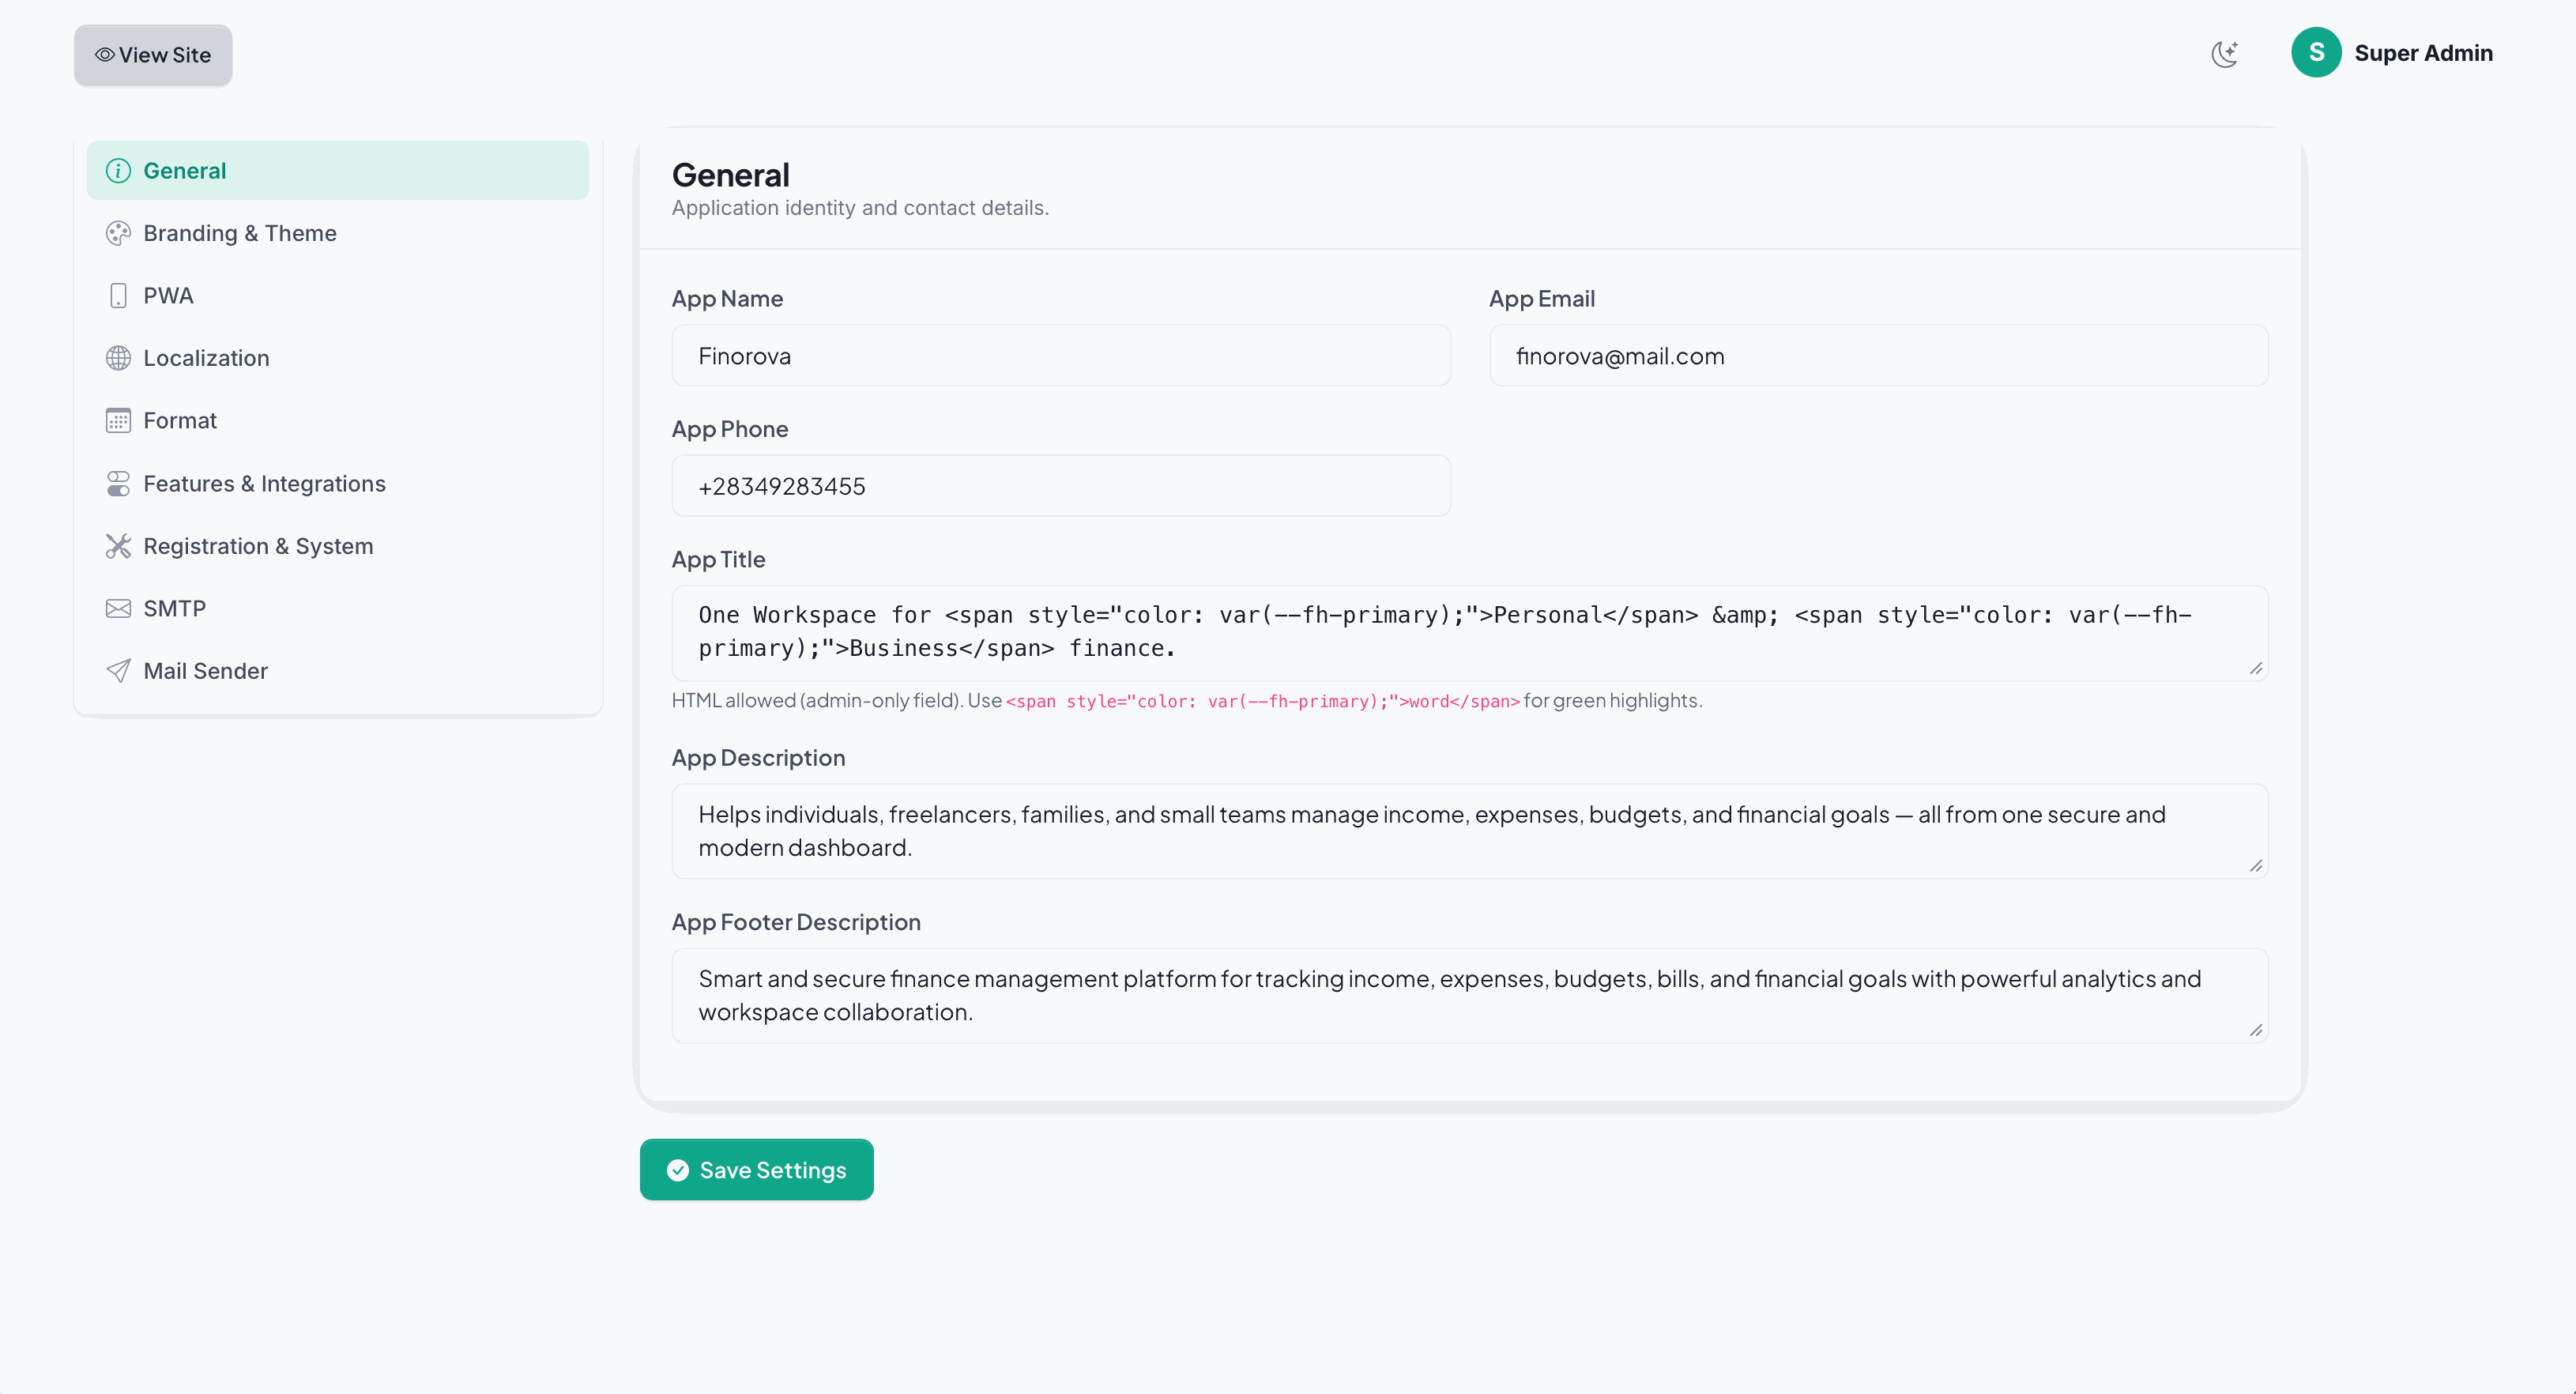
General Settings
Set your app name, logo, favicon, timezone, default locale, currency format and footer text. Configure SMTP for outgoing emails.
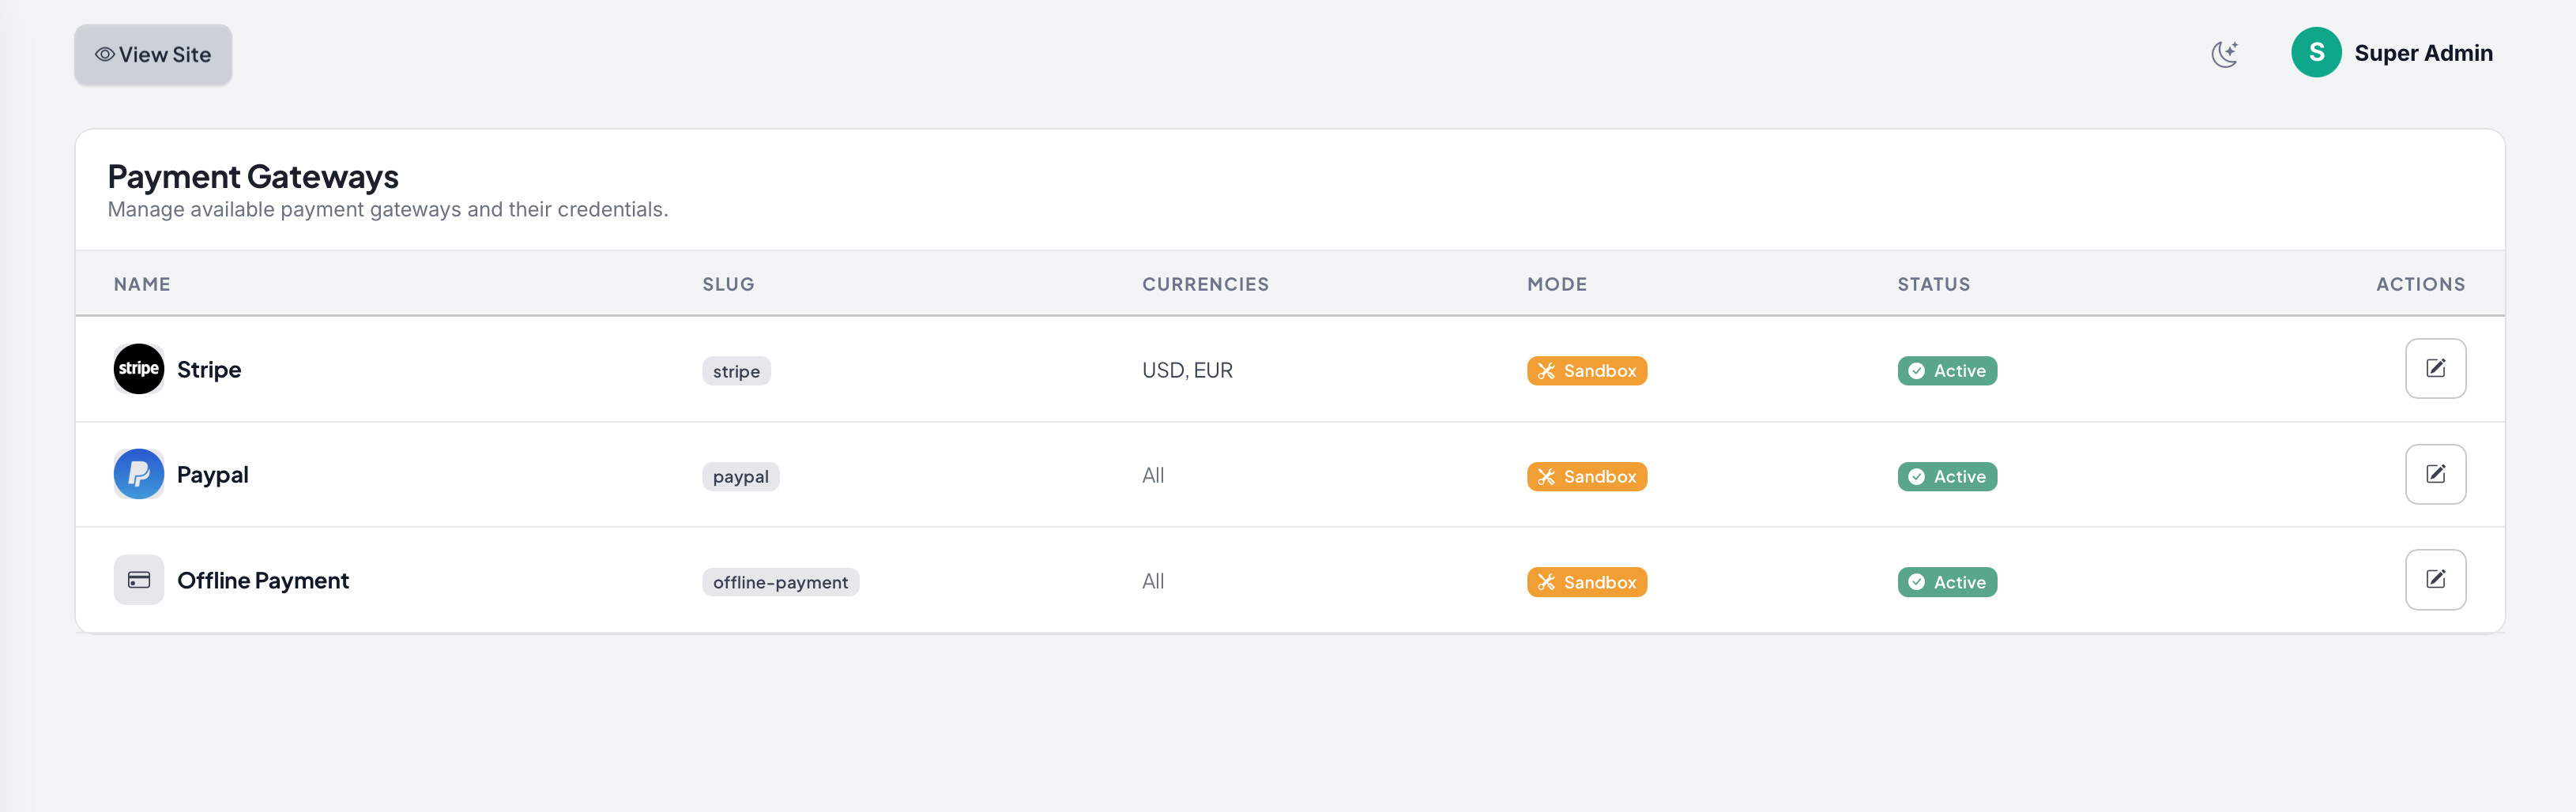
Payment Gateway
Enable and configure supported gateways (Stripe, PayPal, manual transfer). Add API keys and webhook URLs in one place.
Maintenance Mode
Take the site offline for upgrades with a custom message. Admins keep access while regular users see a maintenance page.
If maintenance mode was enabled without an admin account available, flip it back from the database:
- Open phpMyAdmin and select your Finorova database.
- From the left sidebar, open the
settingstable and click the Browse tab. - Edit the only row (pencil icon) and set the
maintenance_modecolumn to0to disable, or1to enable. - (Optional) Update
maintenance_messagewith the text visitors should see while the site is offline. - Click Go to save, then reload your site — access is restored immediately.
Users
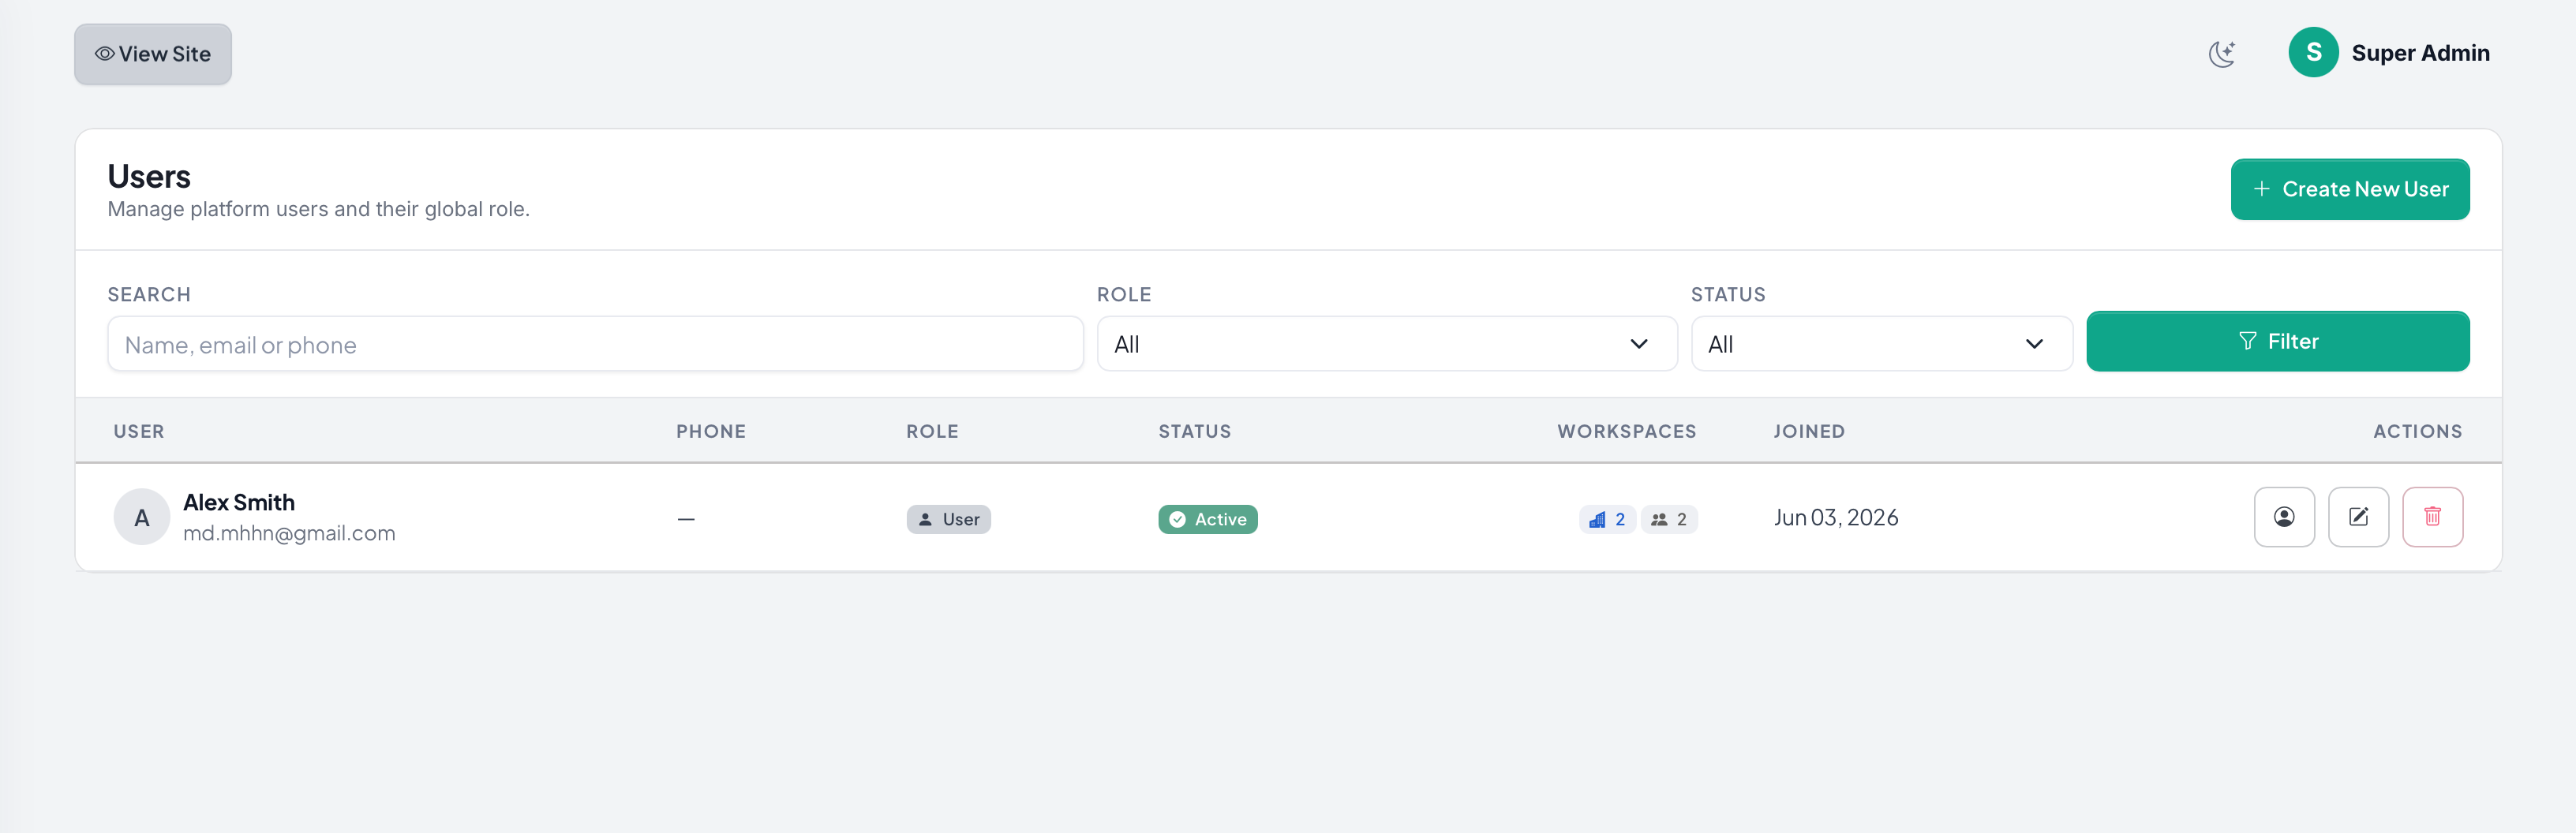
User Management
View, search and filter all registered users. Activate or suspend accounts, reset passwords, and inspect each user's workspaces and subscription history.
Plans
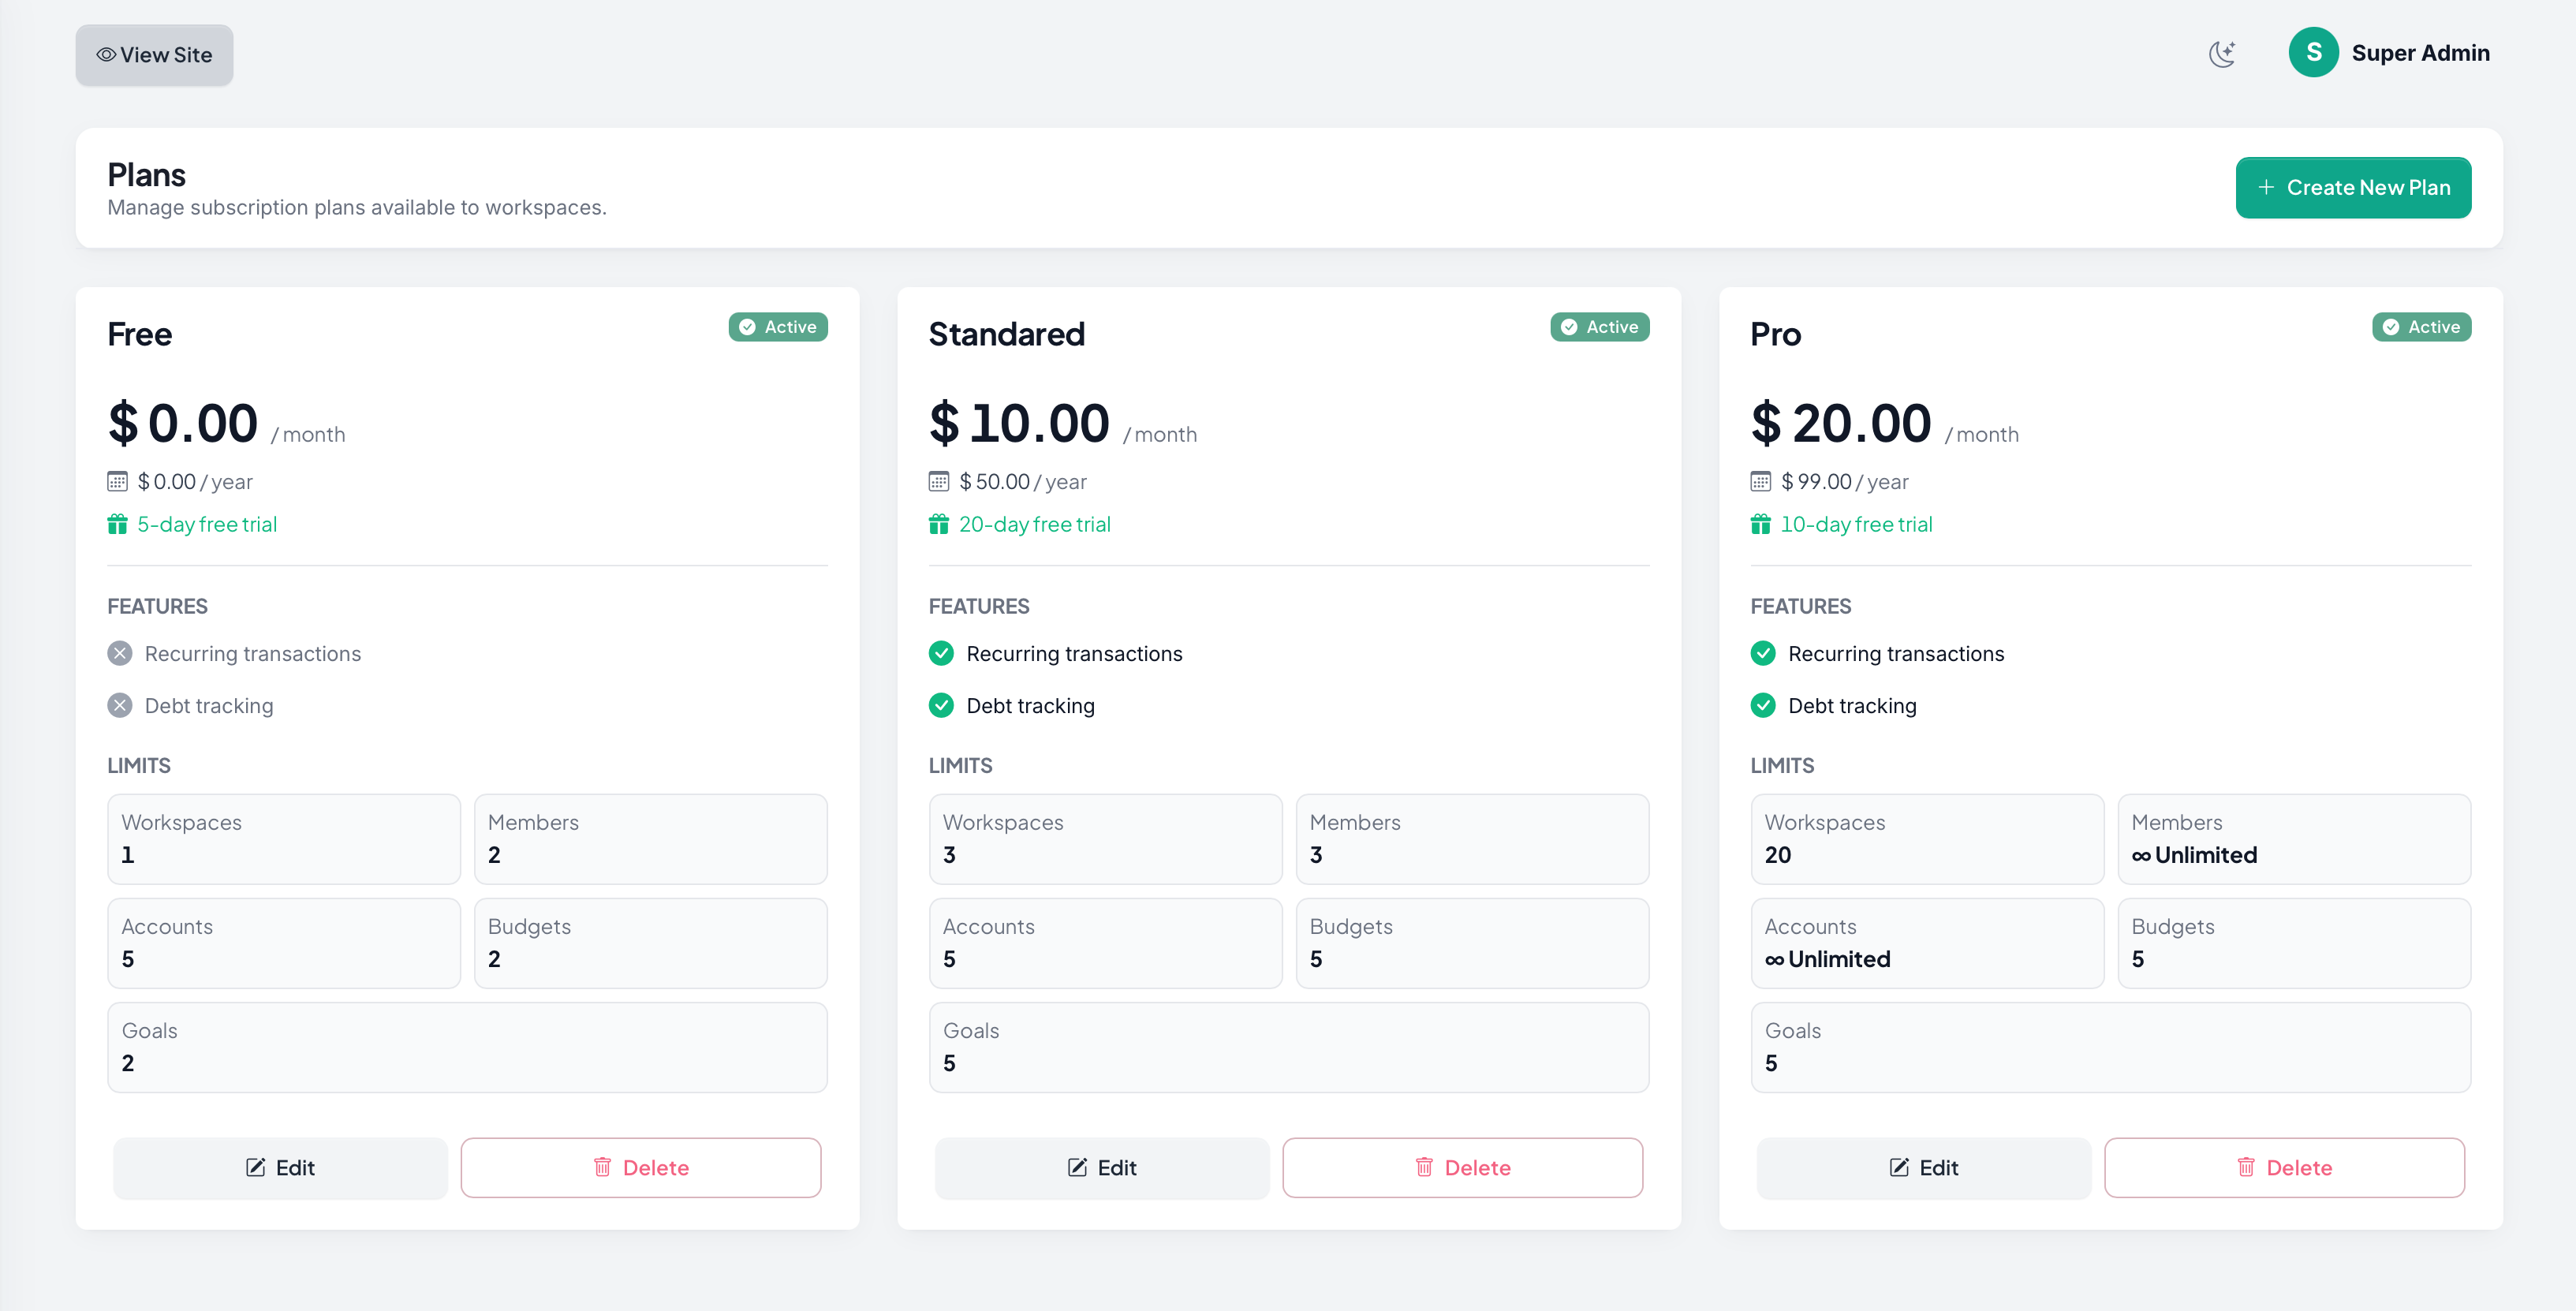
Subscription Plans
Create monthly and yearly plans with custom pricing, feature limits, and trial periods. Mark plans as featured or hide them from the pricing page.
Subscriptions
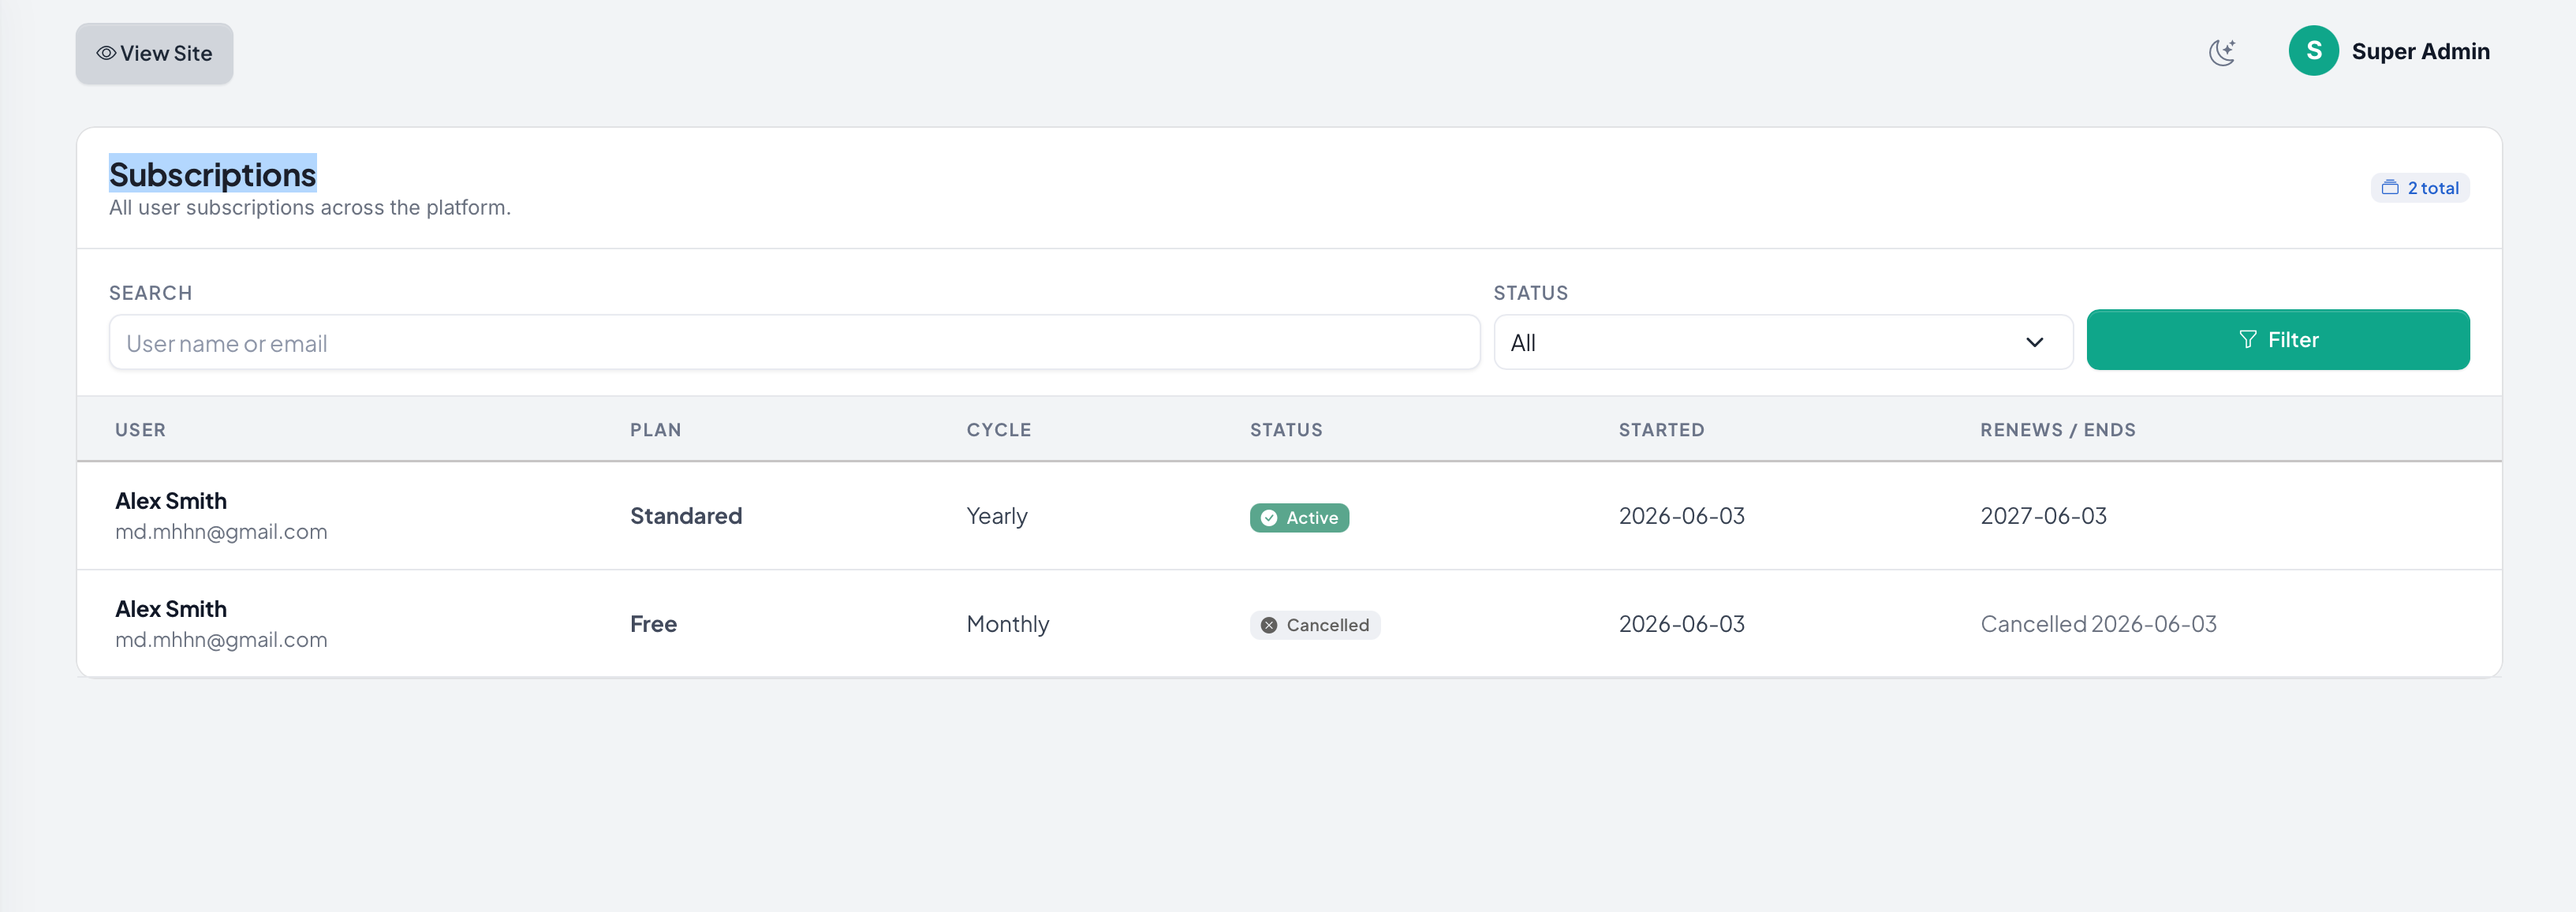
Active Subscriptions
Browse every active subscription, filter by plan or status, extend or cancel manually, and view the full billing history per user.
Payments
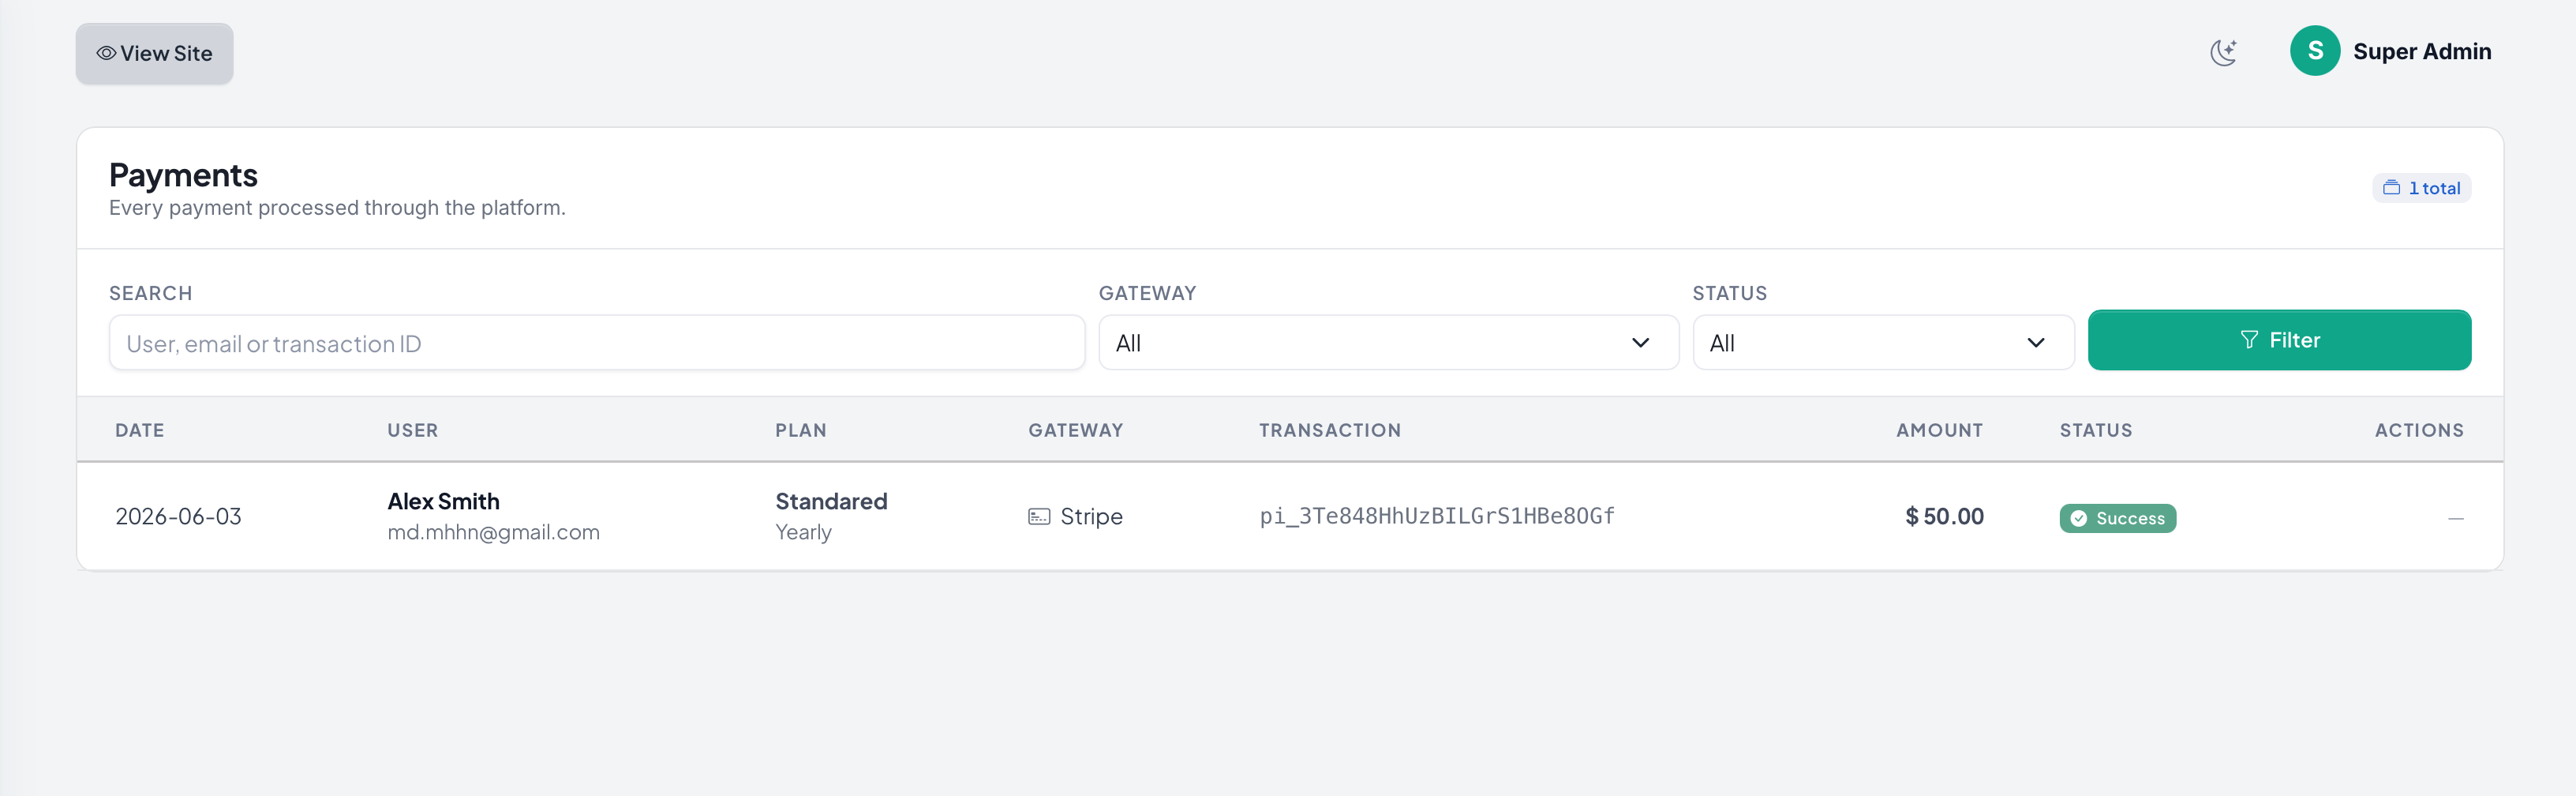
Online Payments
Full log of automated gateway transactions — Stripe, PayPal, etc. Filter by status, refund directly from the panel.
Manual Payments
Review offline bank transfers submitted by users. Approve or reject with notes; approved payments activate the user's subscription instantly.
Verify every manual payment against your bank statement before approving — approvals cannot be auto-reversed.
Features
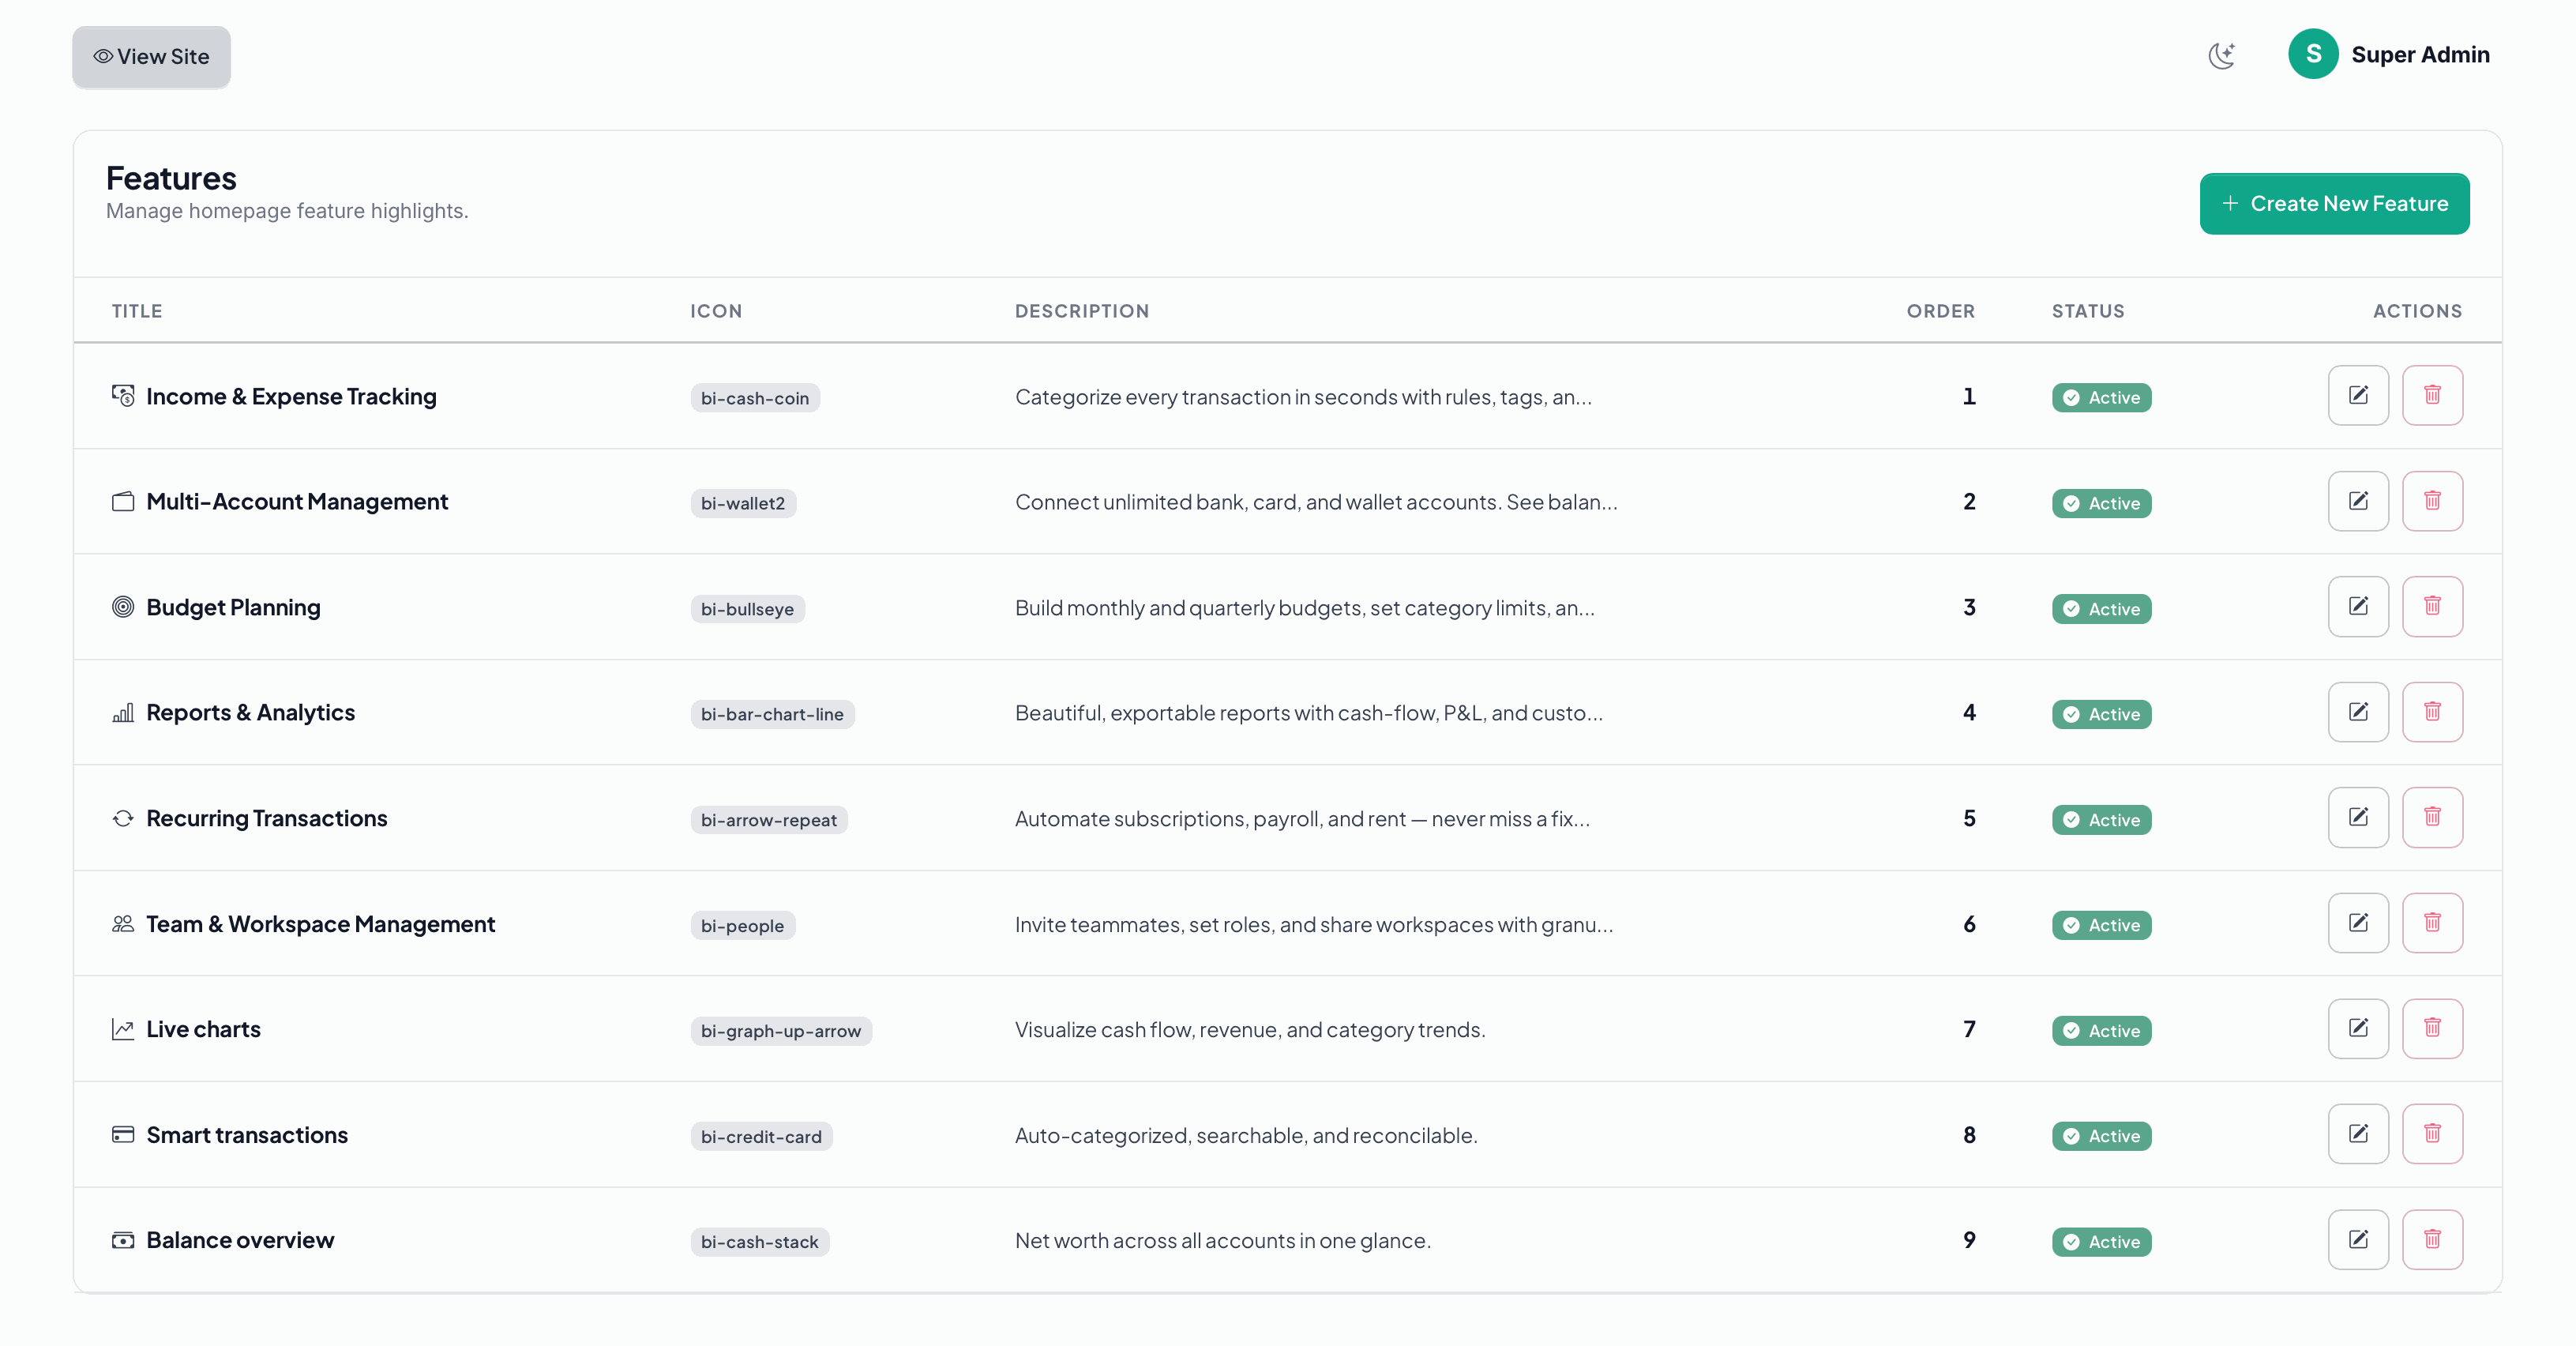
Marketing Features
Manage the feature blocks shown on the public landing page — title, description, and icon. Drag to reorder.
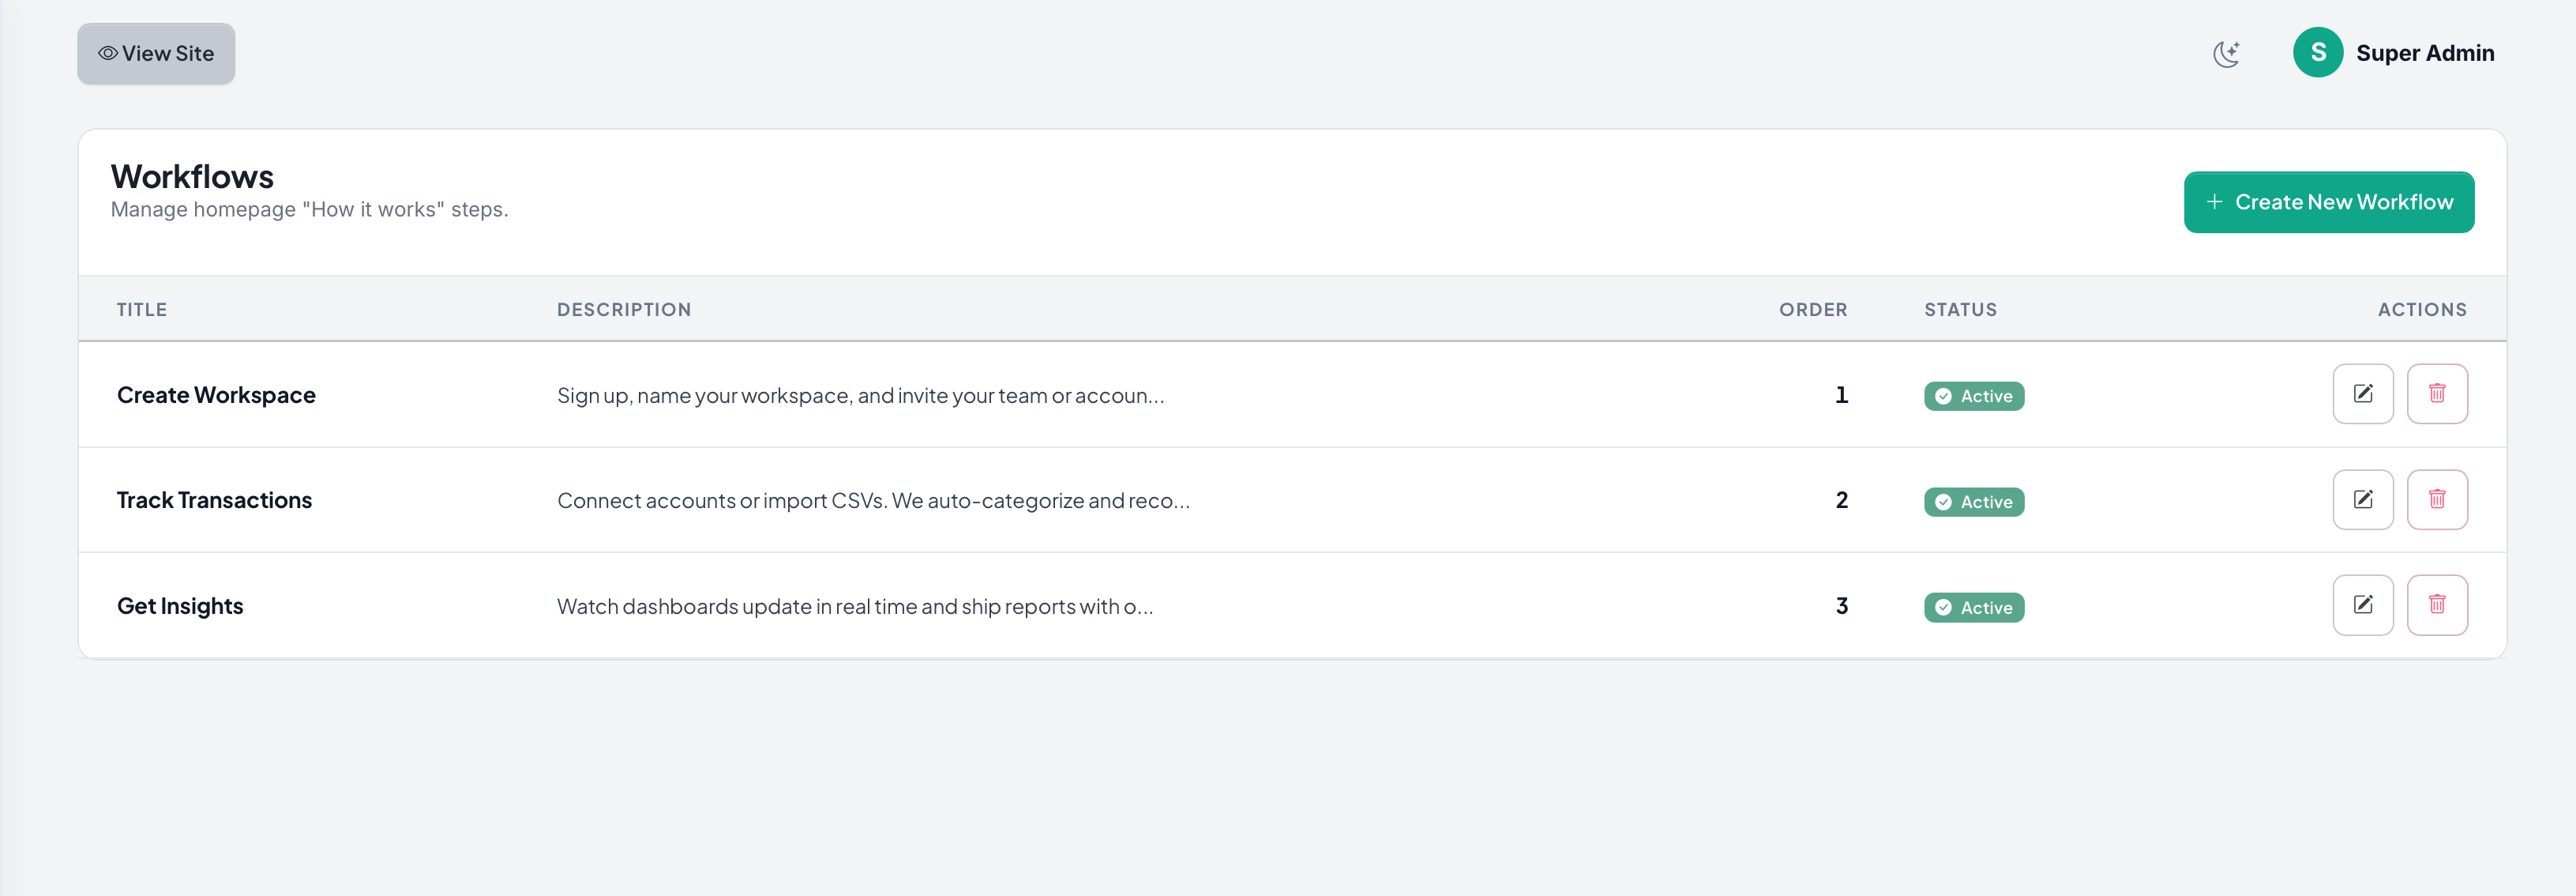
Workflows
Process Workflows
Define the "How it works" steps shown on the landing page (Sign up → Add accounts → Track expenses → Get reports). Edit copy and icons.
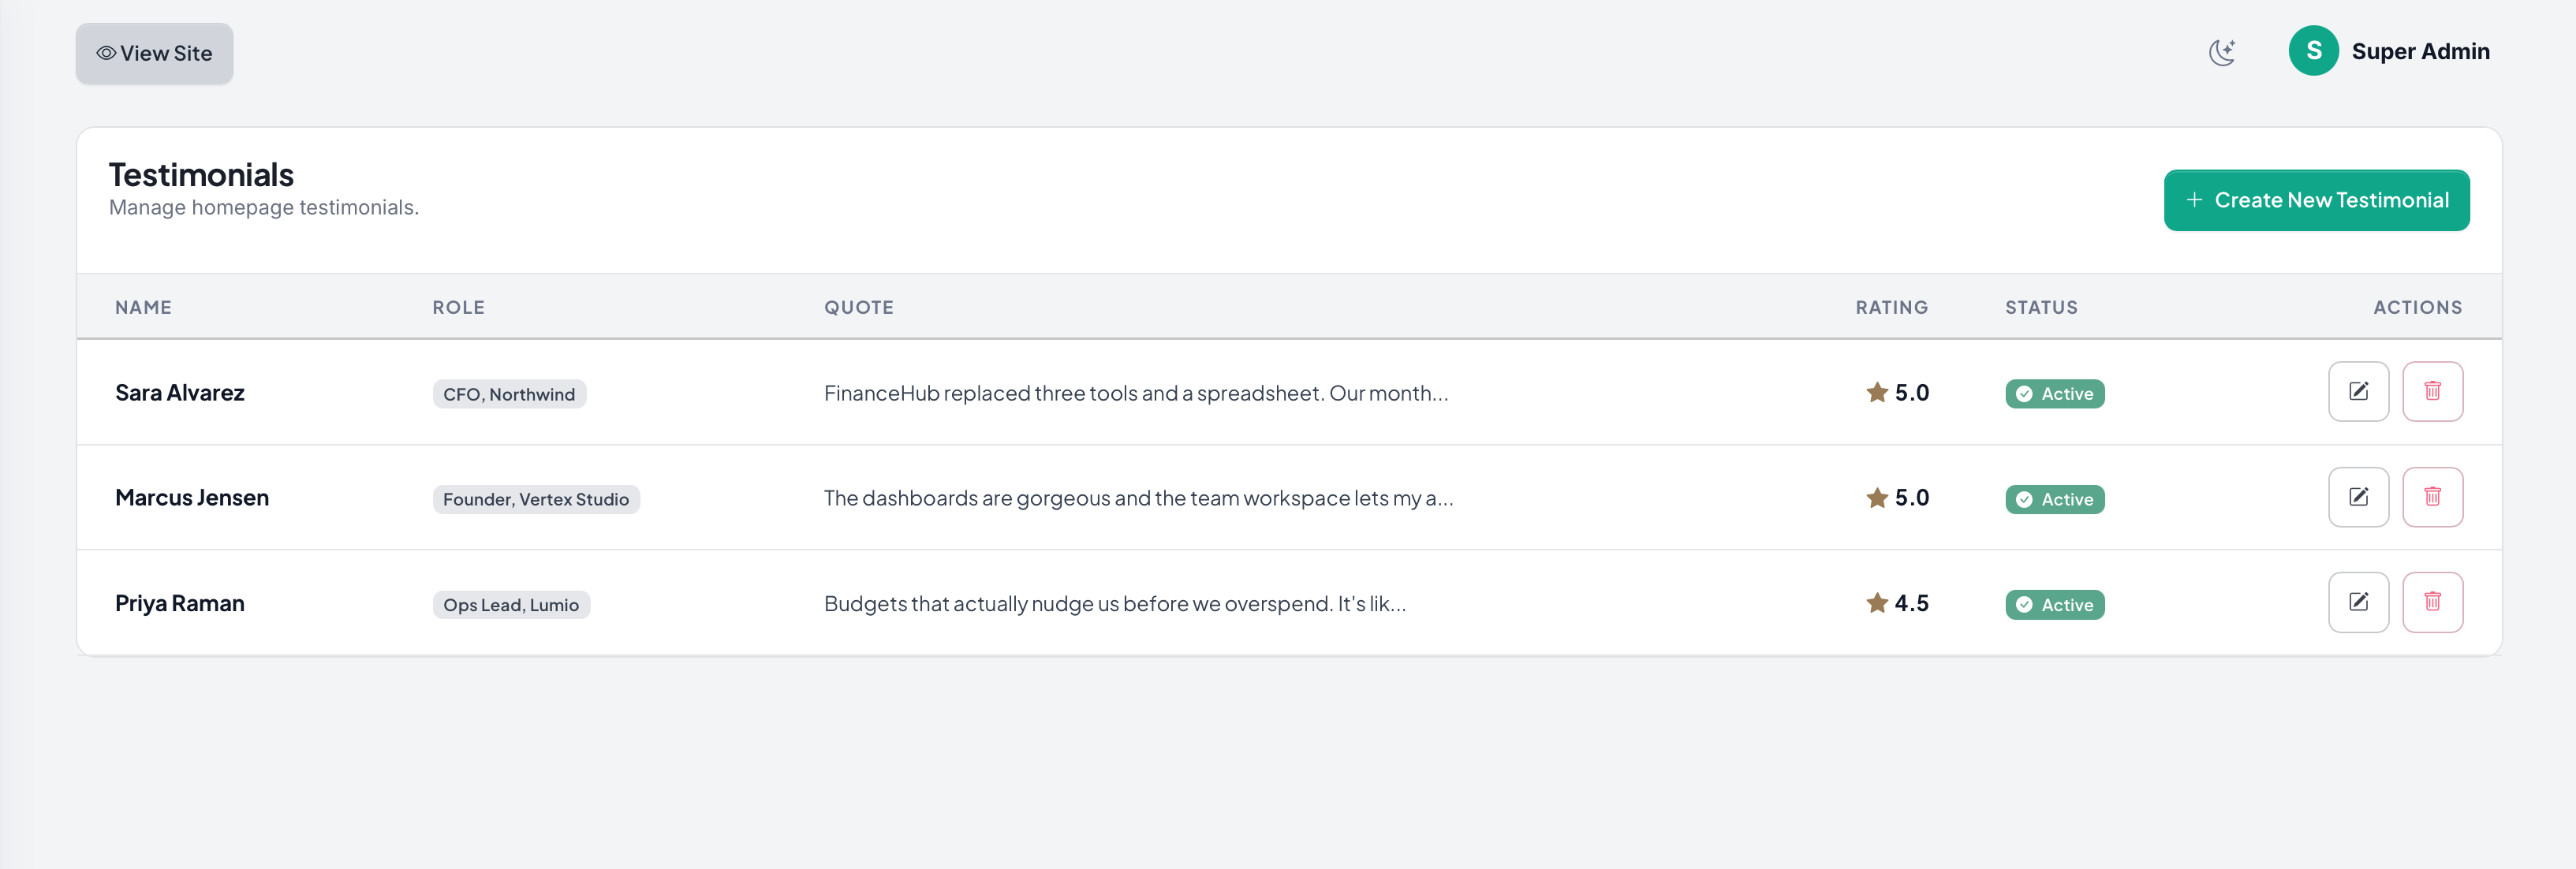
Testimonials
Customer Quotes
Add, edit and reorder testimonials displayed on the public homepage. Includes name, role, company, photo and quote text.
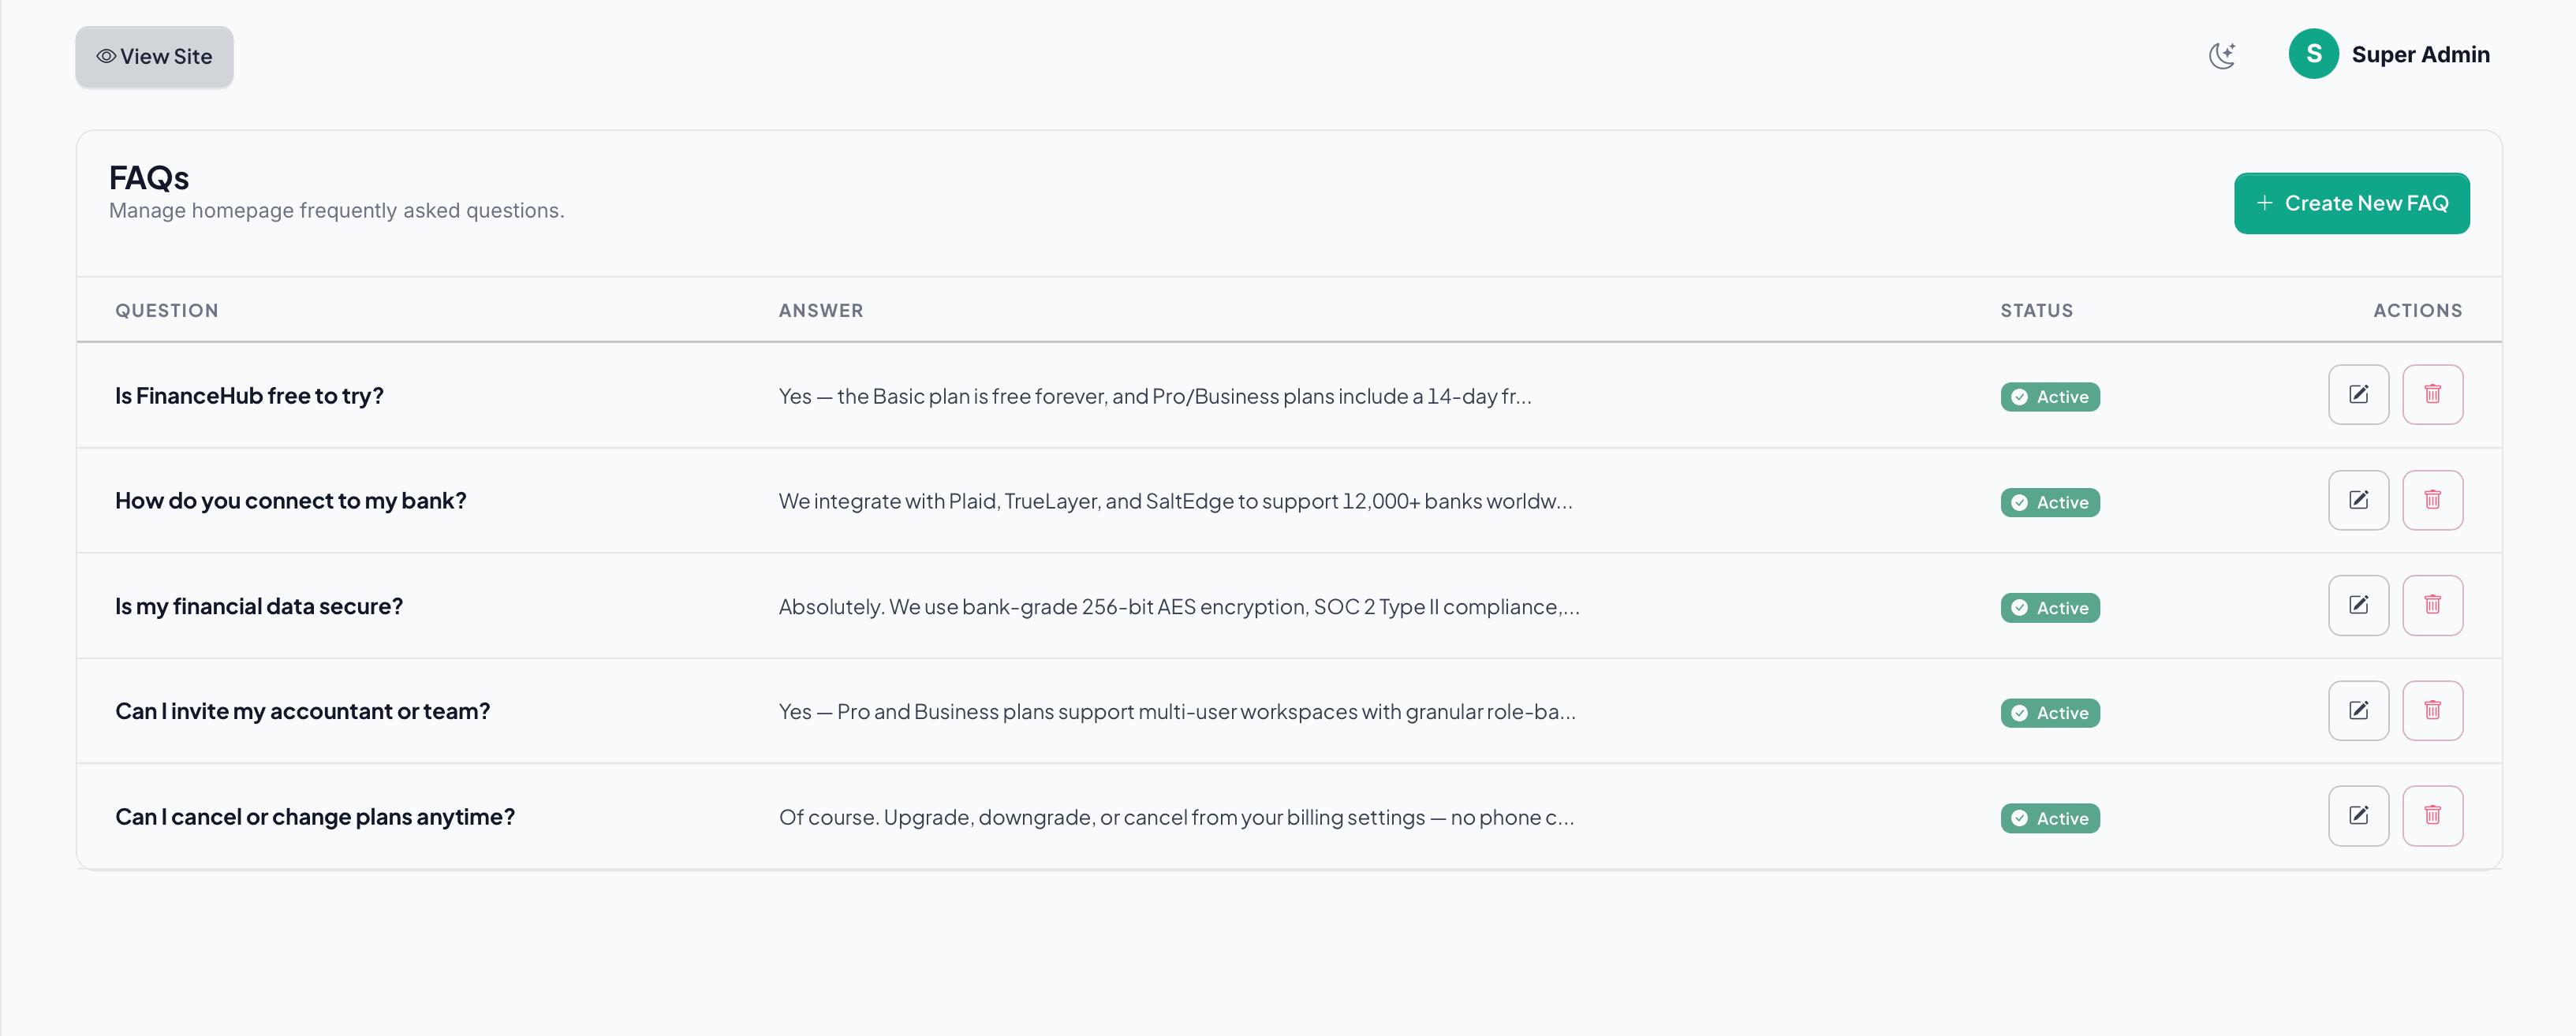
FAQs
Frequently Asked Questions
Maintain the public FAQ block. Group questions by category and toggle visibility per item.
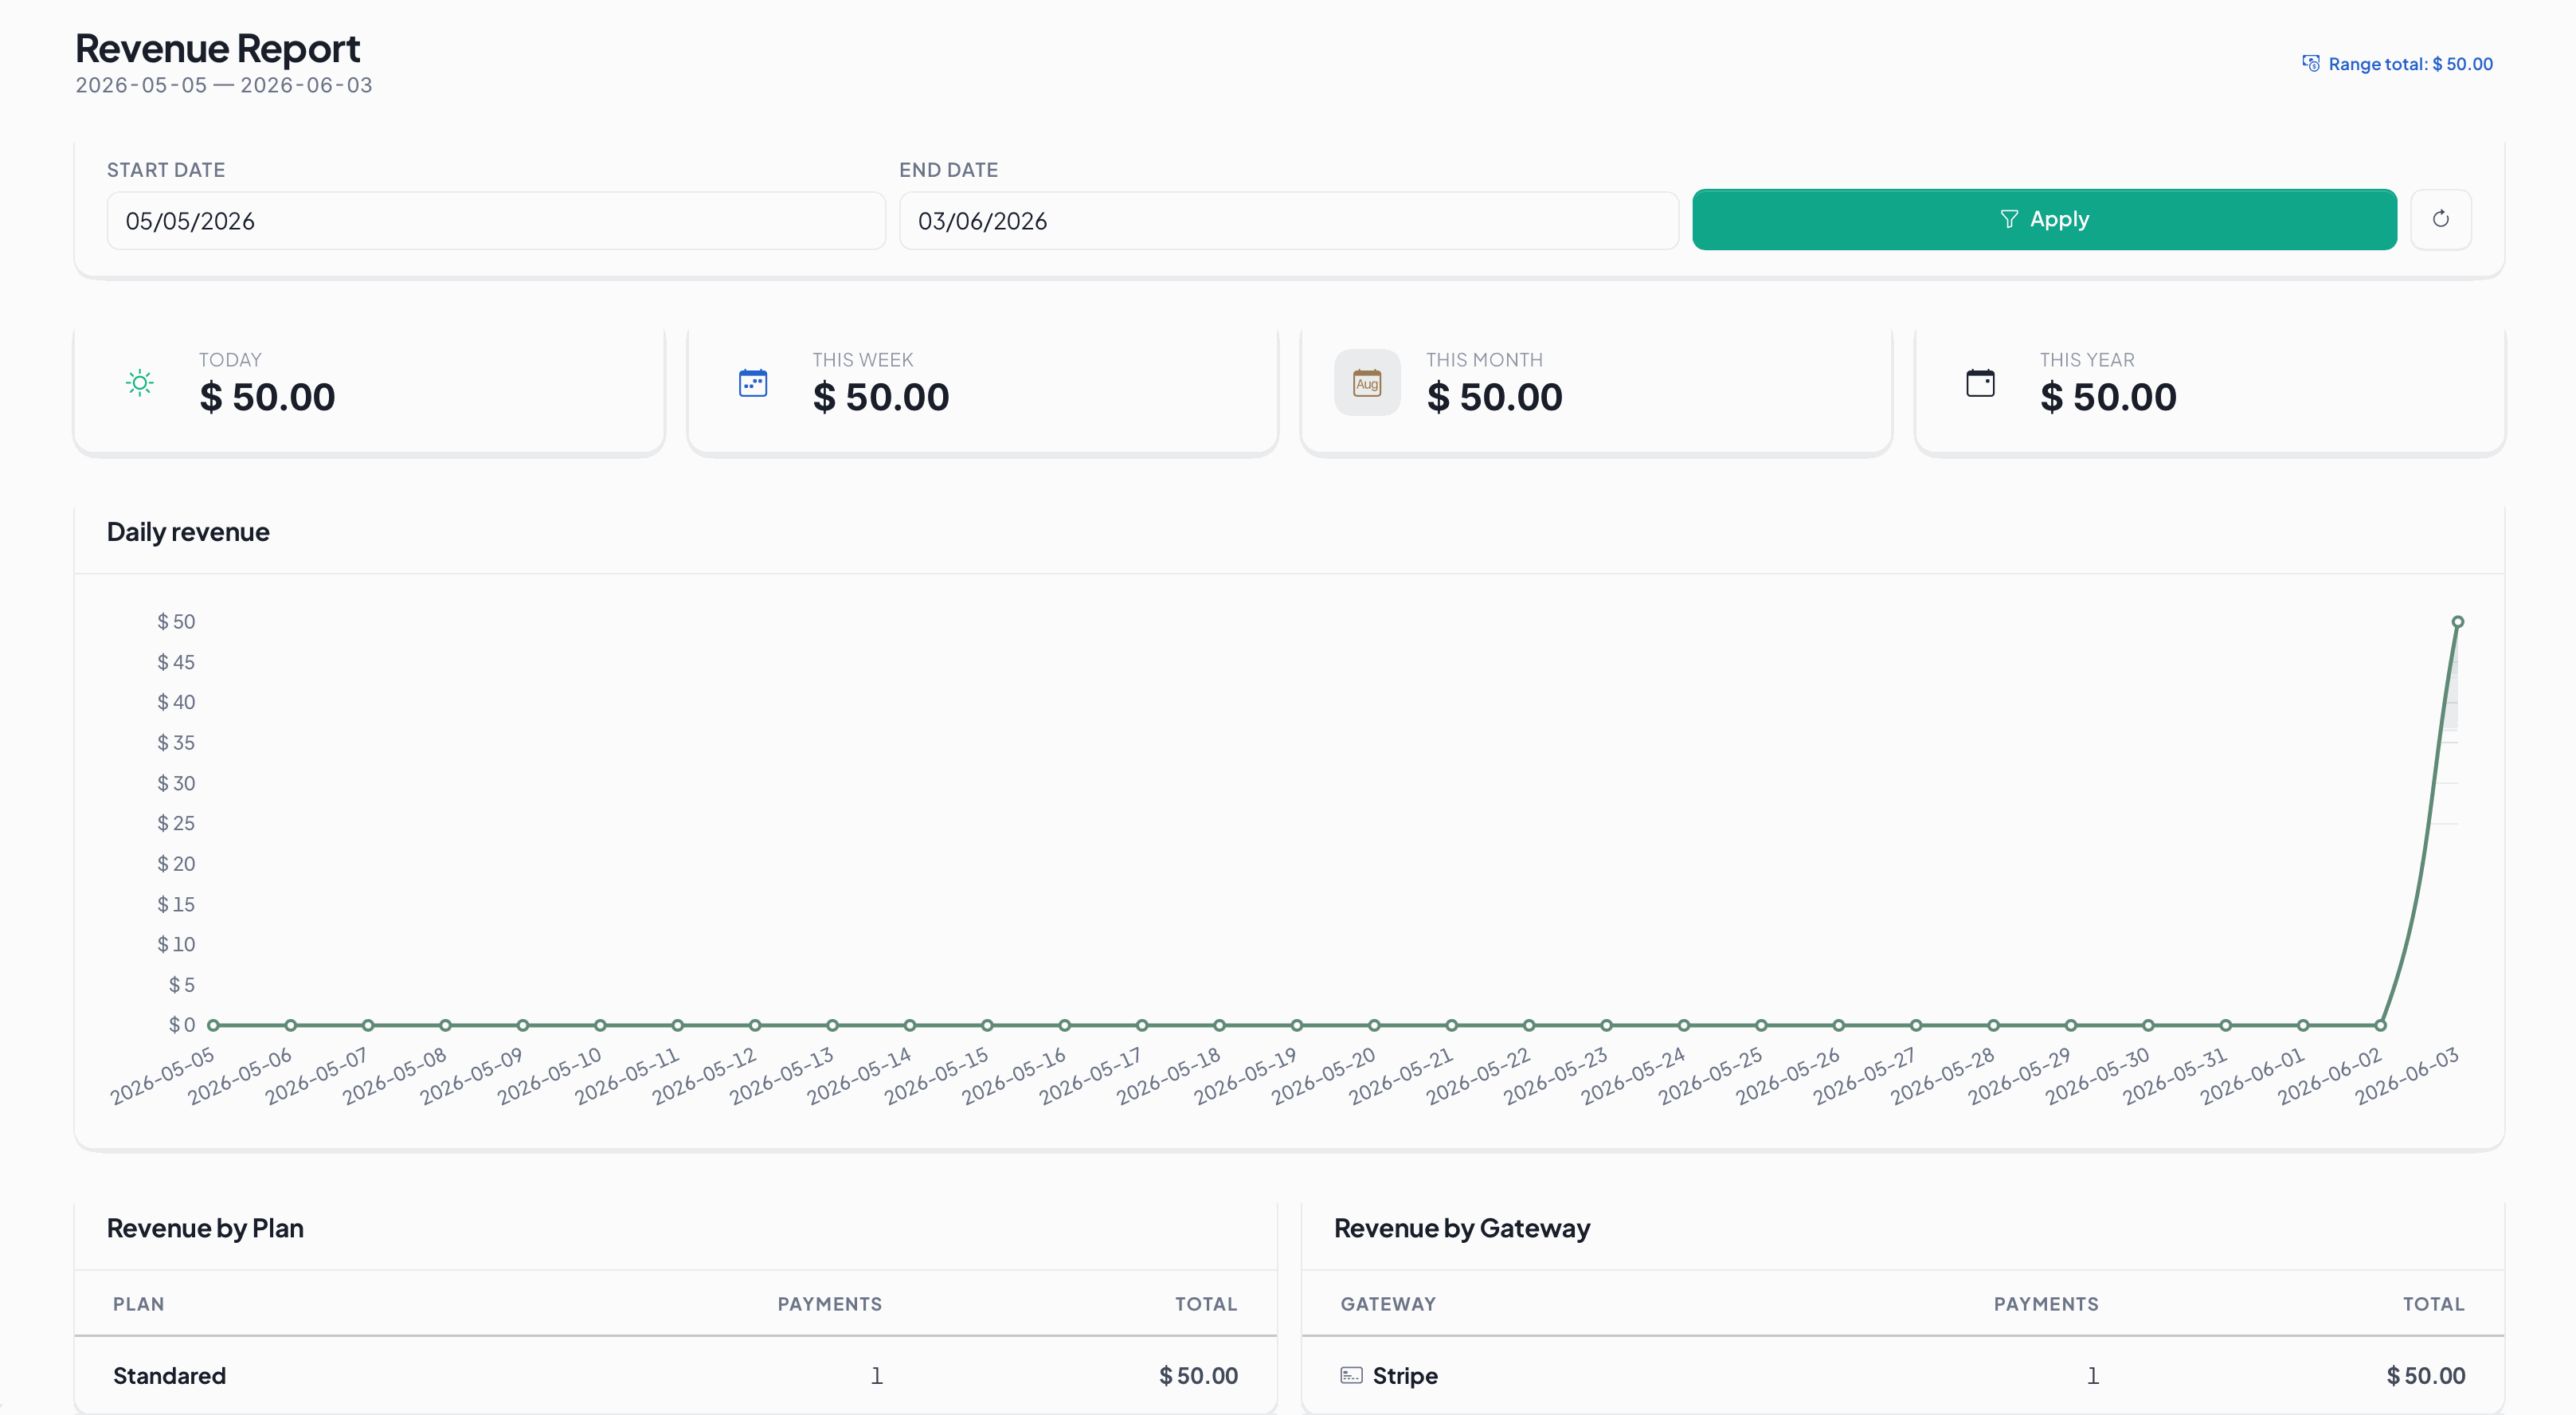
Reports
Three platform-level reports for the SaaS owner:
- Revenue Report
- User Growth
- Subscription Stats
Insights at a Glance
Filter by date range, export to CSV, and visualize revenue, signups, and subscription conversion trends.
User Dashboard
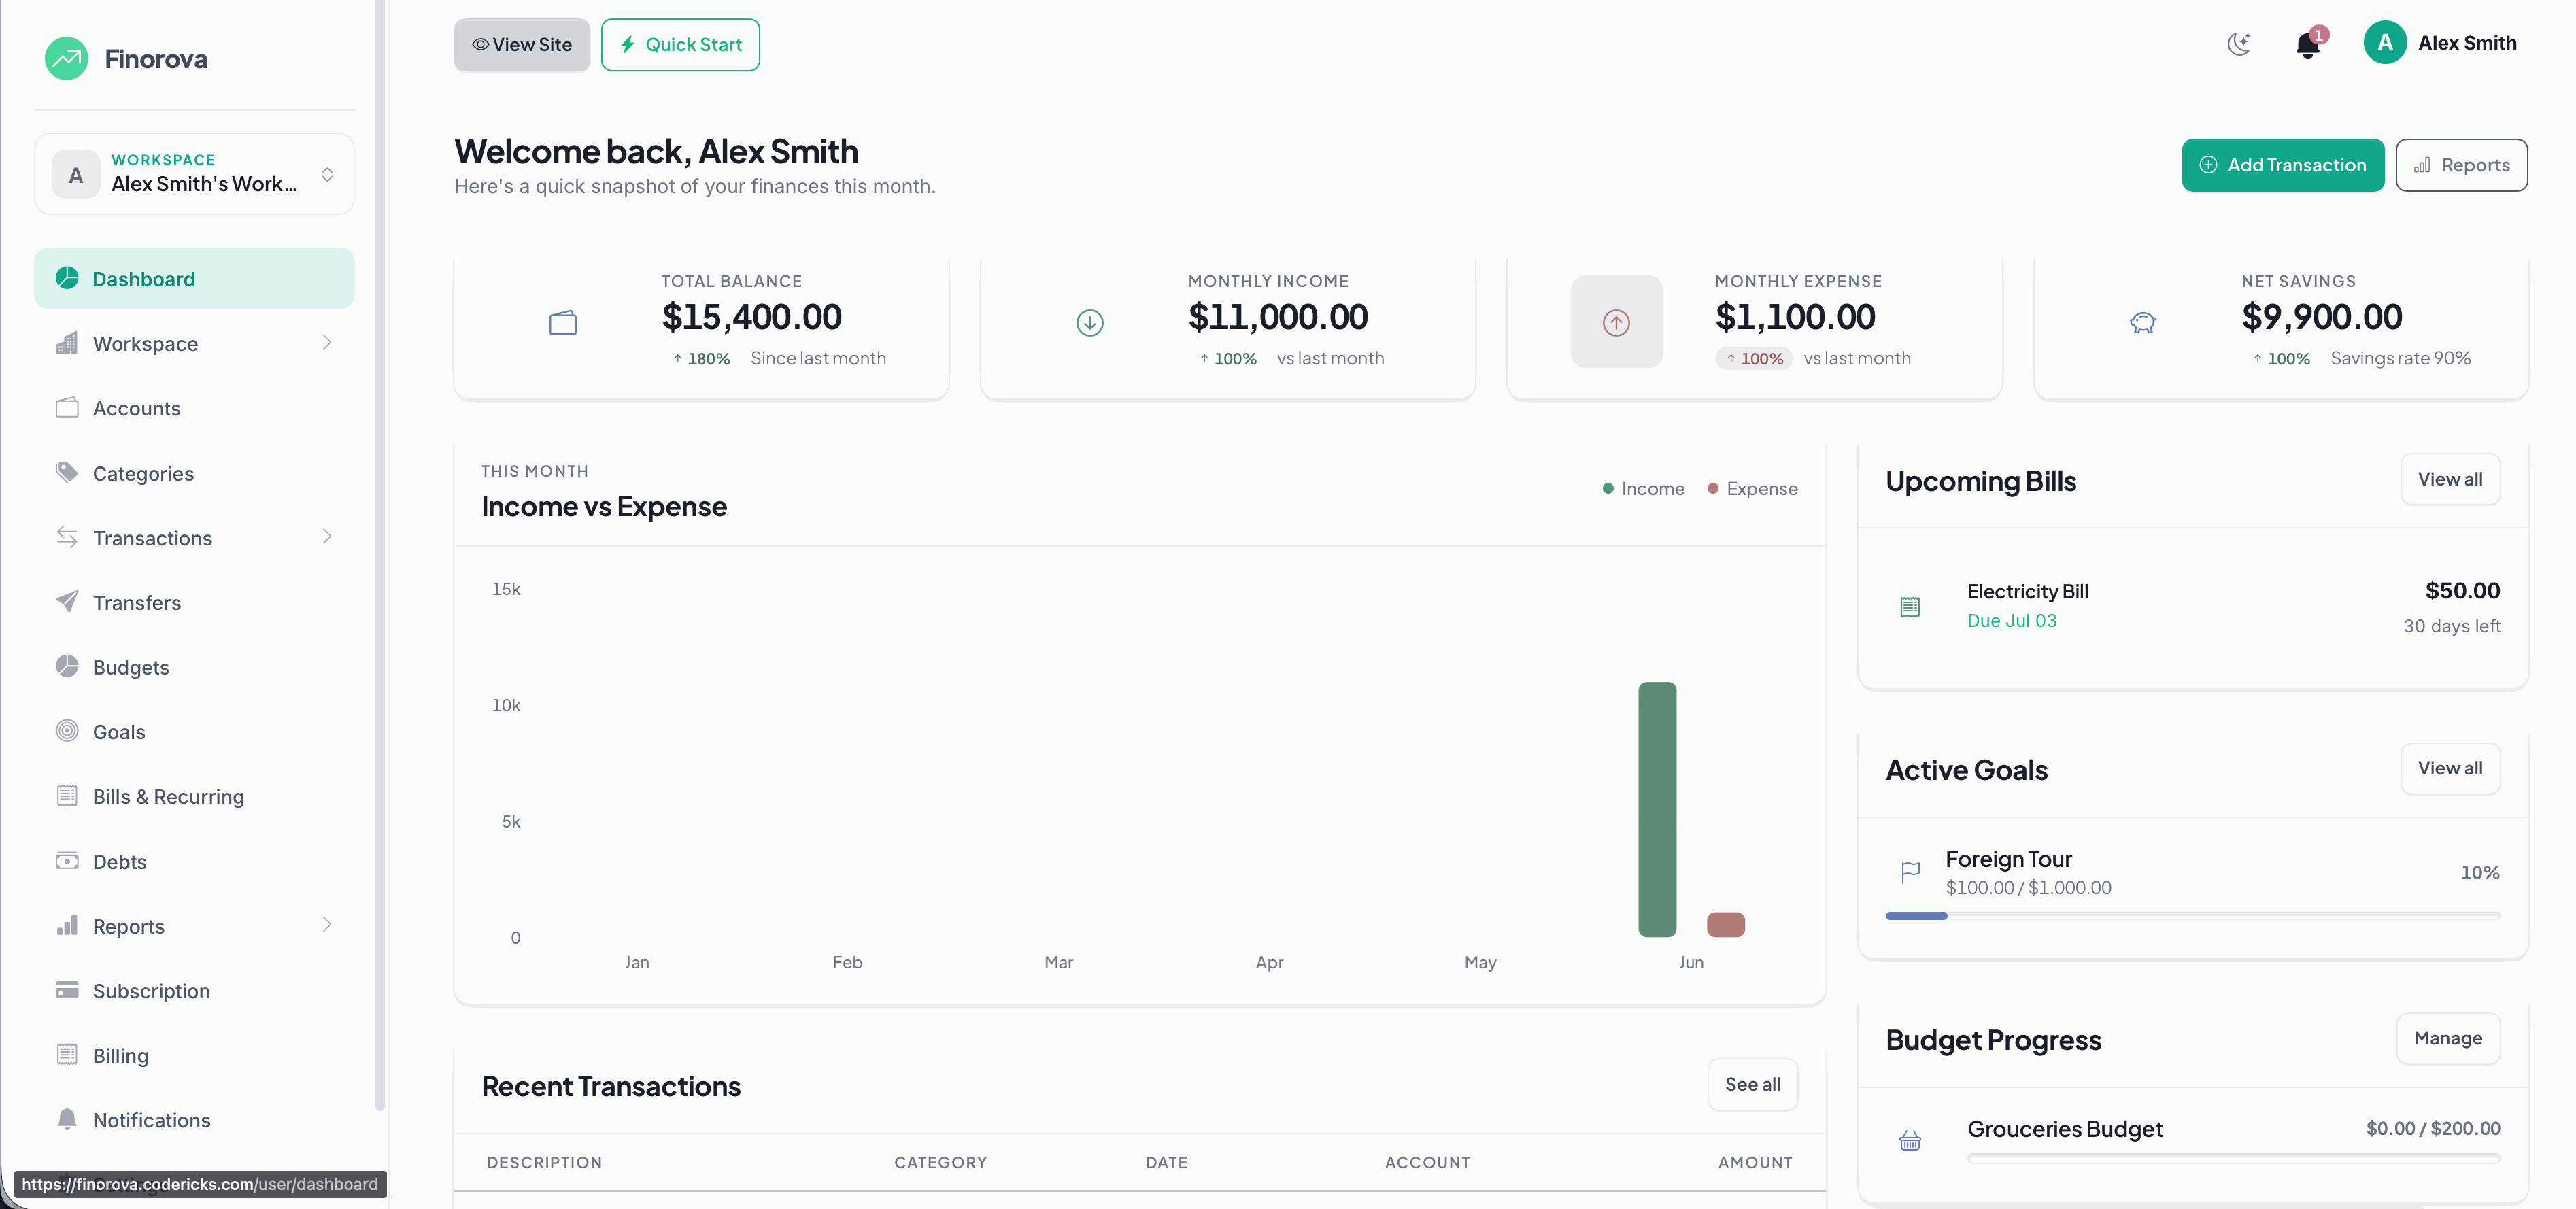
Personal Overview
Total balance, monthly income, monthly expense and net savings — with trend badges, charts, and quick actions to add a transaction.
Workspace
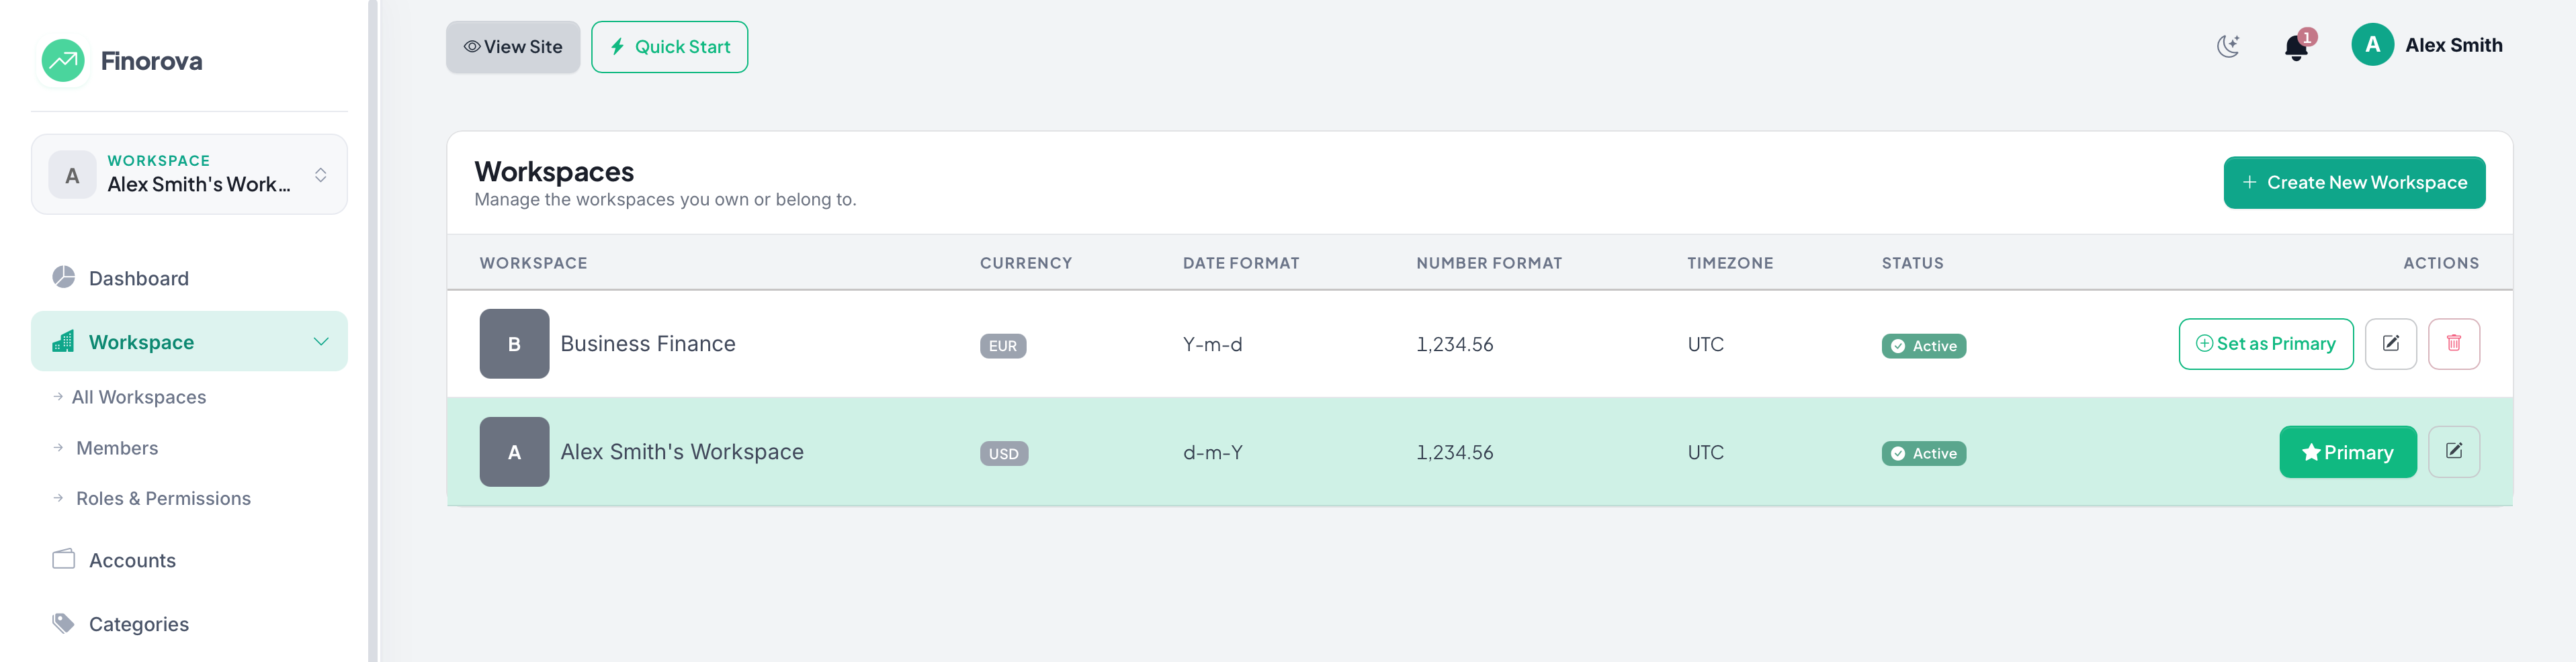
All Workspaces
Create separate workspaces for personal, family, business, or any group. Switch between them from the sidebar.
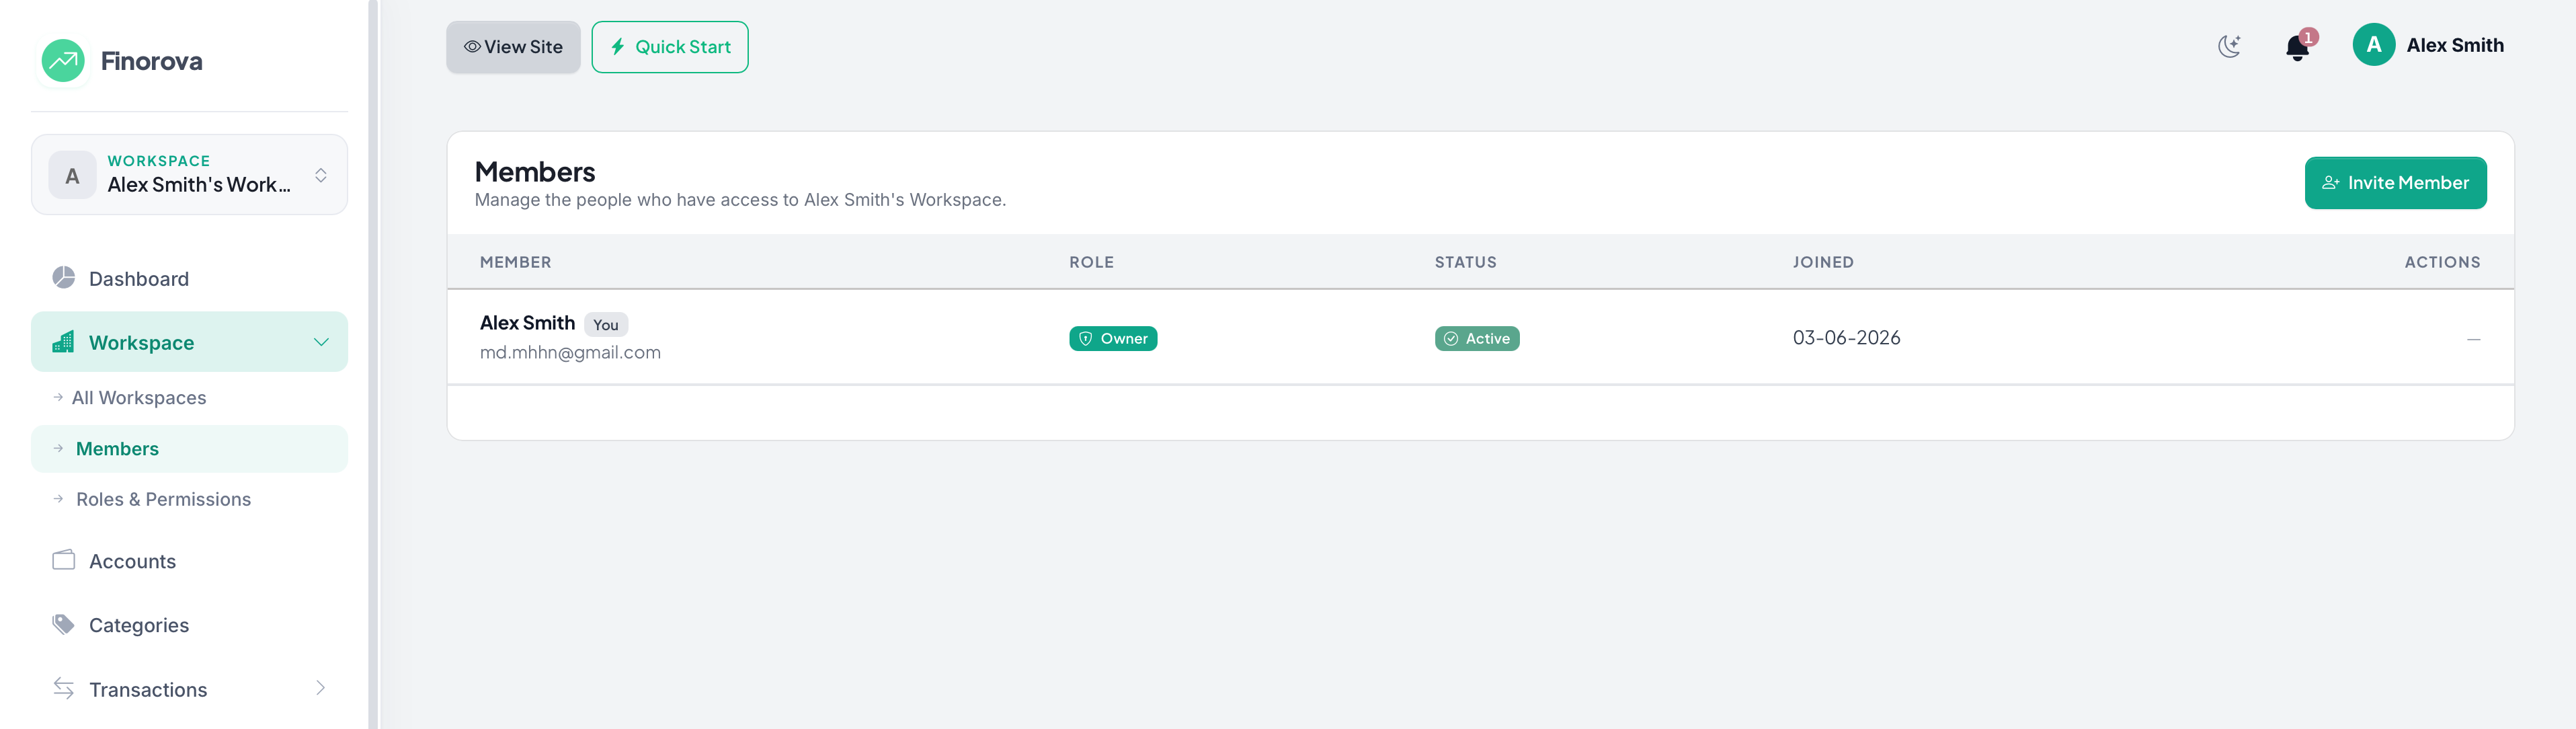
Members
Invite teammates by email, assign roles, and remove access anytime. Each member sees only what their role permits.
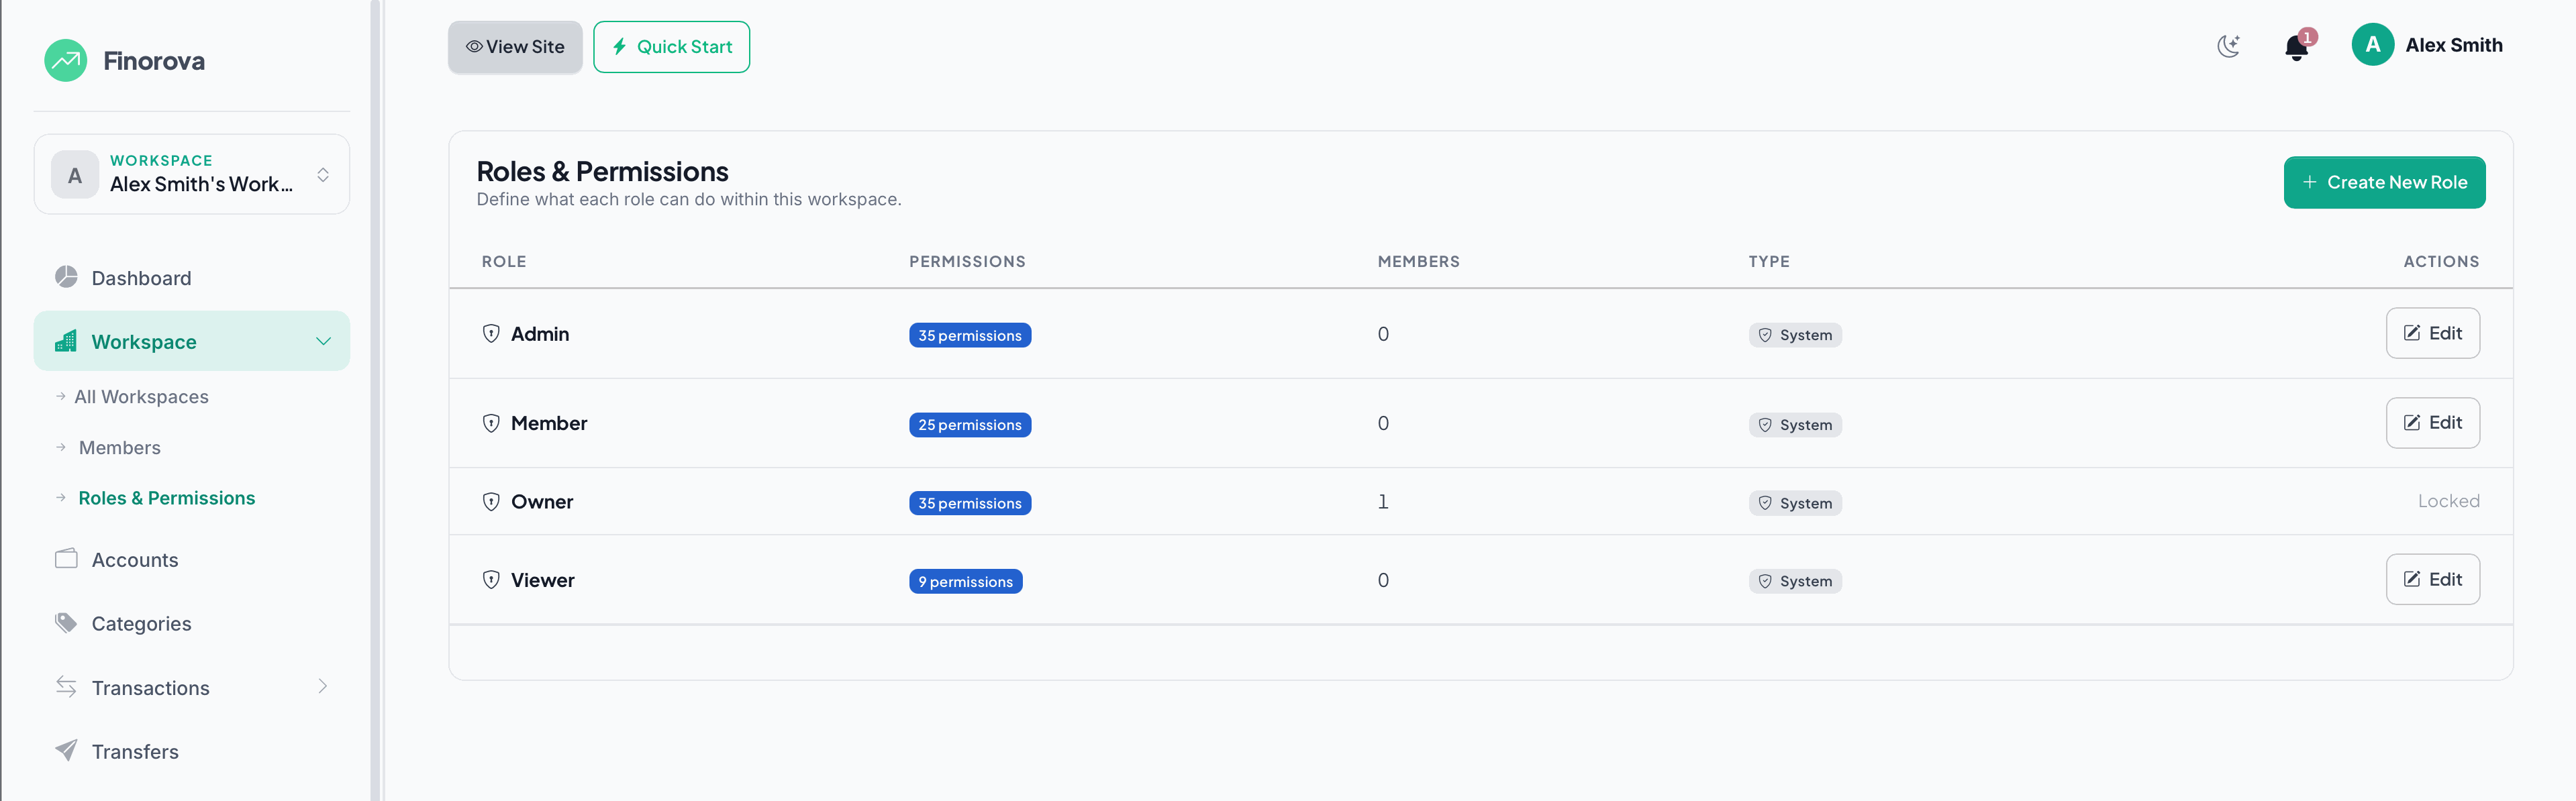
Roles & Permissions
Create custom roles (Owner, Editor, Viewer) and choose exactly which modules each role can access — accounts, transactions, reports.
Accounts
Manage Accounts
Accounts represent any place where money lives — bank accounts, cash on hand, credit cards, mobile wallets, investment accounts, and more. Every transaction must be tied to an account, and the system keeps each account's running balance up to date automatically.
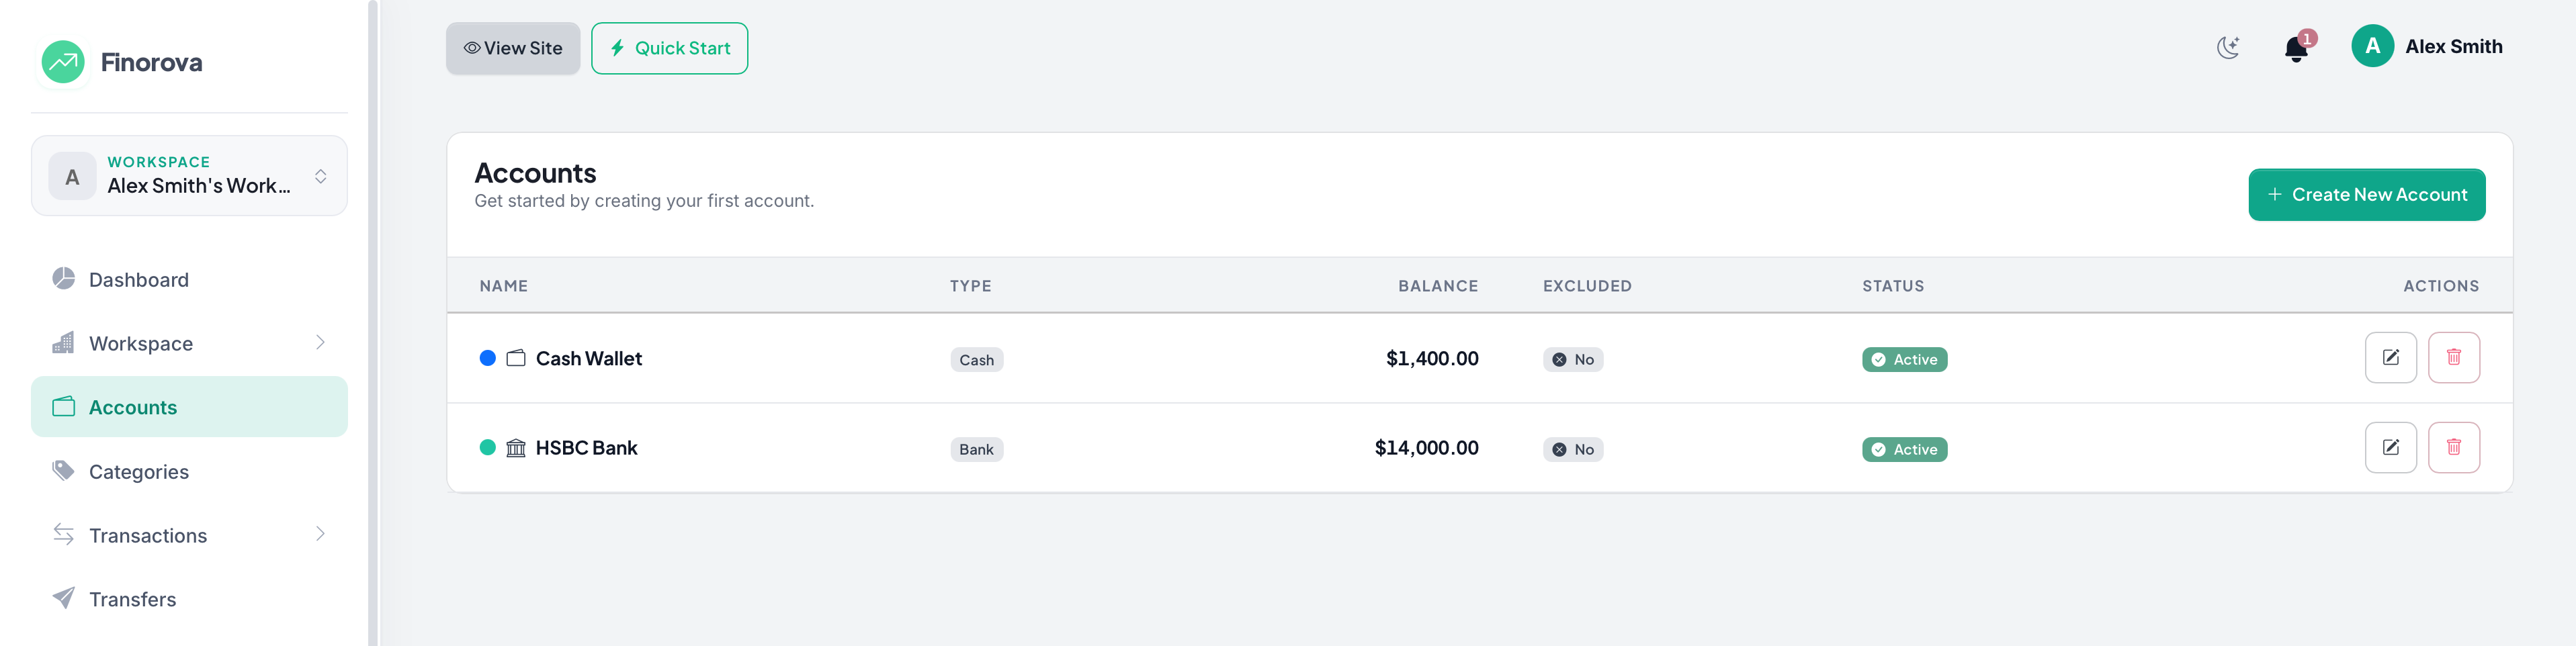
Fields You Can Set
- Name — display label (e.g. "HSBC Checking").
- Type — Cash, Bank, Mobile, Card, Wallet, Investment, or Other.
- Currency — 3-letter ISO code (defaults to USD).
- Starting balance — opening balance when the account is created.
- Color & icon — visual identification across the dashboard.
- Exclude from total — hides this account from the workspace total balance (useful for long-term savings).
- Low-balance threshold — sends an alert when the balance drops below this value.
- Active / Inactive — inactive accounts stay archived but selectable in historical views.
Use Exclude from total to keep accounts like "Emergency Fund" out of your day-to-day spending power without losing track of them.
Categories
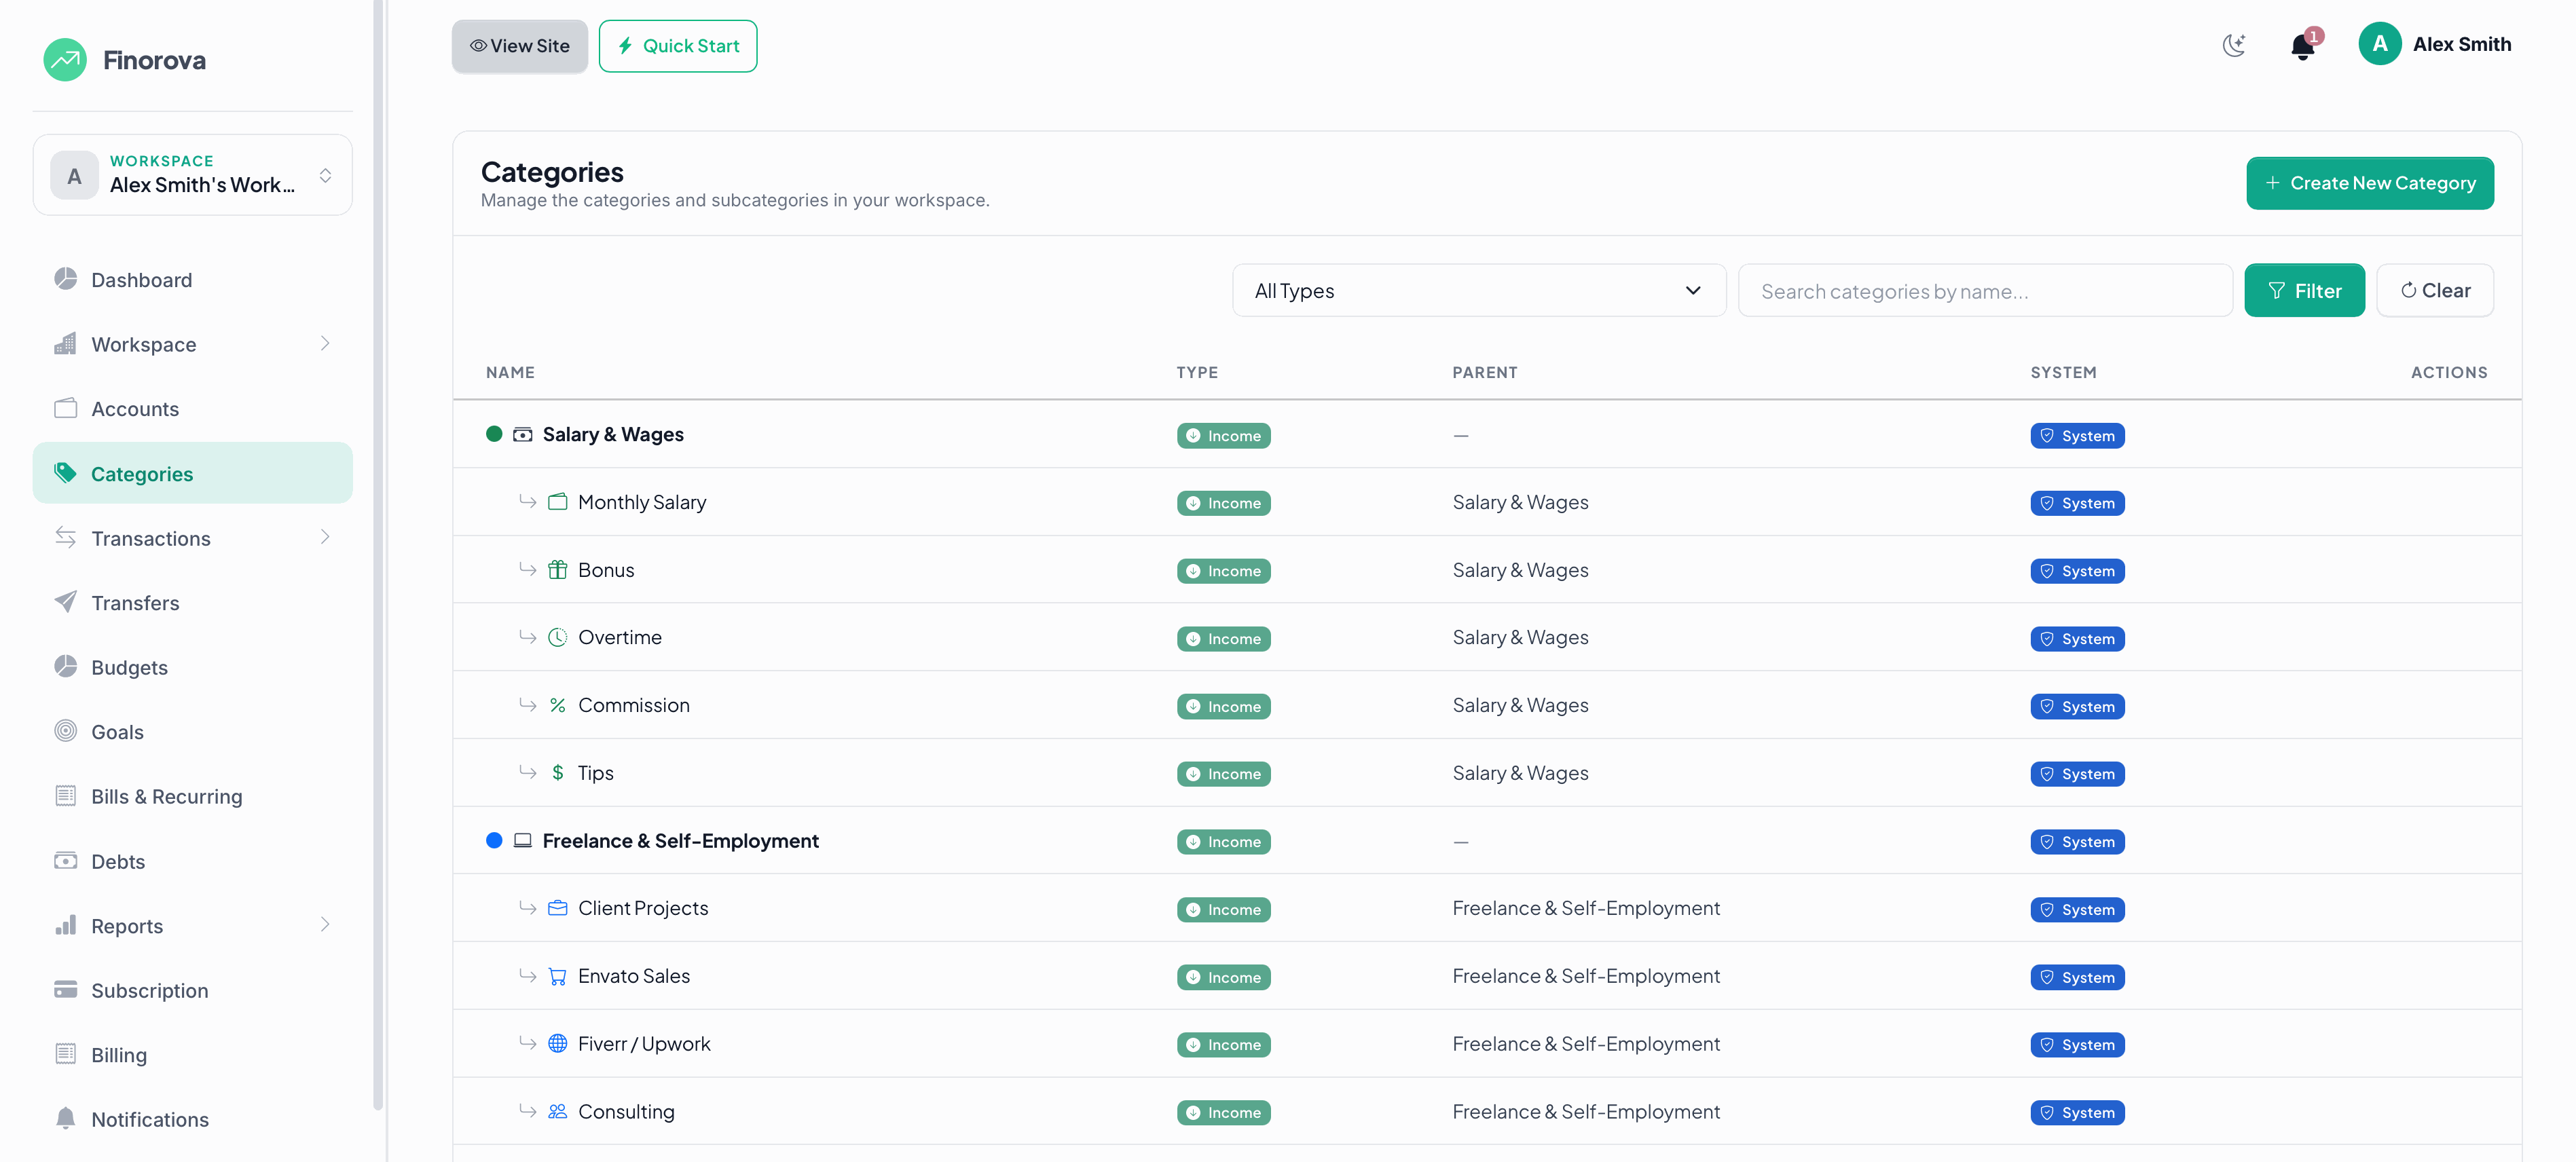
Income & Expense Categories
Organize transactions with custom income and expense categories (Salary, Groceries, Rent, etc.). Color-code and nest sub-categories.
Transactions
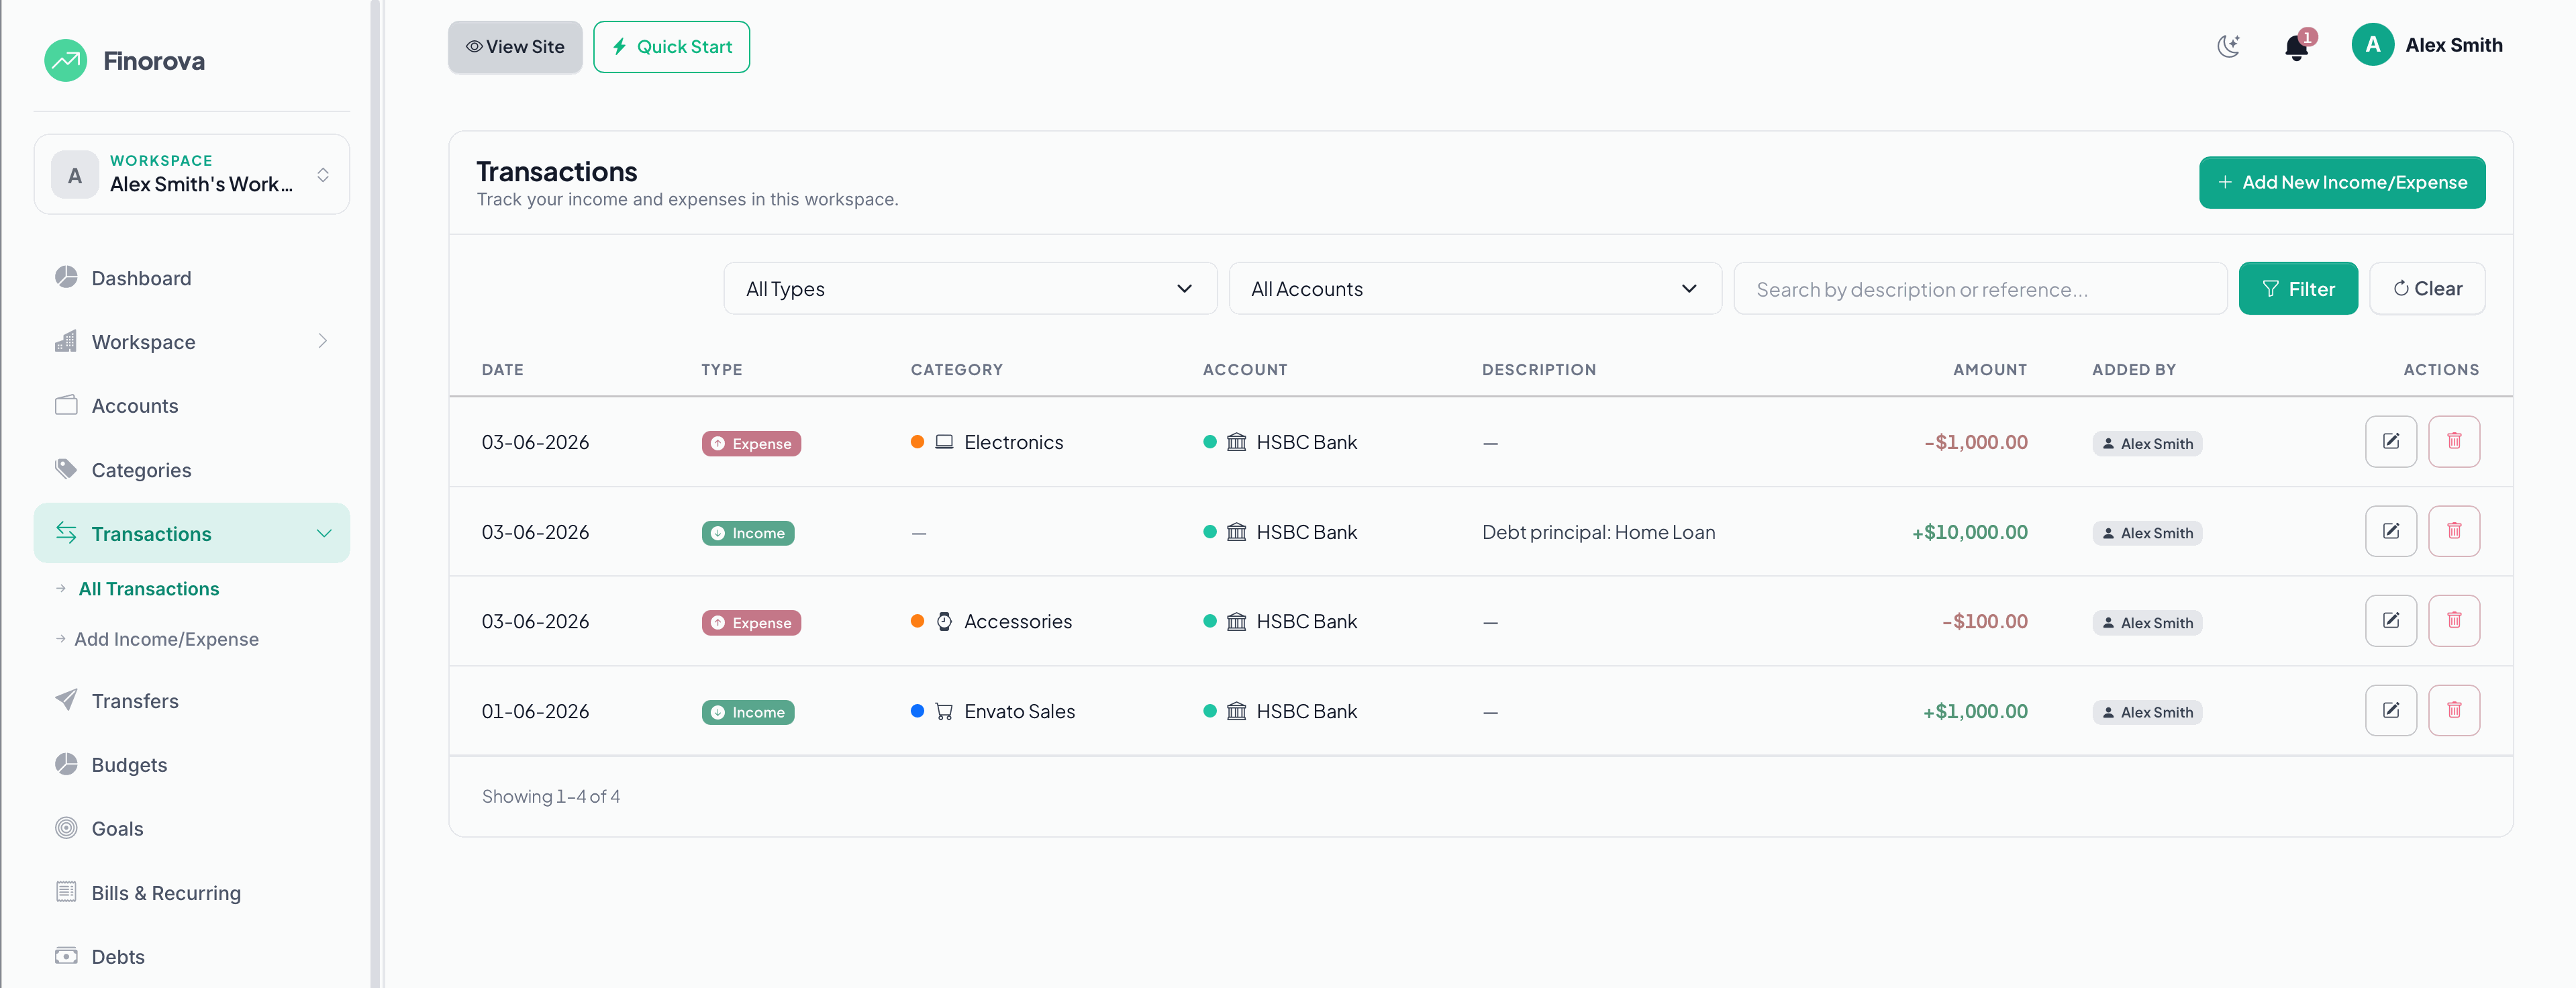
All Transactions
Every money flow in the system — income that arrives into an account or an expense that leaves it. The list is paginated, searchable, and filterable by type, account, category and date range.
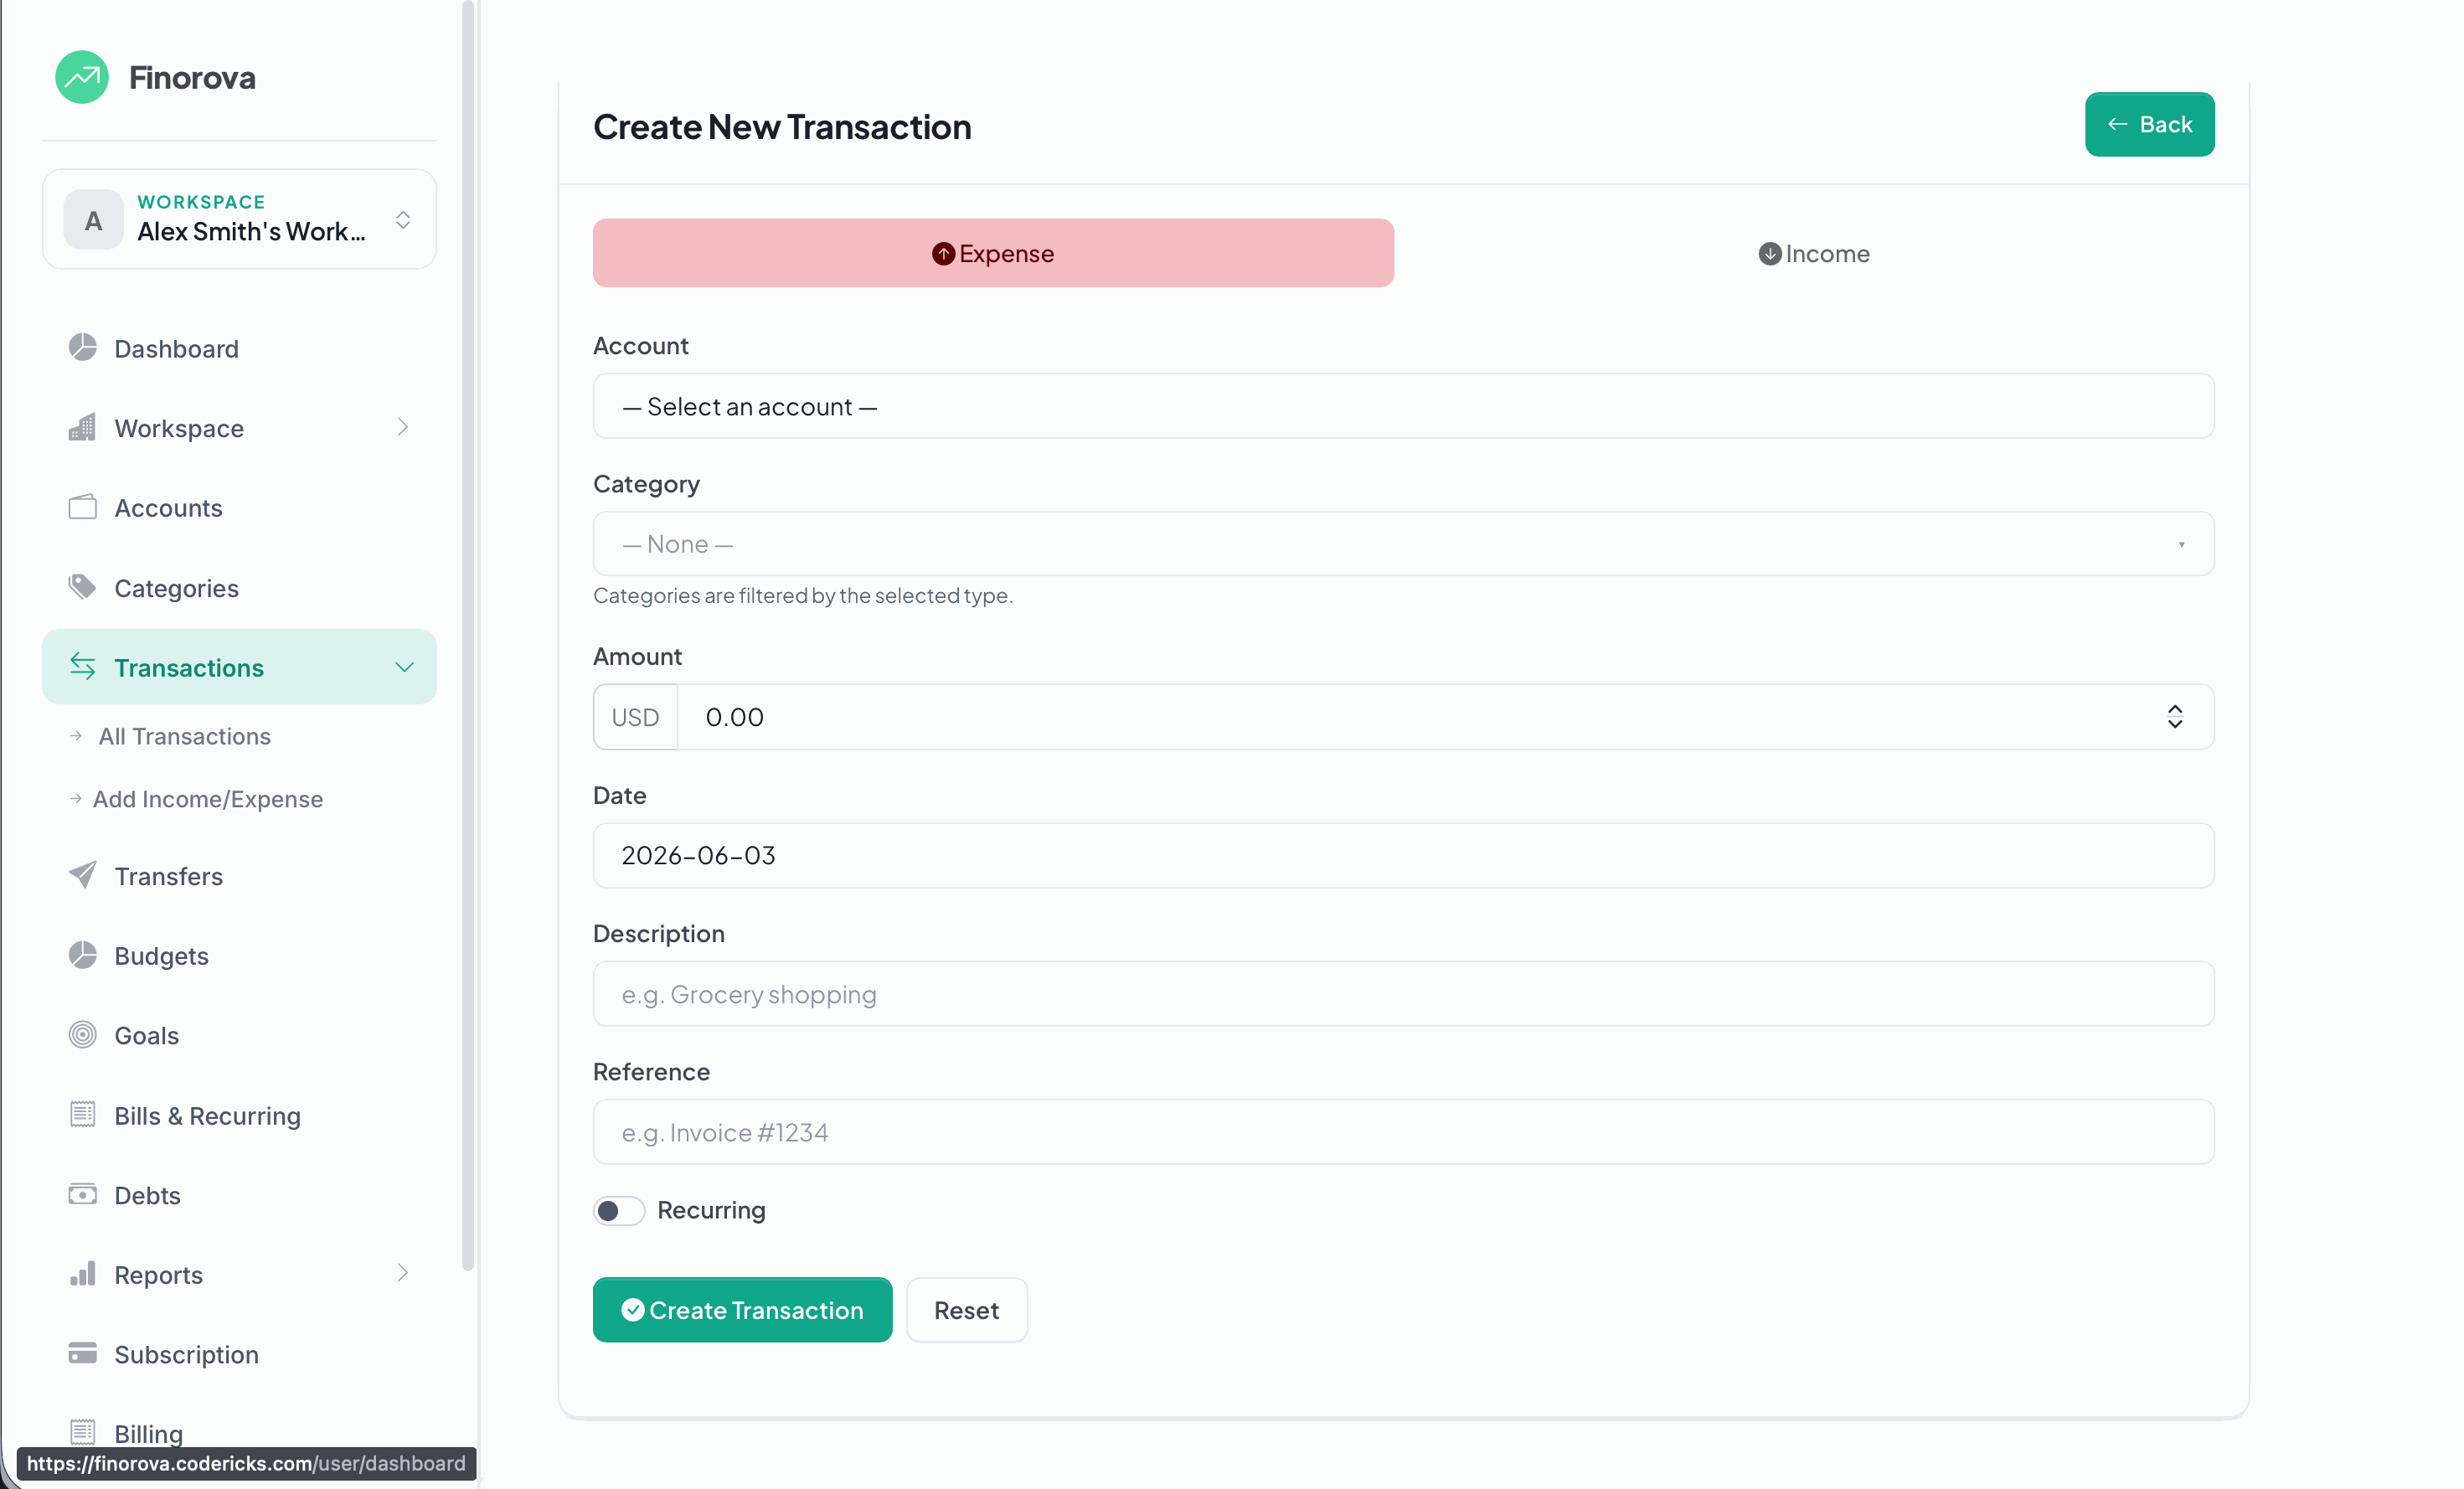
Add Income / Expense
One form for both directions — pick type, account, category, amount and date. Optionally attach a receipt, write a reference number, or mark the transaction as recurring.
Fields You Can Set
- Type — Income (adds to balance) or Expense (subtracts from balance).
- Account — which account the money moves through.
- Category — optional but recommended; budgets and the Category Breakdown report rely on it.
- Amount, date, description, reference — standard ledger fields.
- Attachment — upload a receipt or invoice for record keeping.
- Recurring — flag used by reporting; full recurring automation lives in Bills.
Transfers
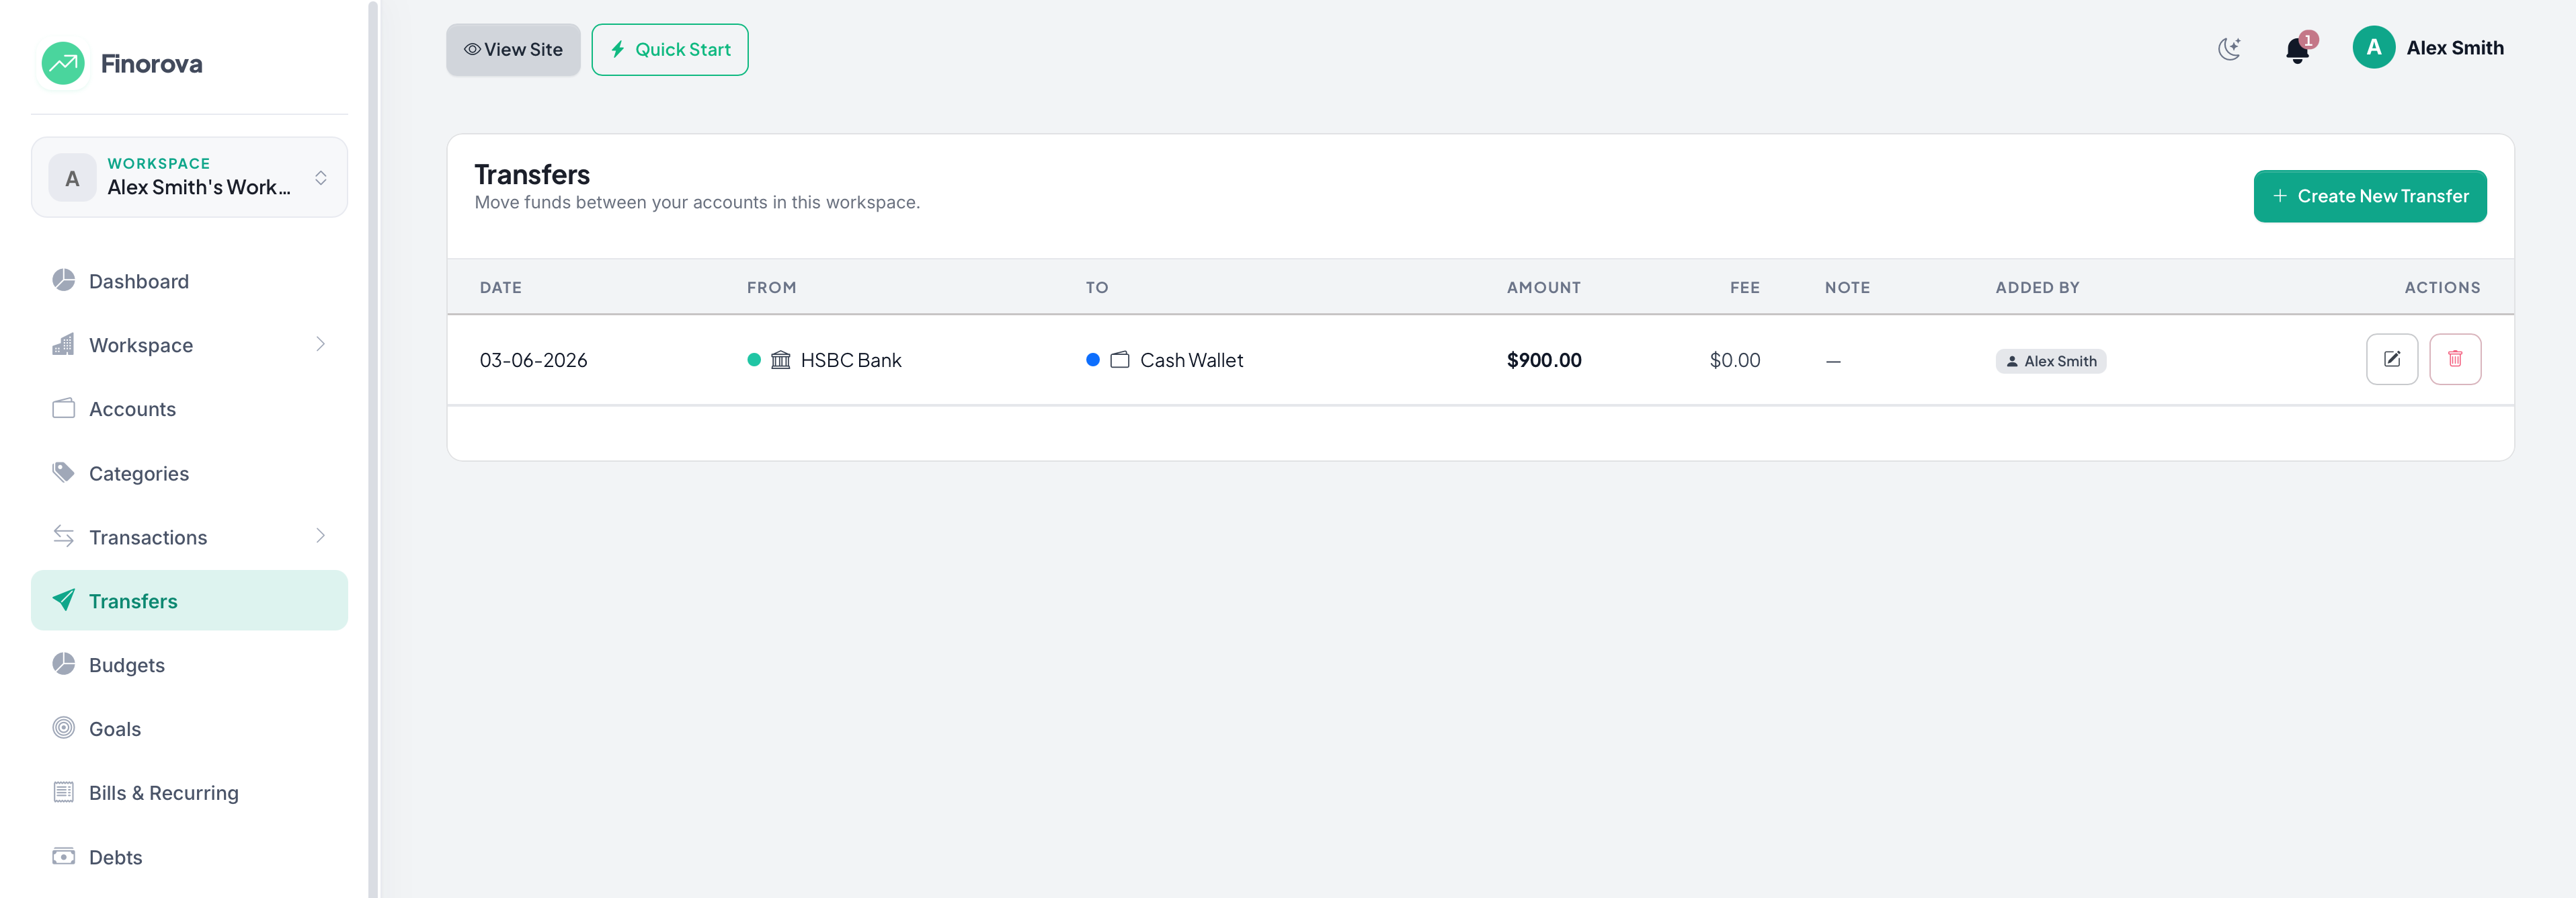
Account Transfers
Move money between two of your own accounts without polluting your income or expense totals. A transfer debits one account and credits another in a single, atomic step.
Fields You Can Set
- From account & To account — source and destination, must be different accounts in the same workspace.
- Amount — credited to the destination account.
- Fee — optional. Deducted from the source account but not credited to the destination (think wire transfer or ATM fee).
- Transfer date — the effective date of the move.
- Note — optional memo.
Use the fee field for real-world transfer charges (wire fees, ATM withdrawal fees) — keeping them on the transfer instead of recording a separate expense keeps reports cleaner.
Budgets
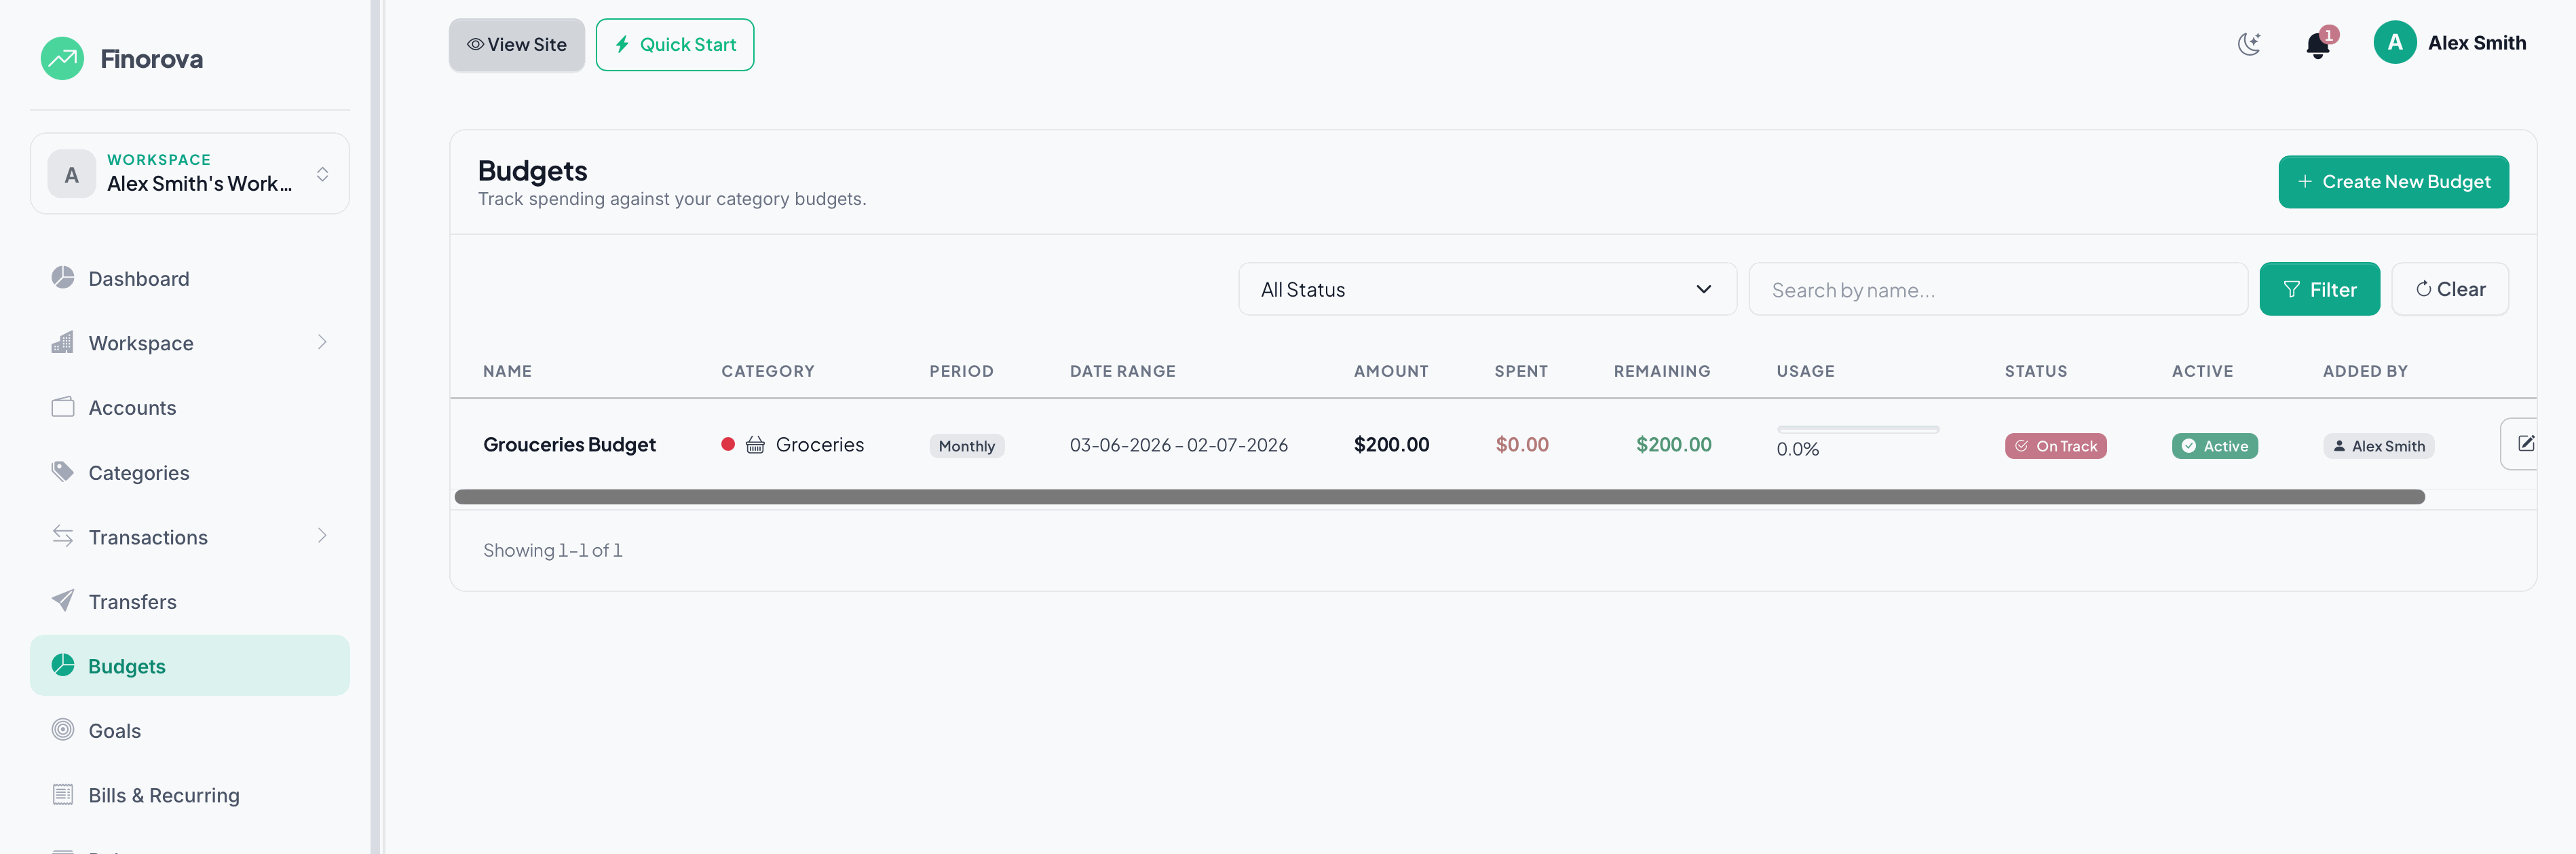
Category Budgets
Cap how much you can spend in a given category over a defined period — monthly, quarterly, yearly, or a custom range. Budgets watch every new expense in real time and alert you as you approach or exceed the limit.
Fields You Can Set
- Name — a friendly label (e.g. "Groceries — Jan").
- Category — must be an expense category. One budget tracks one category.
- Amount — the spending limit.
- Period — Monthly, Quarterly, Yearly, or Custom.
- Start date & end date — for preset periods the end date is filled in automatically (e.g. start
Jan 1+ Monthly → endJan 31); for Custom you set both ends manually. - Active toggle — disables alert emails without deleting the budget.
Status & Alerts
Status is recomputed for every view based on usage = spent / amount × 100:
- On track — under 80%.
- Warning — between 80% and 99%.
- Exceeded — 100% or more.
Alerts fire when you cross the 80% and 100% thresholds. Each threshold only fires once per budget (tracked by last_alerted_threshold), so you don't get spammed when small transactions push usage back and forth across the line.
Use Custom periods for event-based budgets (vacation week, wedding month, etc.) where the calendar period doesn't match your spend window.
Goals
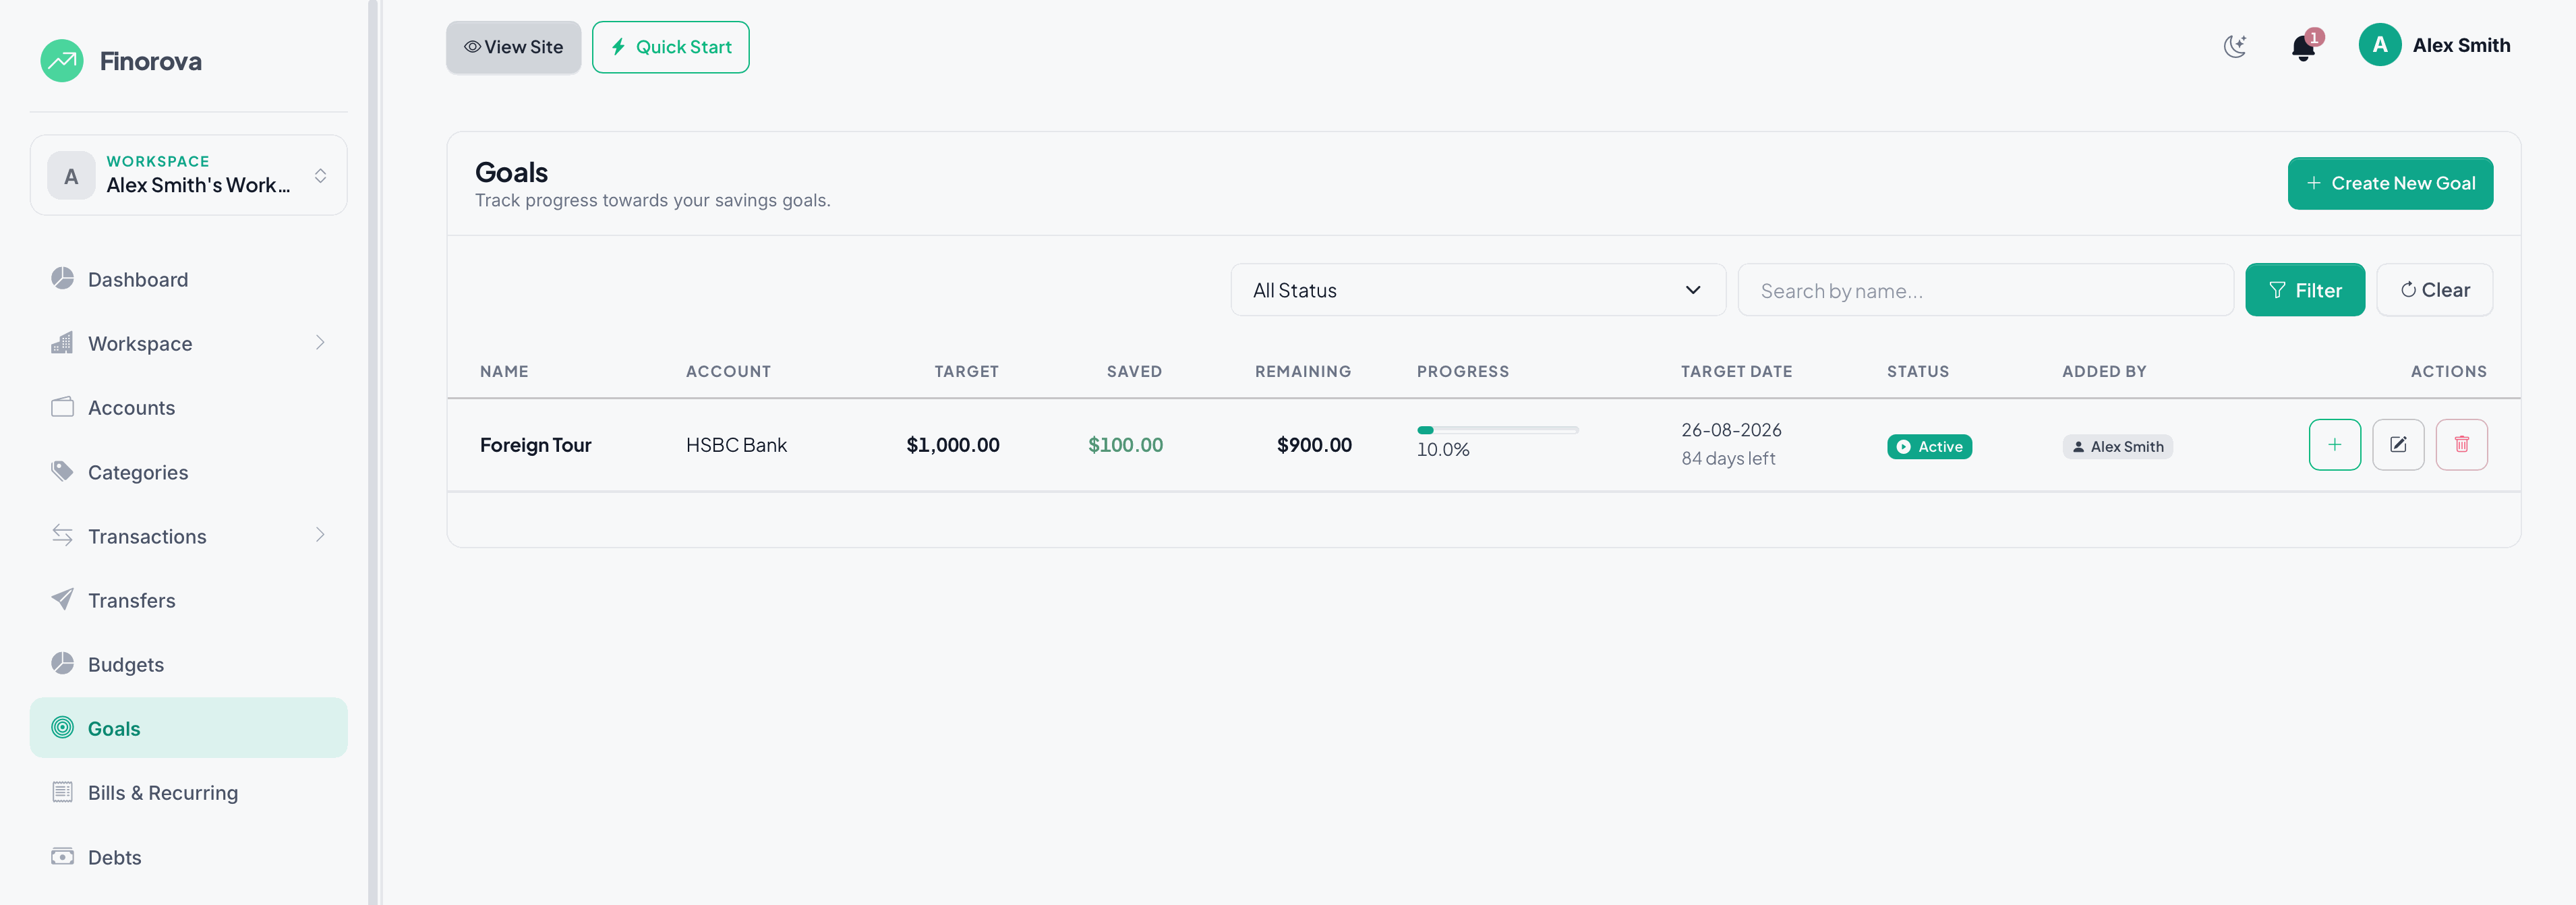
Savings Goals
Set a savings target (e.g. "Vacation fund — $2,000 by December"), then log contributions as you put money aside. The system tracks progress, calculates how much is left, warns when you're falling behind, and auto-completes the goal the moment you hit your target.
Fields You Can Set
- Name & icon — what you're saving for.
- Target amount — the number you're aiming at.
- Current amount — starting balance (defaults to 0).
- Target date — optional deadline; drives the "overdue" indicator.
- Linked account — optional, for reference only (Goals do not move money — they're a savings plan, not a separate sub-account).
- Notes — context for your future self.
Goal Lifecycle
- Active — the default state while you're still contributing.
- Completed — set automatically the moment a contribution makes
current_amount >= target_amount. The system fires a "goal achieved" notification. - Cancelled — manually set from the edit screen. Only active goals can be cancelled; completed ones cannot.
- Overdue badge — shown when a goal is still active and its target date has passed.
Bills & Recurring
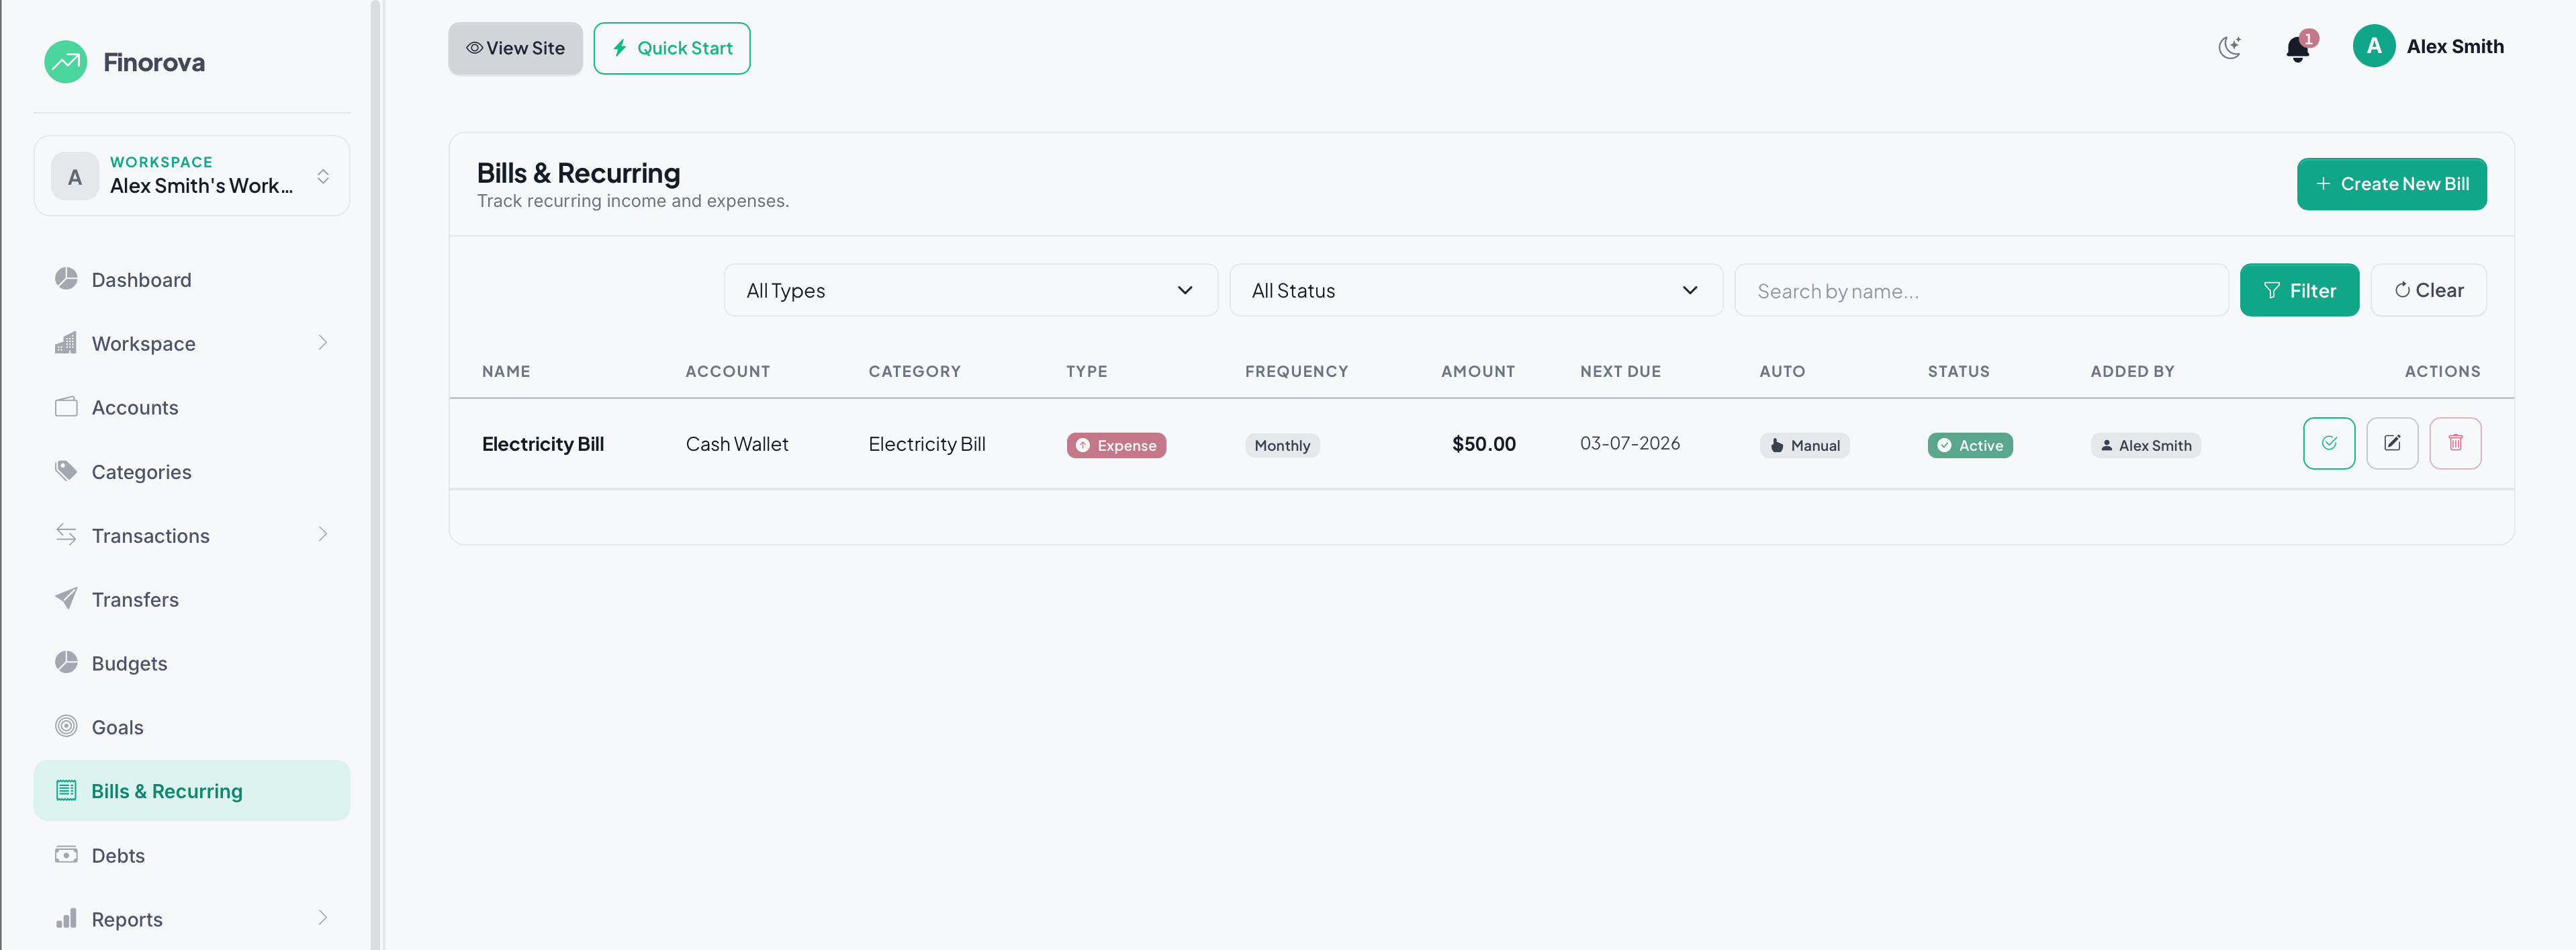
Recurring Bills
Bills are repeating income or expenses (rent, salary, Netflix, mortgage). Each bill knows its next due date; recording a payment writes a real transaction, updates the account balance, and rolls the bill forward to its next due date — automatically.
Fields You Can Set
- Name & type — Income or Expense.
- Account & category — where the money lands / leaves and how to classify it.
- Amount — the recurring value.
- Frequency — Daily, Weekly, Bi-weekly, Monthly, Quarterly, or Yearly.
- Start date — when the bill begins; the first next due date is calculated from this.
- End date — optional cap; the bill auto-deactivates once the next due date passes this.
- Auto-record — reserved for future automation (currently records are manual).
- Description — optional notes.
The "Record" Action
When you click Record on a bill:
- A new Transaction is created with the bill's type, amount, account, and current
next_due_date, withis_recurring=trueand a back-reference (bill_id) to this bill. - The linked account's balance is updated (income adds, expense subtracts).
next_due_dateis advanced by the bill's frequency viaadvanceDueDate().- If the new
next_due_datewould passend_date, the bill auto-deactivates.
Debts
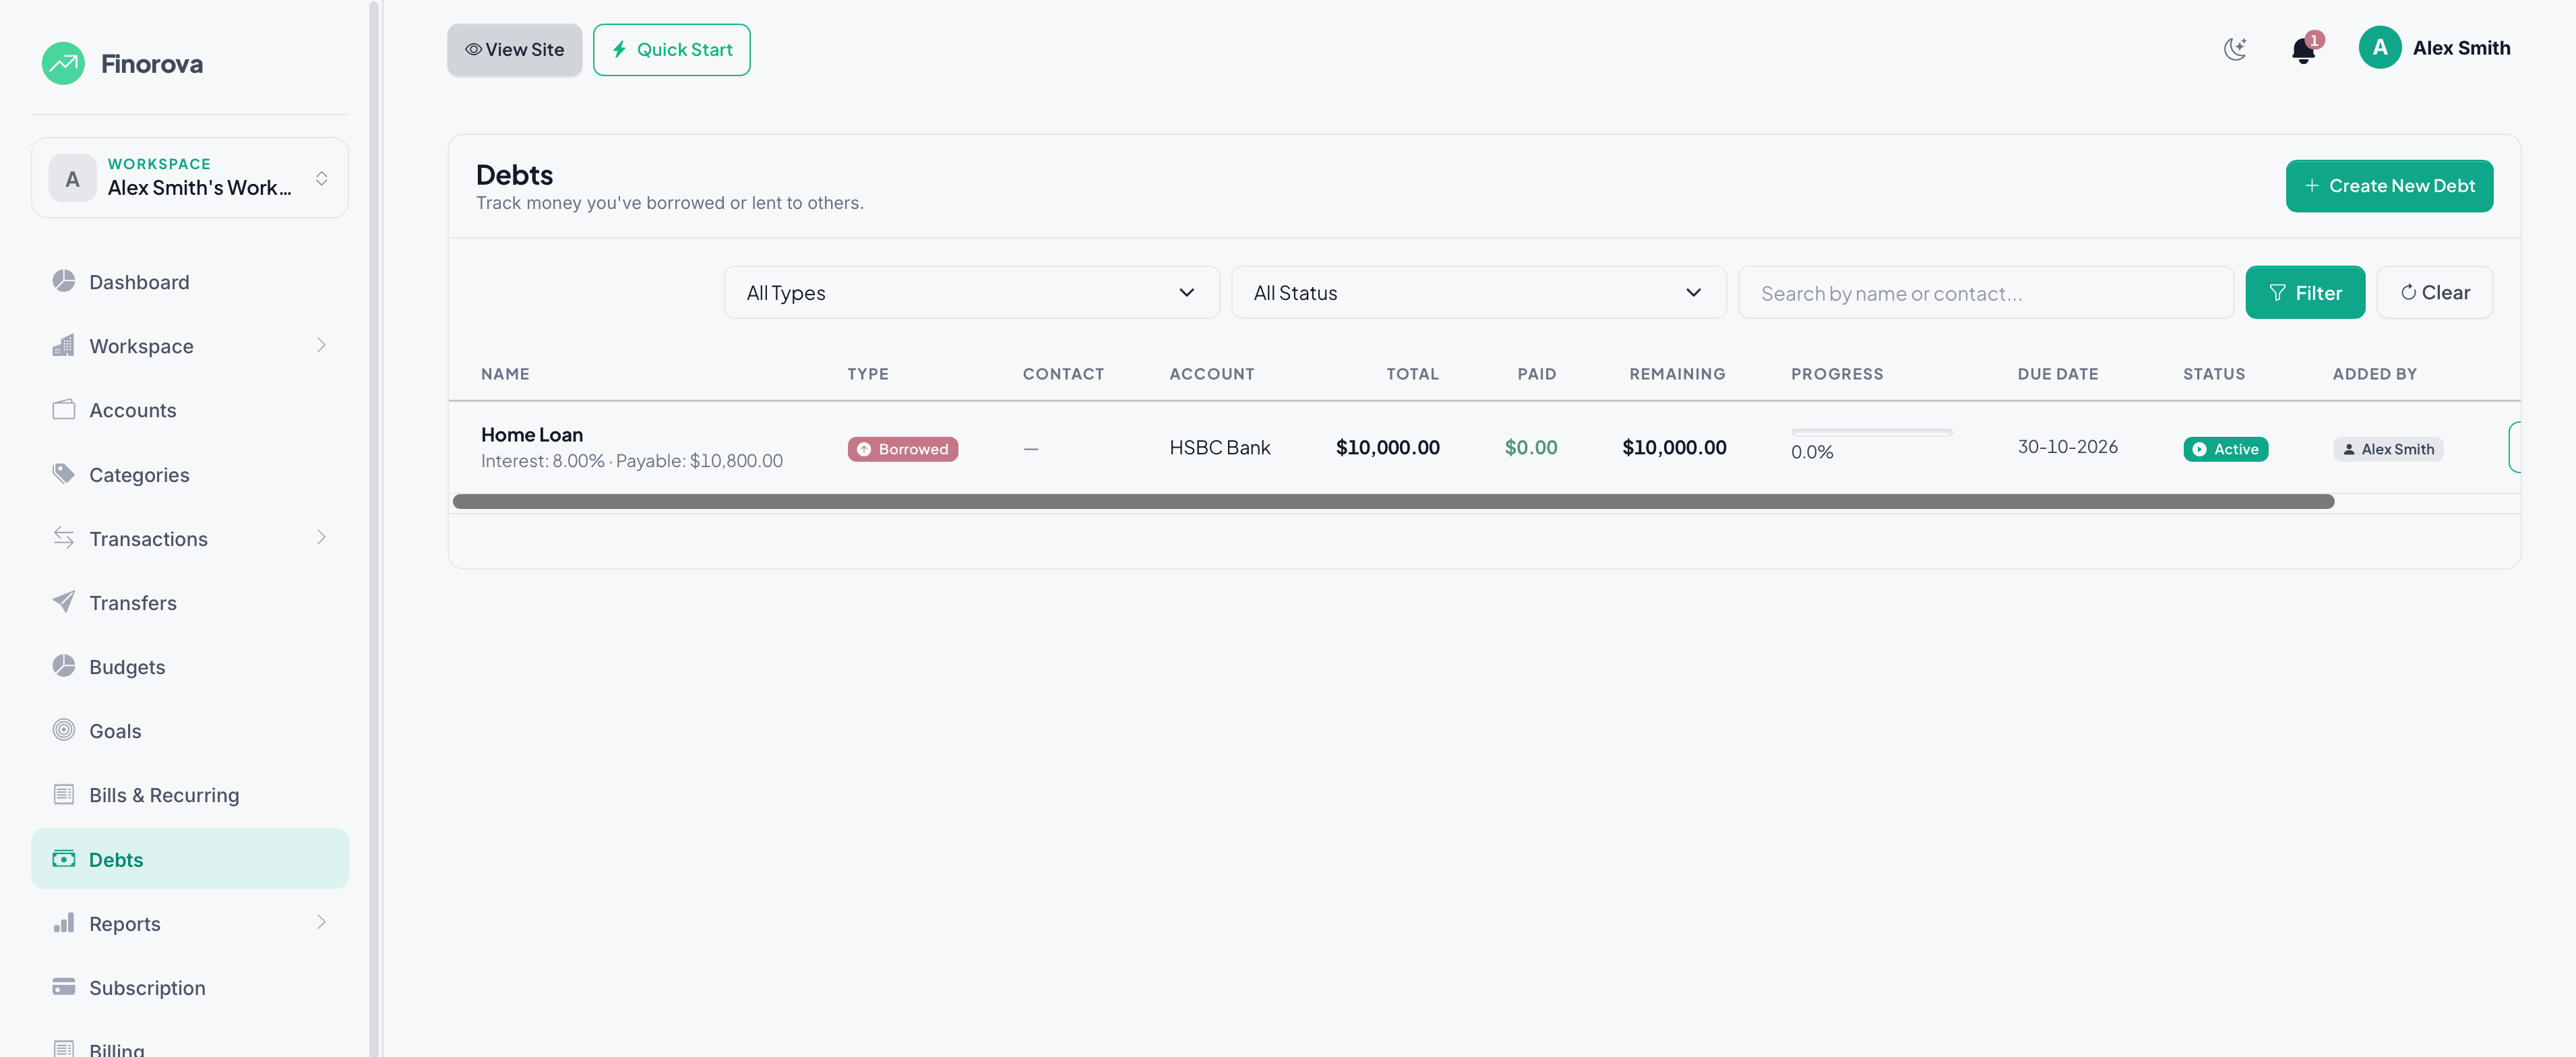
Debt Tracking
Track money you've borrowed (you owe someone) or lent (someone owes you). Recording a debt automatically moves the principal into or out of an account; logging repayments chips away at the balance until the debt is fully settled.
Fields You Can Set
- Type — Borrowed (you received money) or Lent (you gave money out).
- Name, contact name, contact phone — who the other party is.
- Total amount — the principal.
- Interest rate — stored for reference; no auto-accrual.
- Due date — optional; drives the "overdue" status.
- Account — where the principal lands (Borrowed) or leaves from (Lent).
- Notes — context.
How the Principal Works
Creating a debt is more than a record — it creates a real transaction:
- Borrowed debts create an income transaction (the money lands in your account).
- Lent debts create an expense transaction (the money leaves your account).
- The transaction ID is stored on the debt as
principal_transaction_idso the system can reverse it later if the debt is edited or deleted.
Repayments
- Each repayment creates its own transaction in the opposite direction to the principal — paying back a borrowed debt is an expense; receiving repayment on a lent debt is income.
paid_amounton the debt is incremented after each repayment; status is recalculated immediately.- Deleting a repayment reverses both the transaction and the
paid_amount. - Validation prevents repayments that would exceed the remaining balance.
Status Lifecycle
- Active — still outstanding.
- Paid —
paid_amount >= total_amount(auto-set). - Overdue — past due date and not yet paid (auto-set).
- Cancelled — only set manually; reverses all related transactions.
Deleting a debt also reverses its principal transaction and all repayments from the linked account. If the original money has already been spent elsewhere, the balance will drop accordingly — review before deleting.
Reports
Five report types help you understand your finances:
- Income vs Expense
- Category Breakdown
- Account Statement
- Cash Flow
- Budget Report
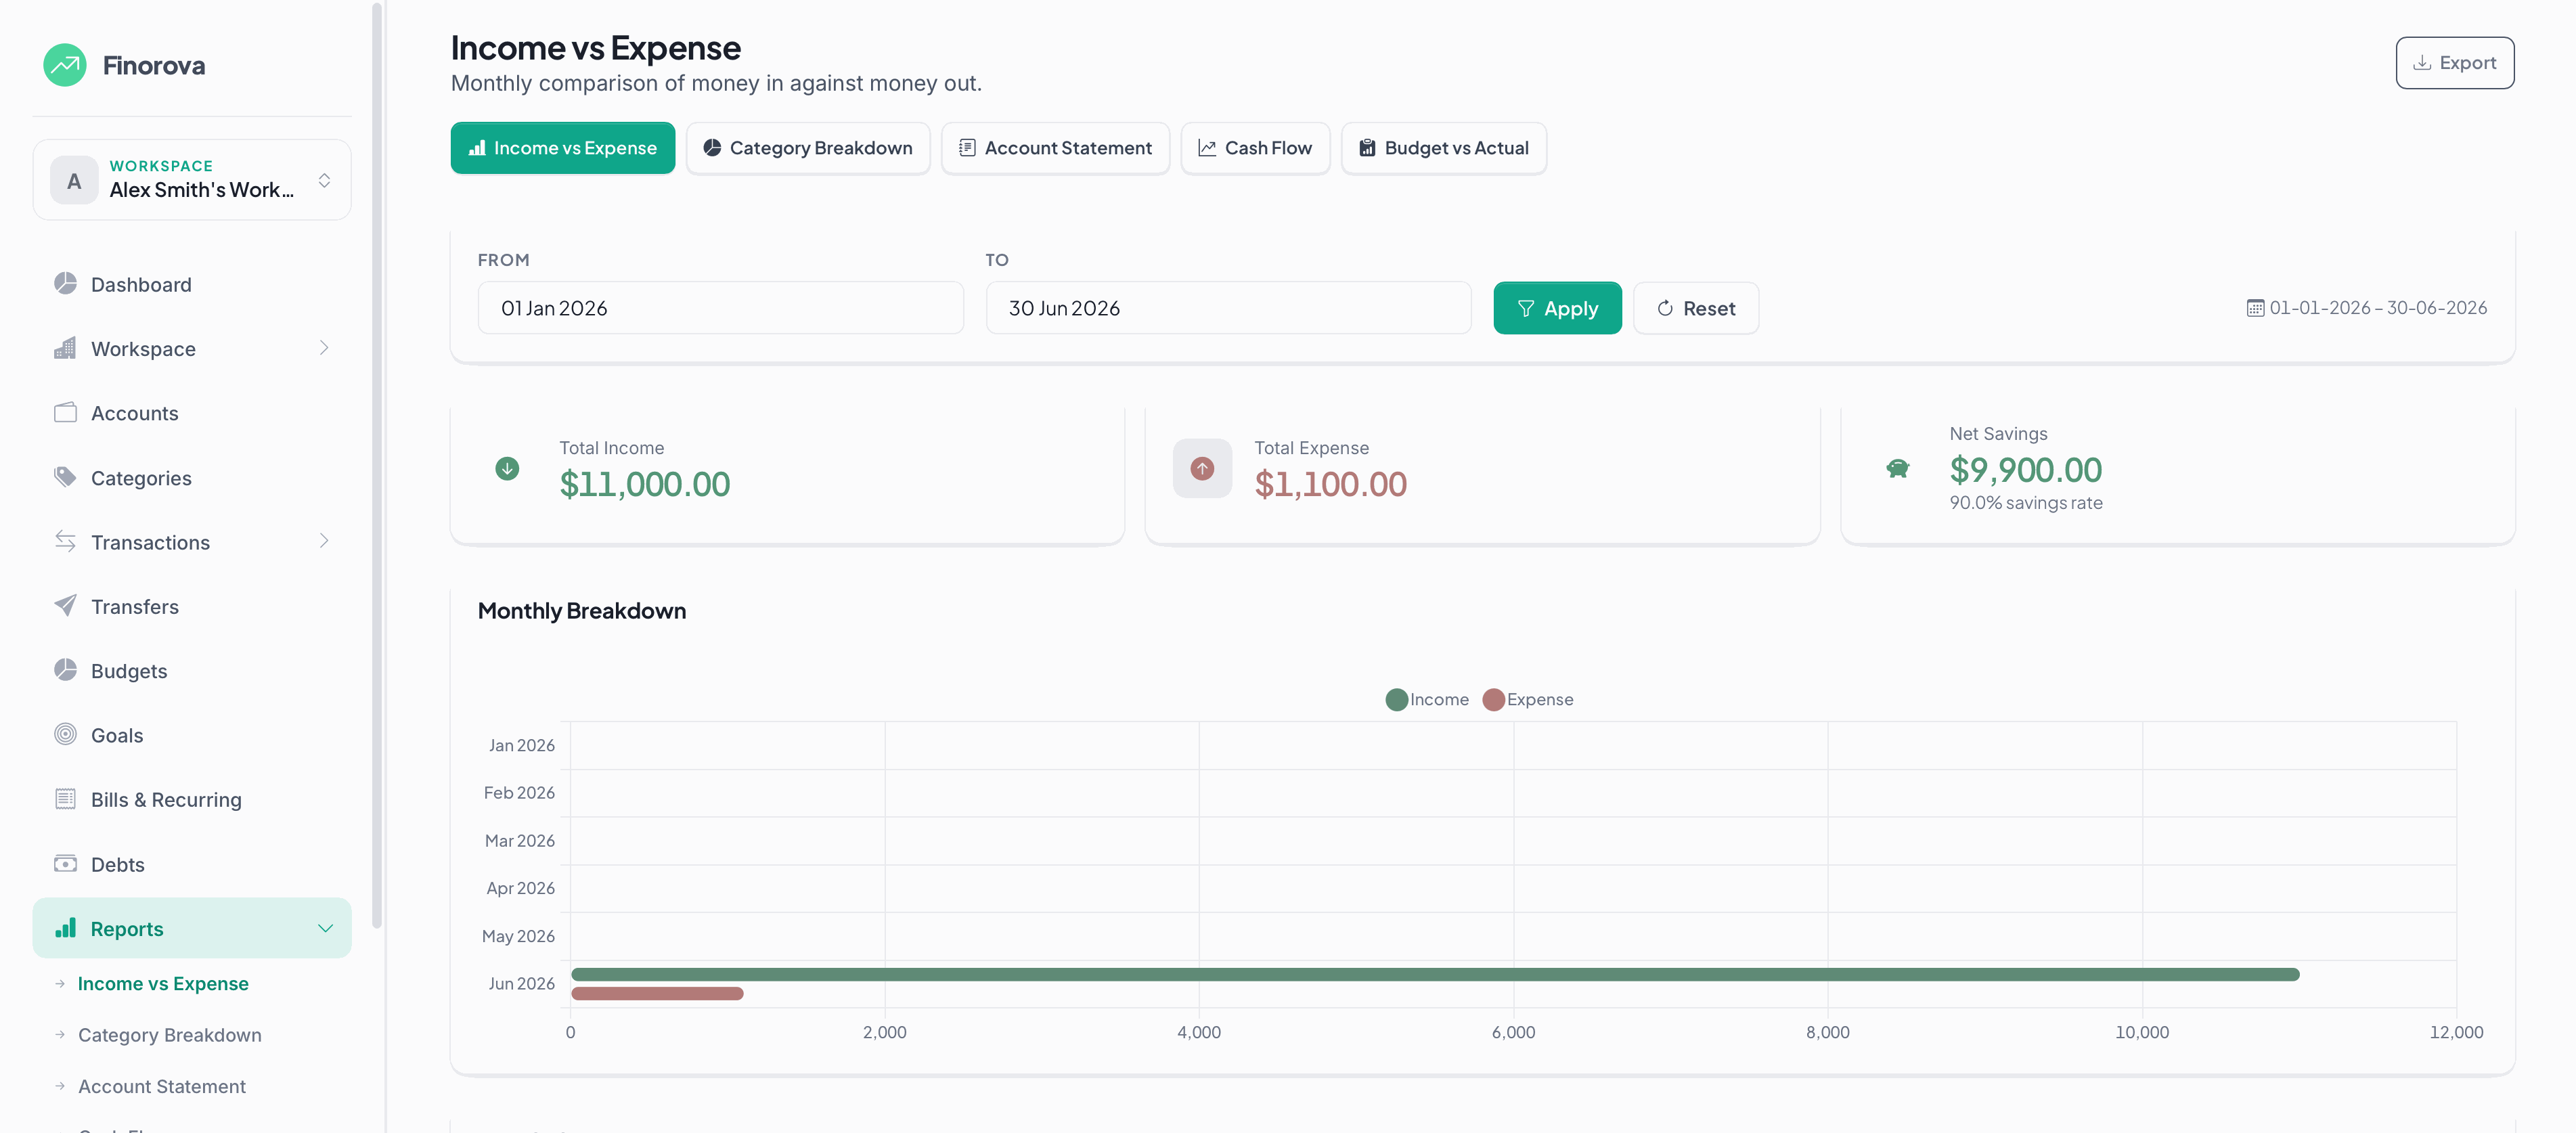
Income vs Expense
Side-by-side comparison of total income and total expenses for any period. Spot months where spending exceeded earnings at a glance.
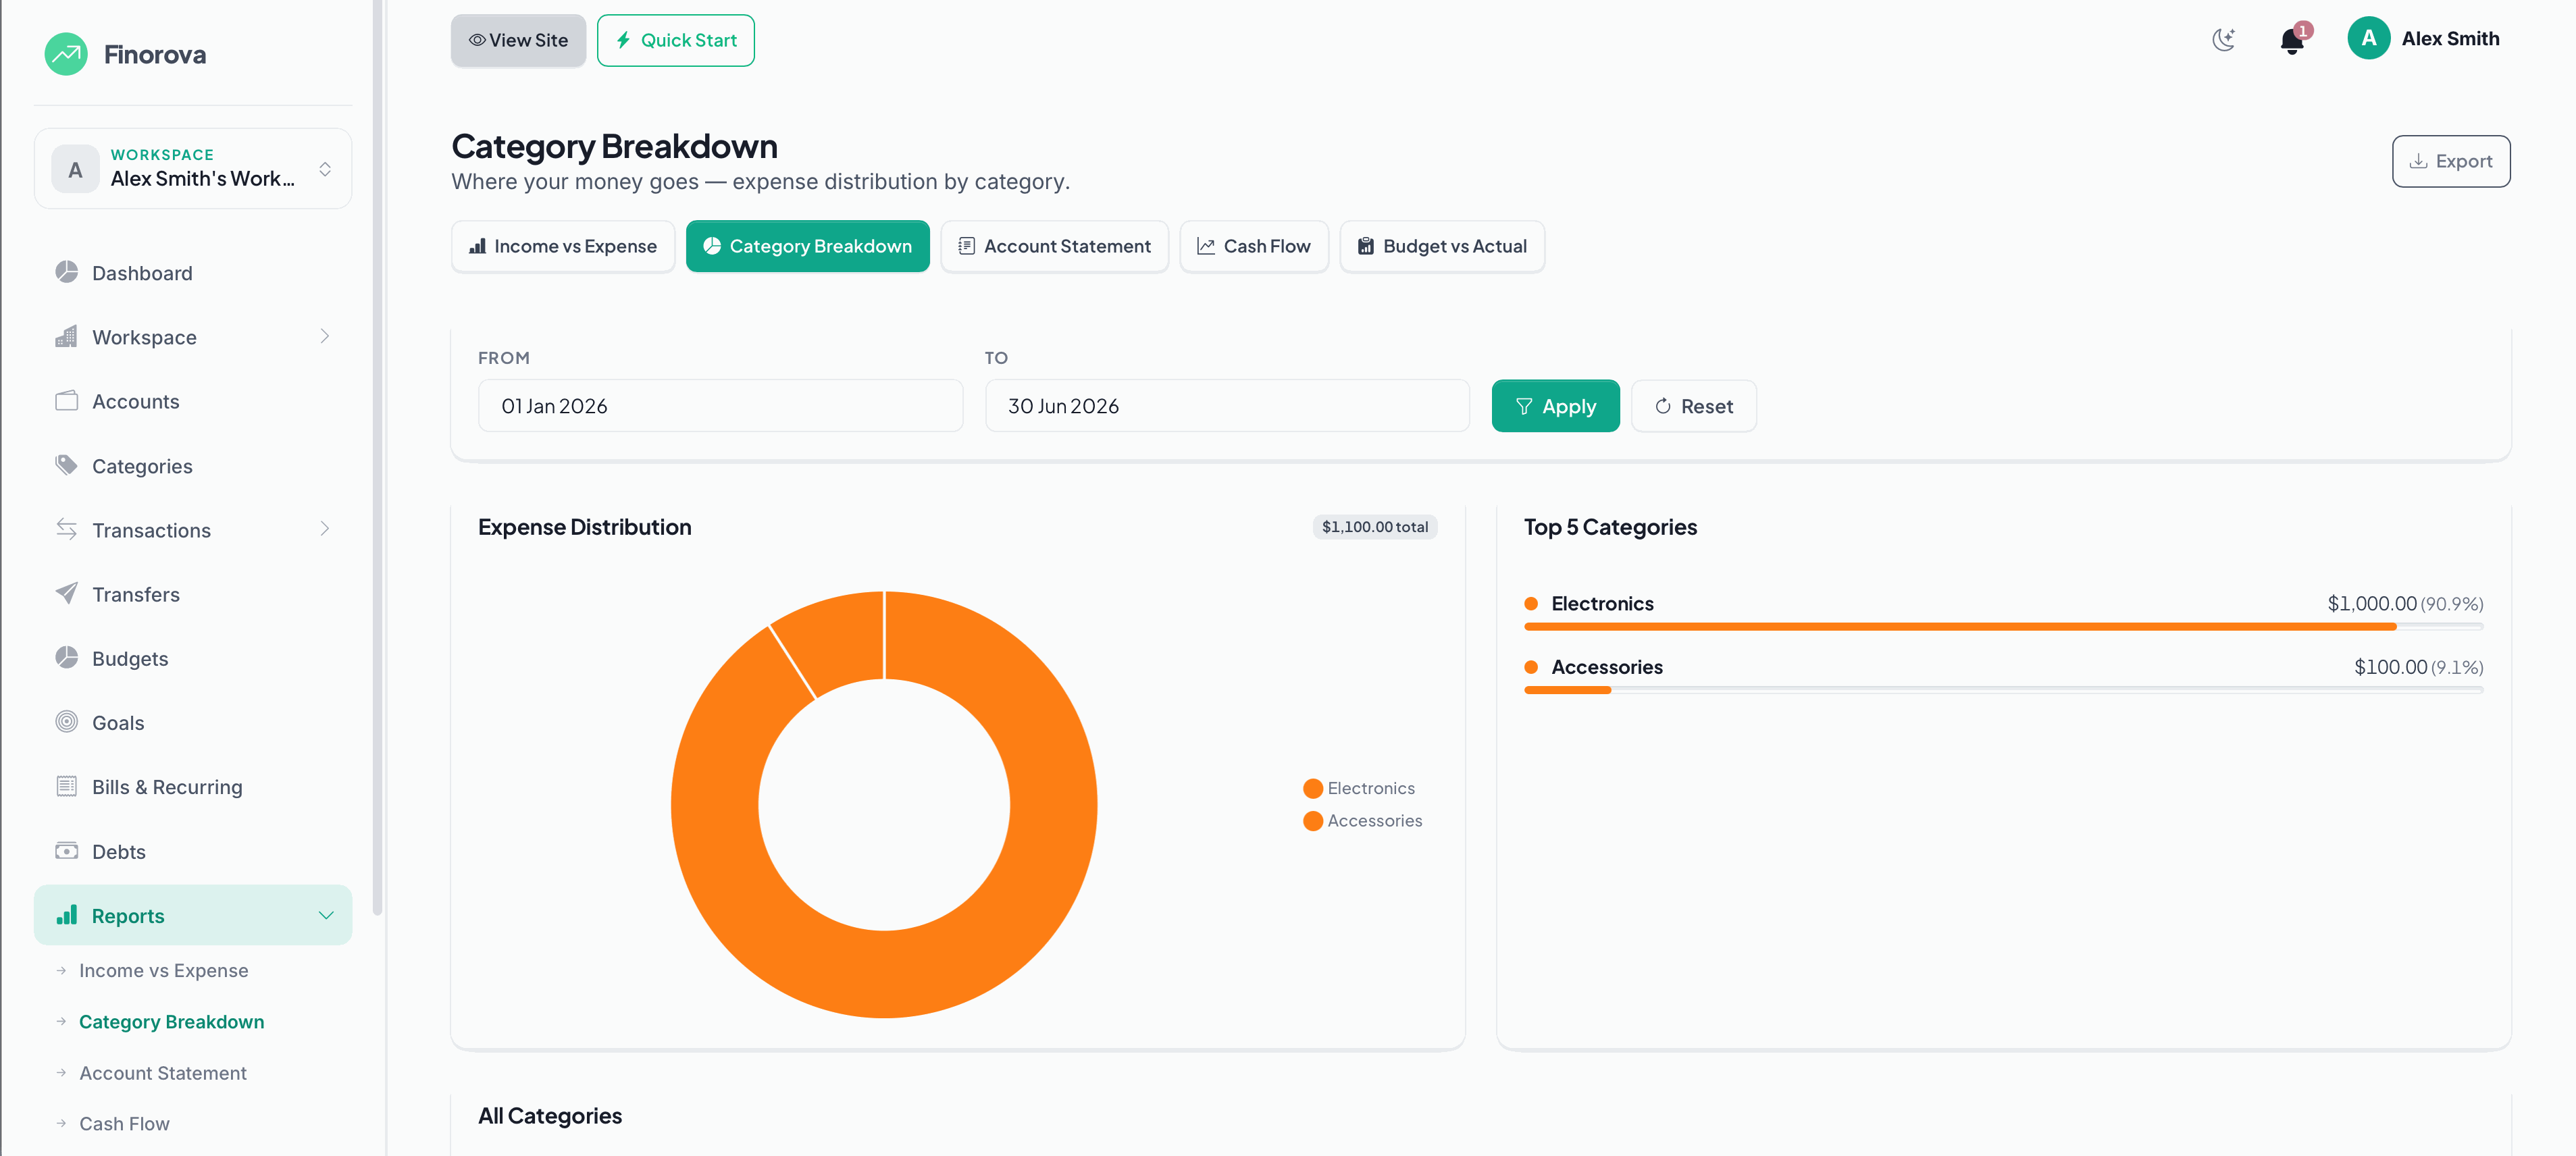
Category Breakdown
See exactly where money is going — a pie or bar chart grouped by category. Drill down by month, quarter or custom range.
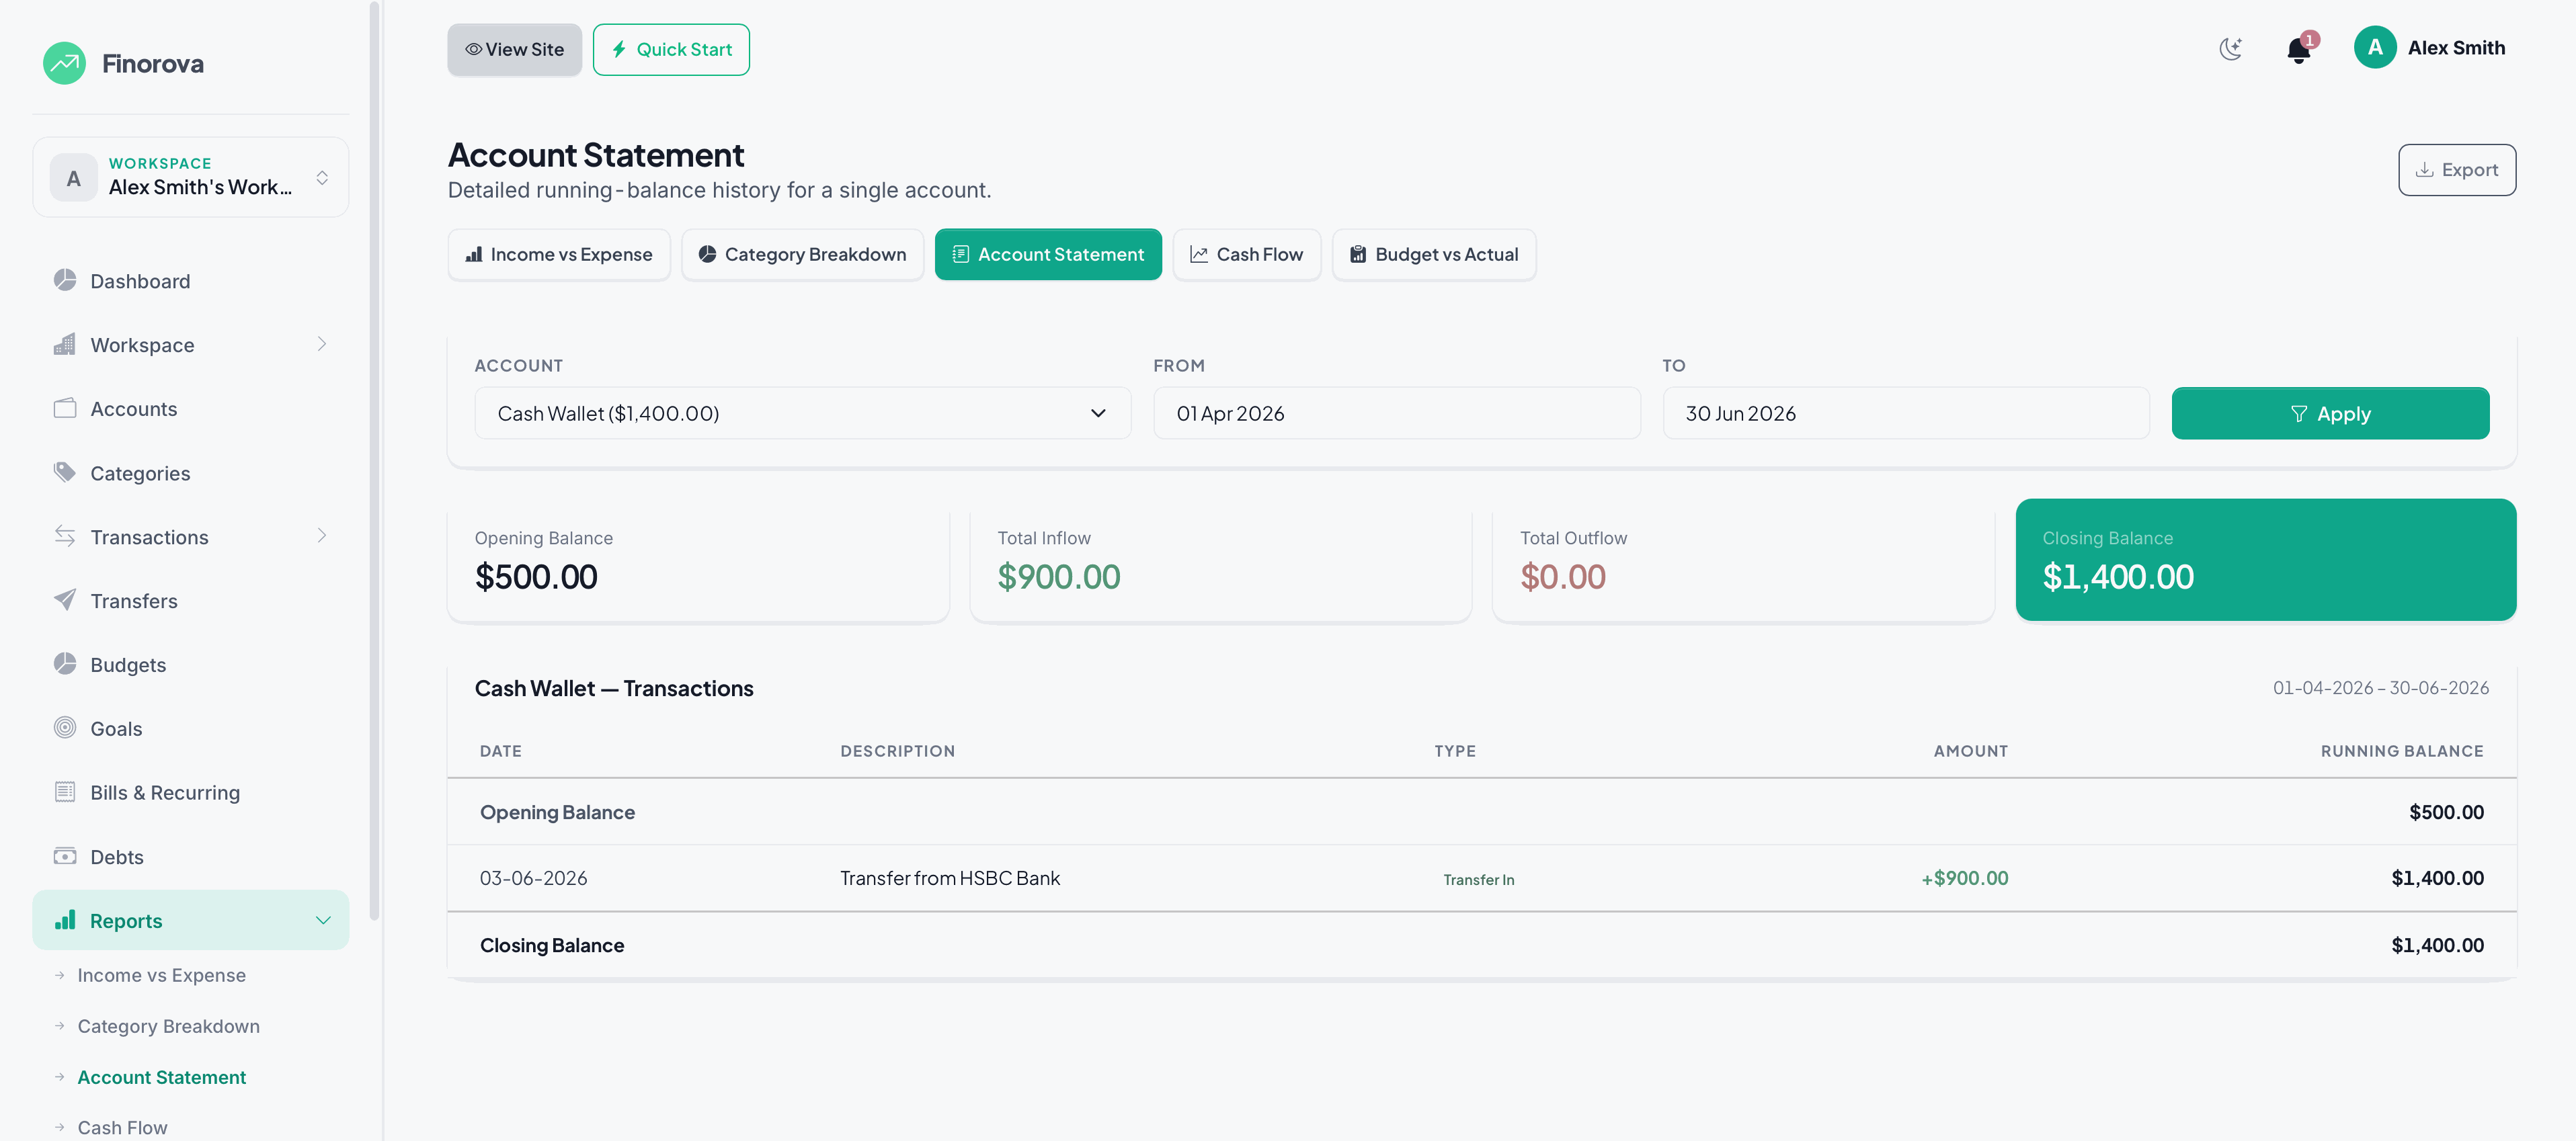
Account Statement
A full ledger view of one account — opening balance, every transaction, and running balance. Export as CSV for reconciliation.
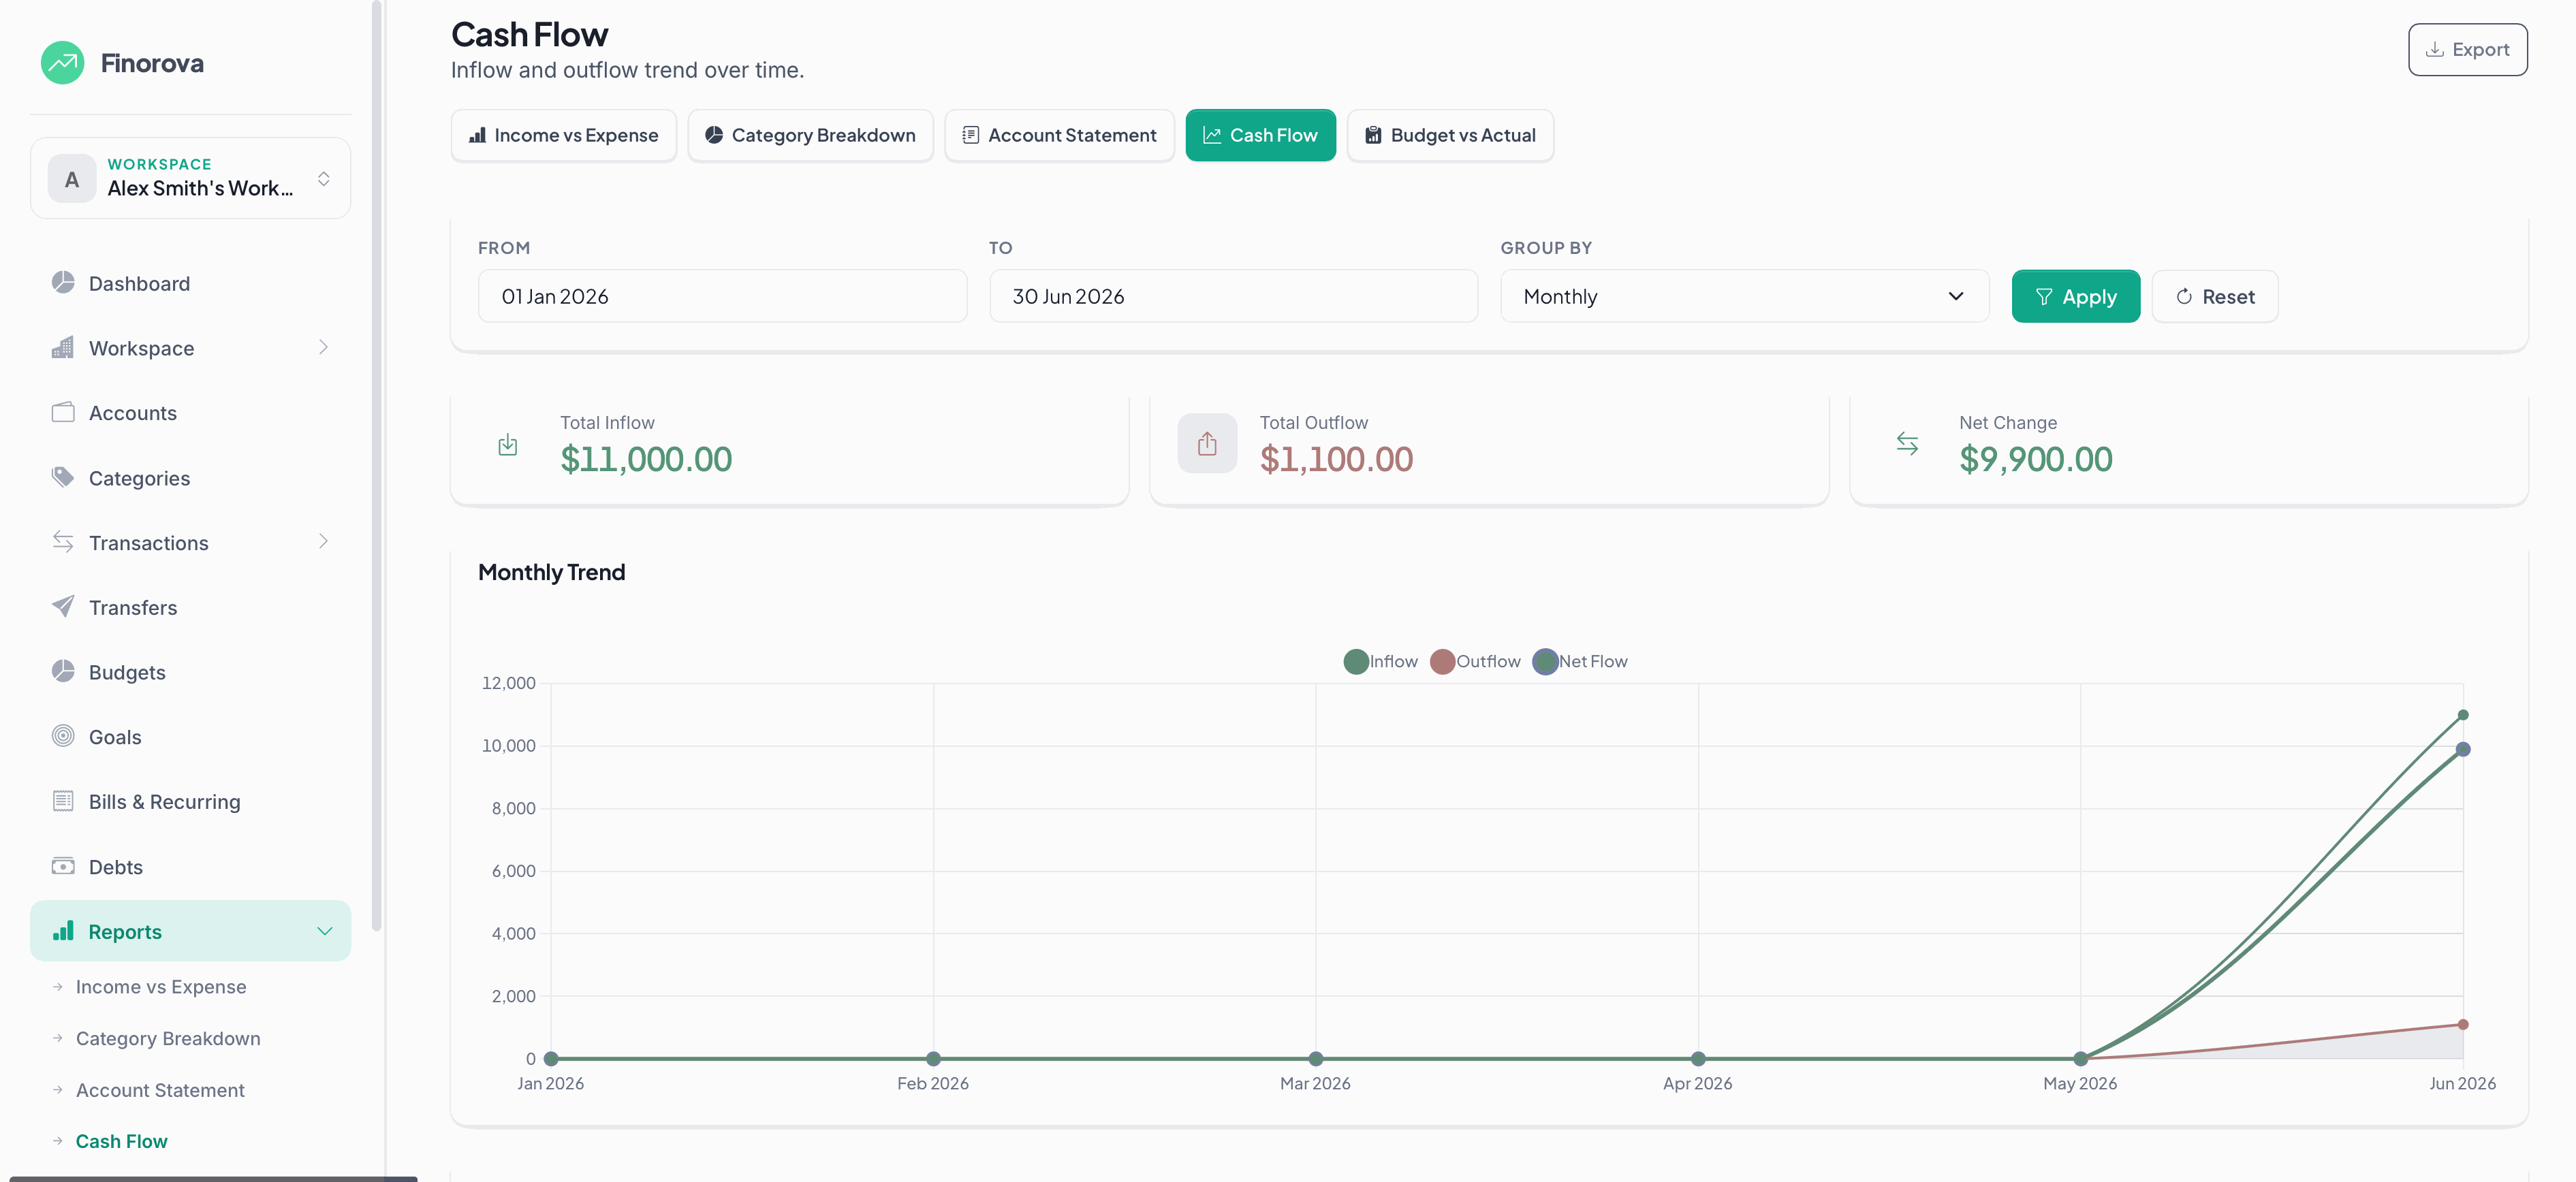
Cash Flow
Monthly cash-flow waterfall — how much came in, went out, and what was left. Identifies seasonal patterns in your finances.
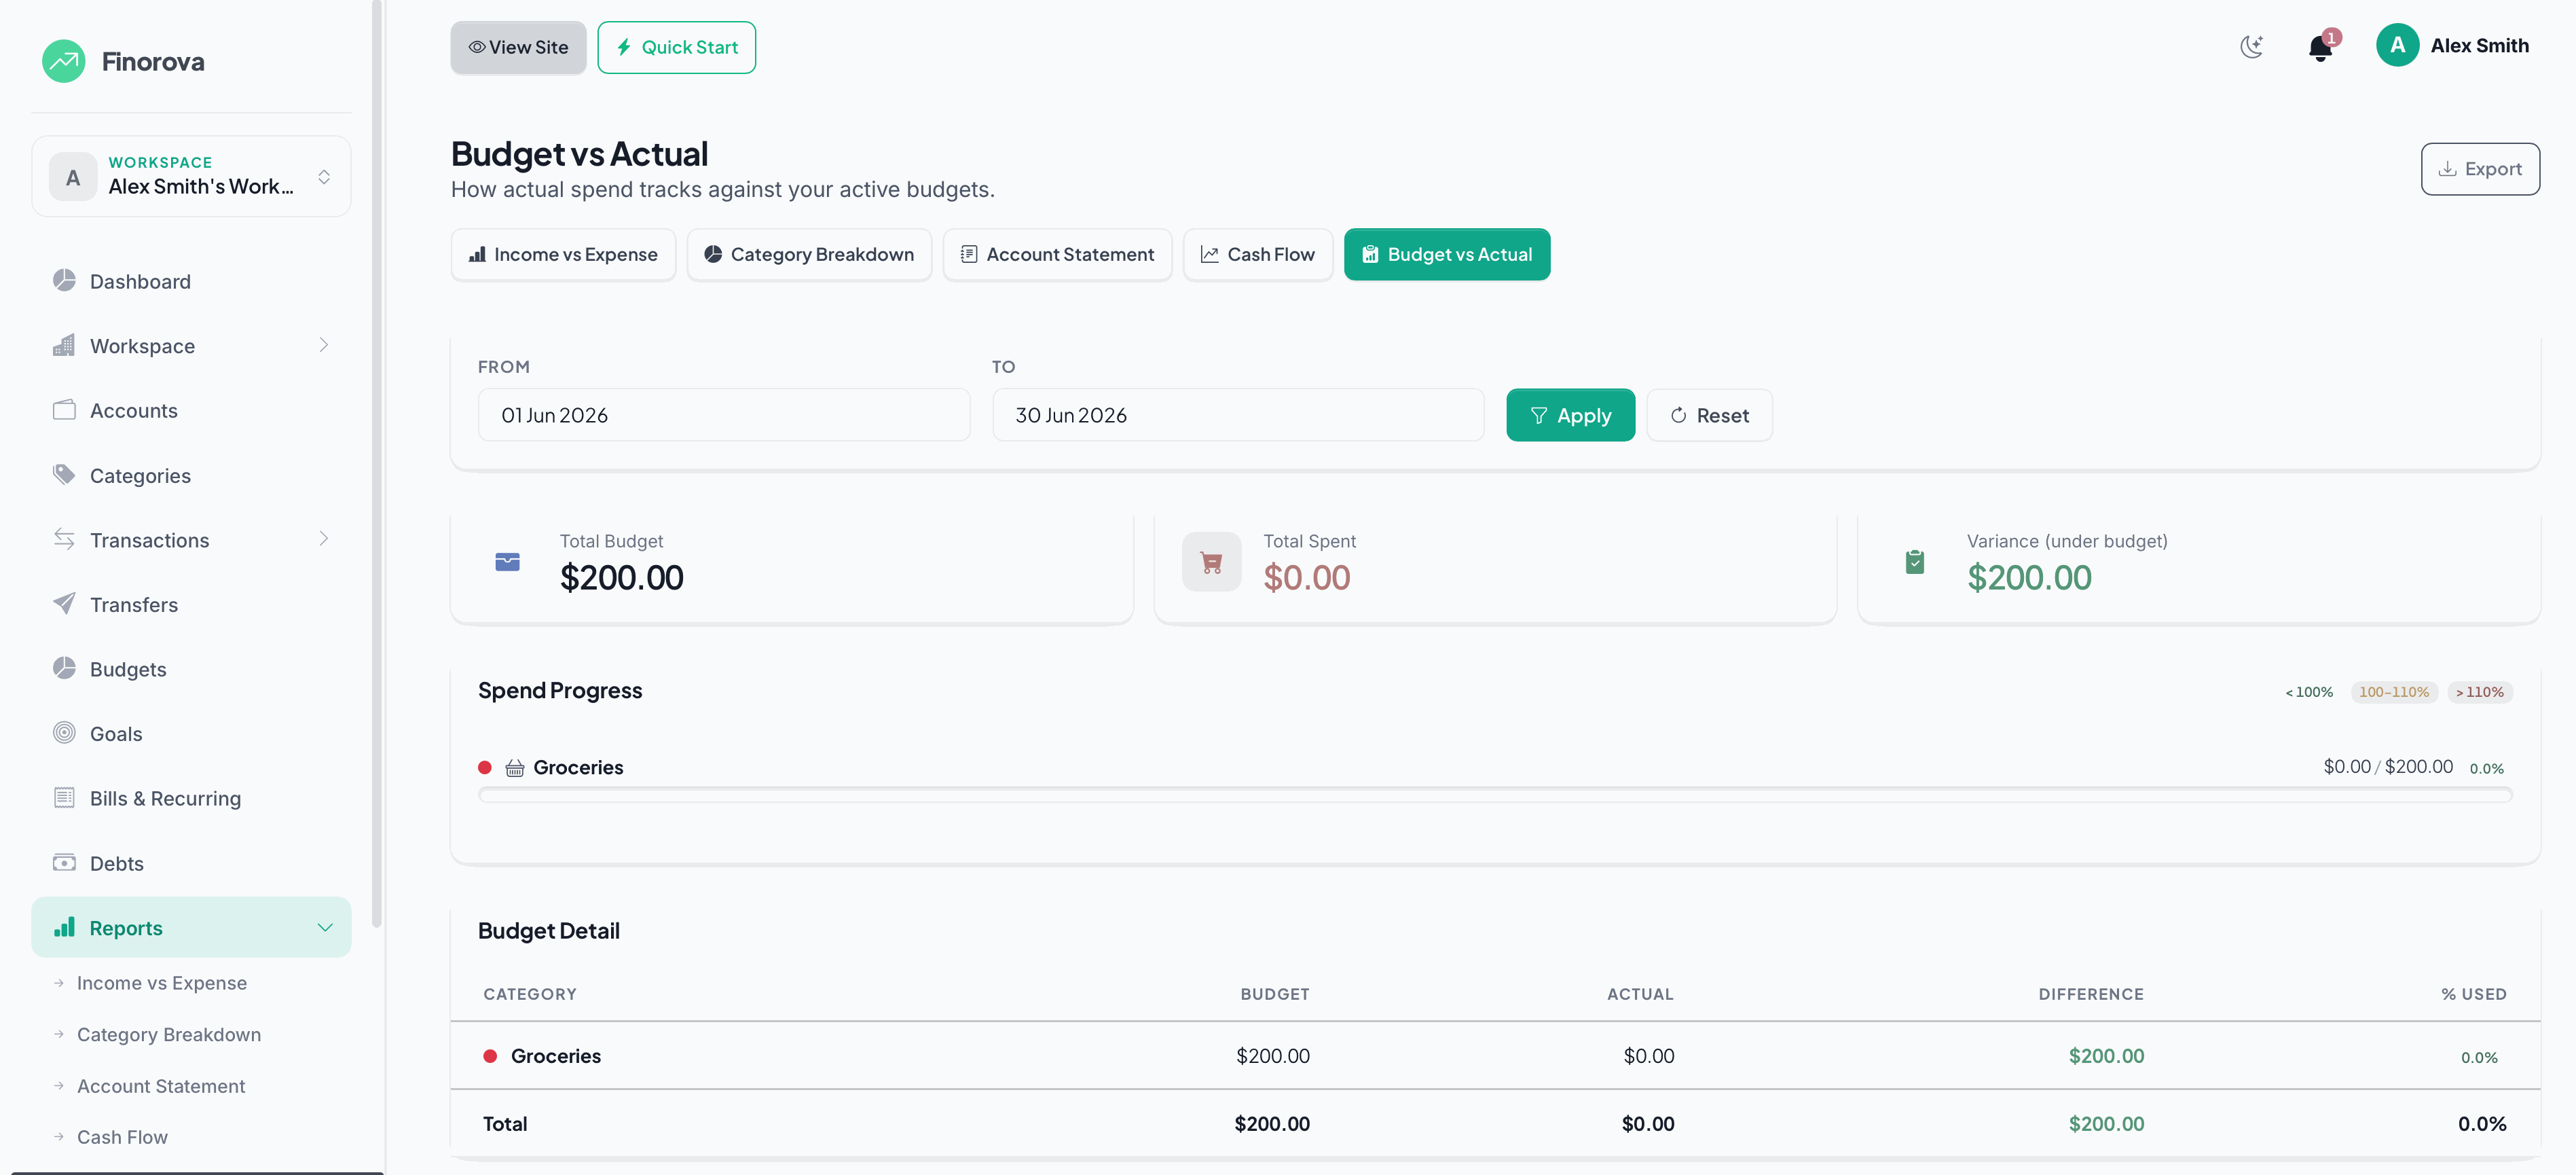
Budget Report
Compare budgeted vs actual spending per category. Color-coded status shows on-track, warning (80 %+) and exceeded (100 %+) budgets.
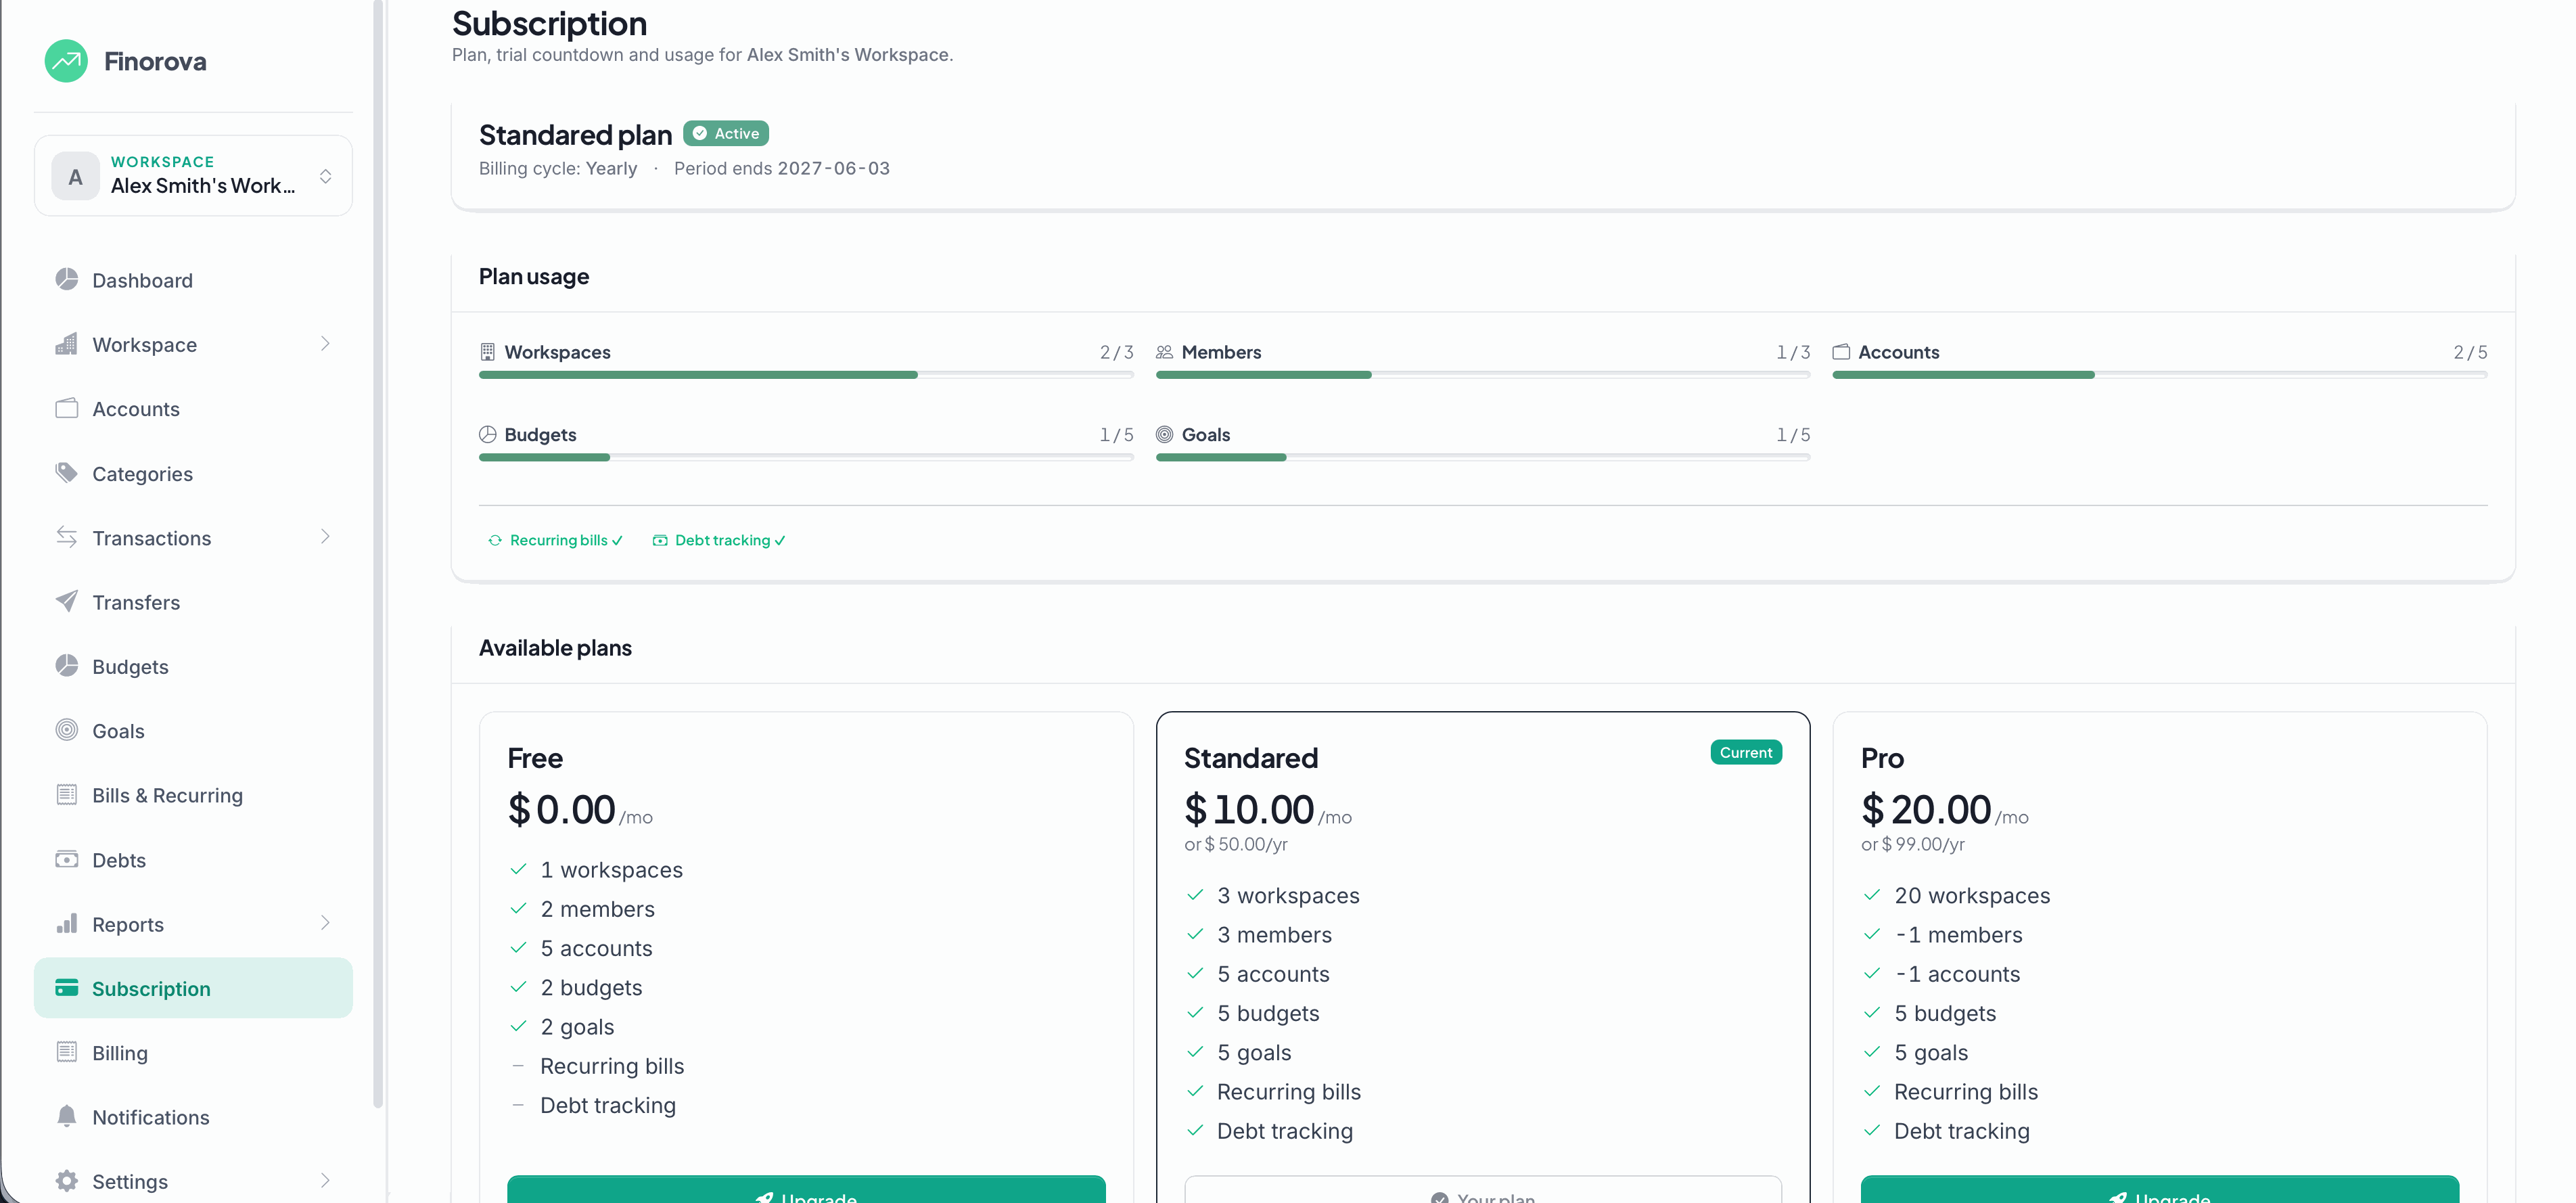
Subscription
My Plan
See your current plan, renewal date, and feature limits. Upgrade, downgrade, or cancel from one screen.
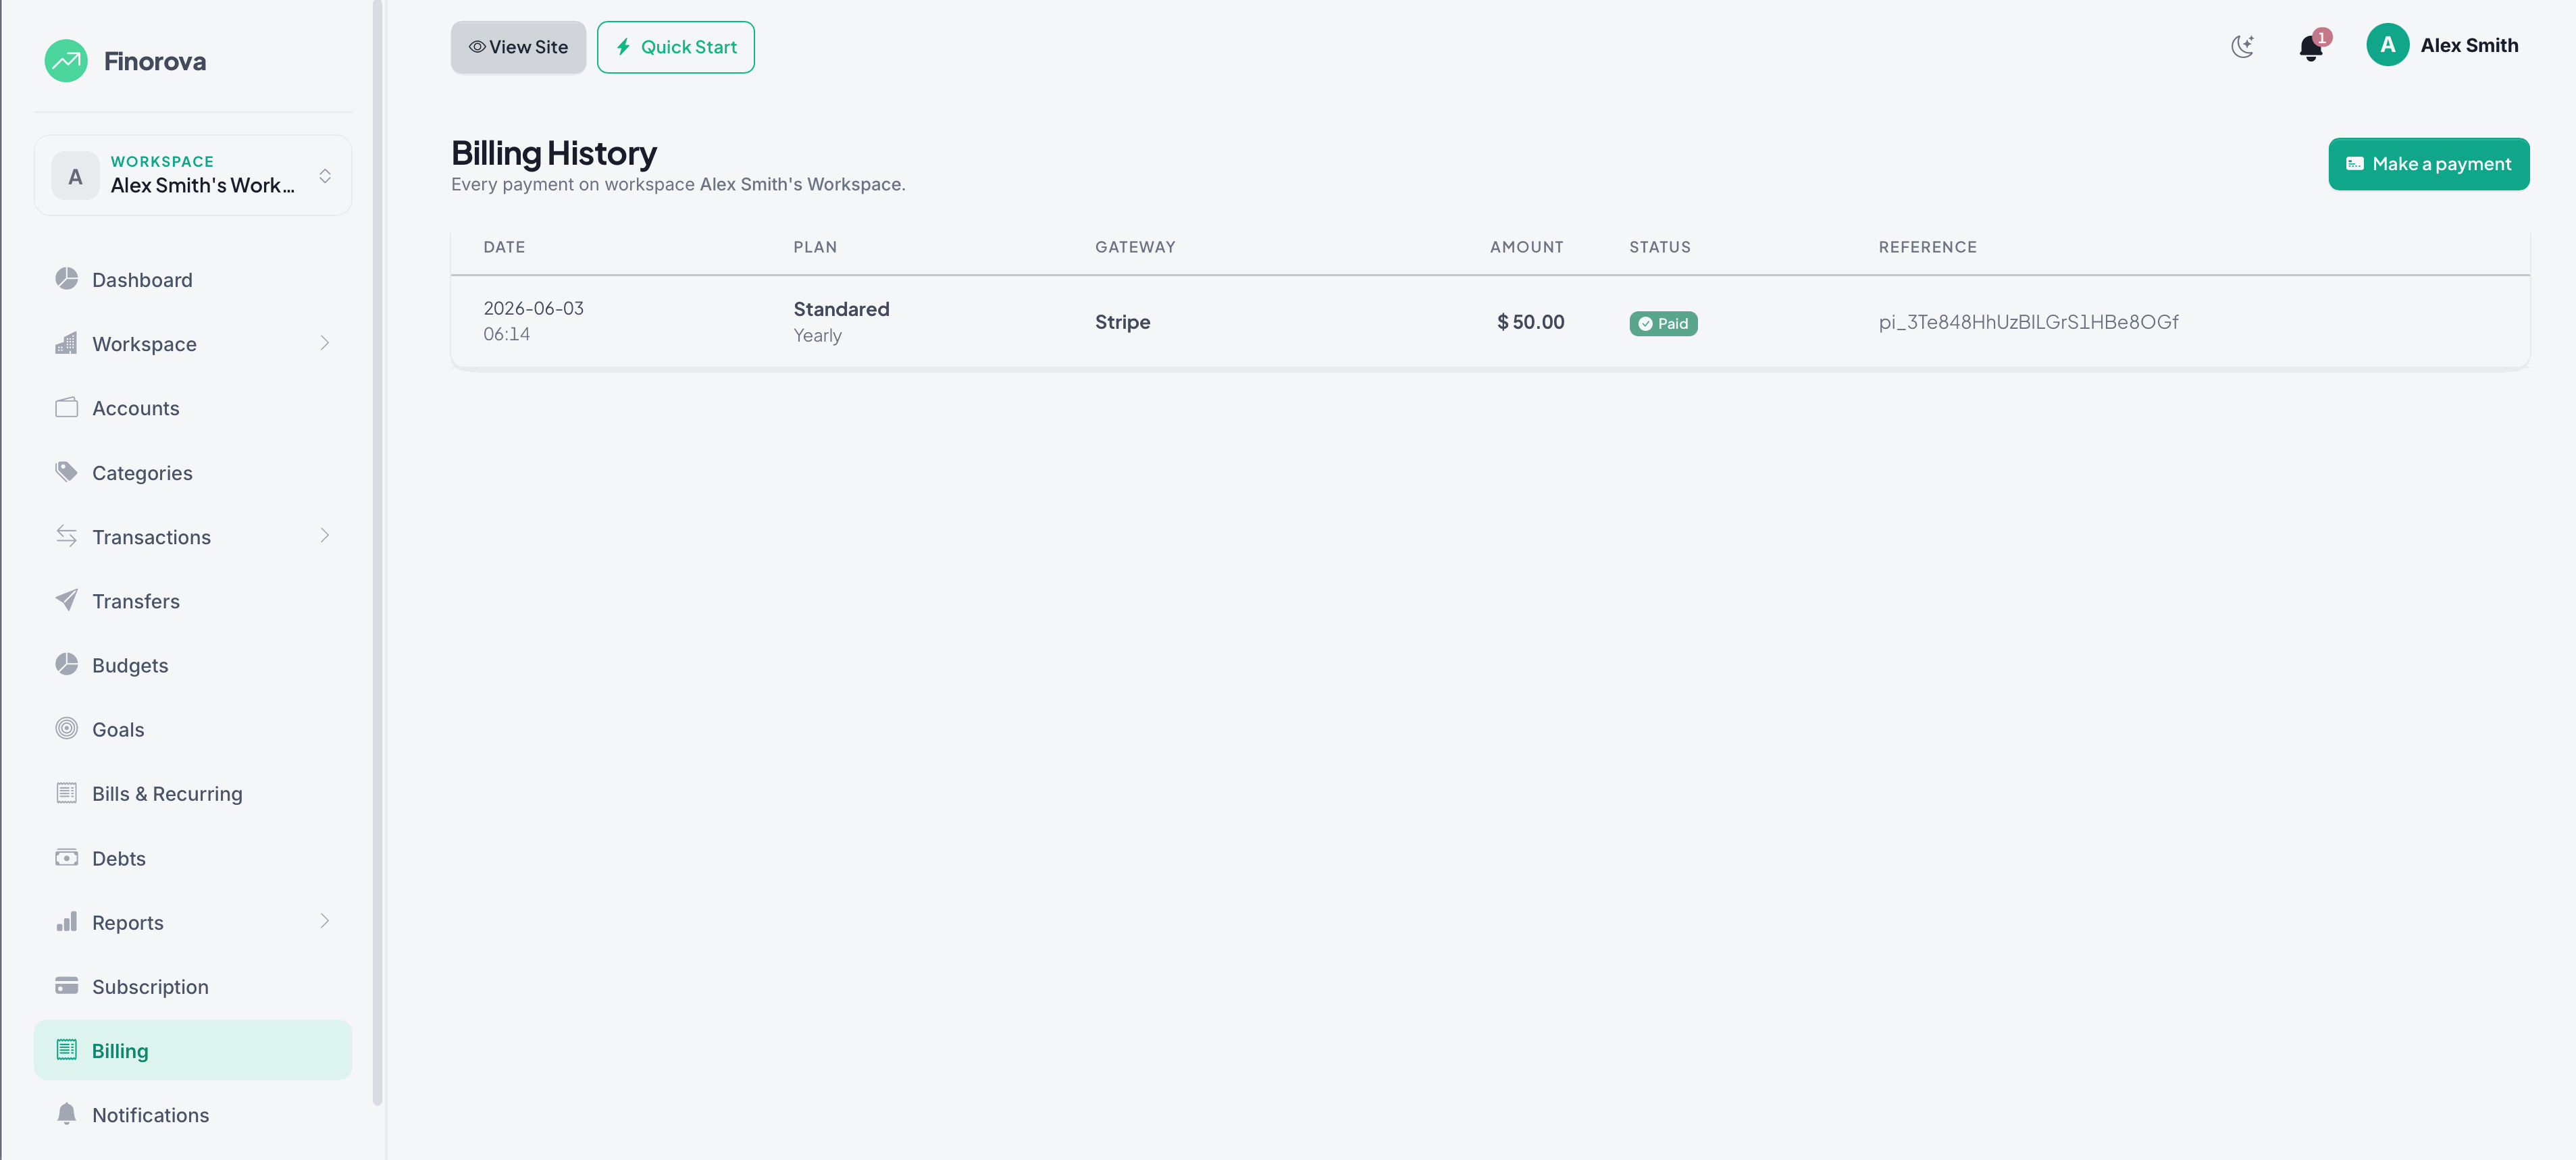
Billing
Billing History
Download invoices for every successful payment. Filter by date or status.
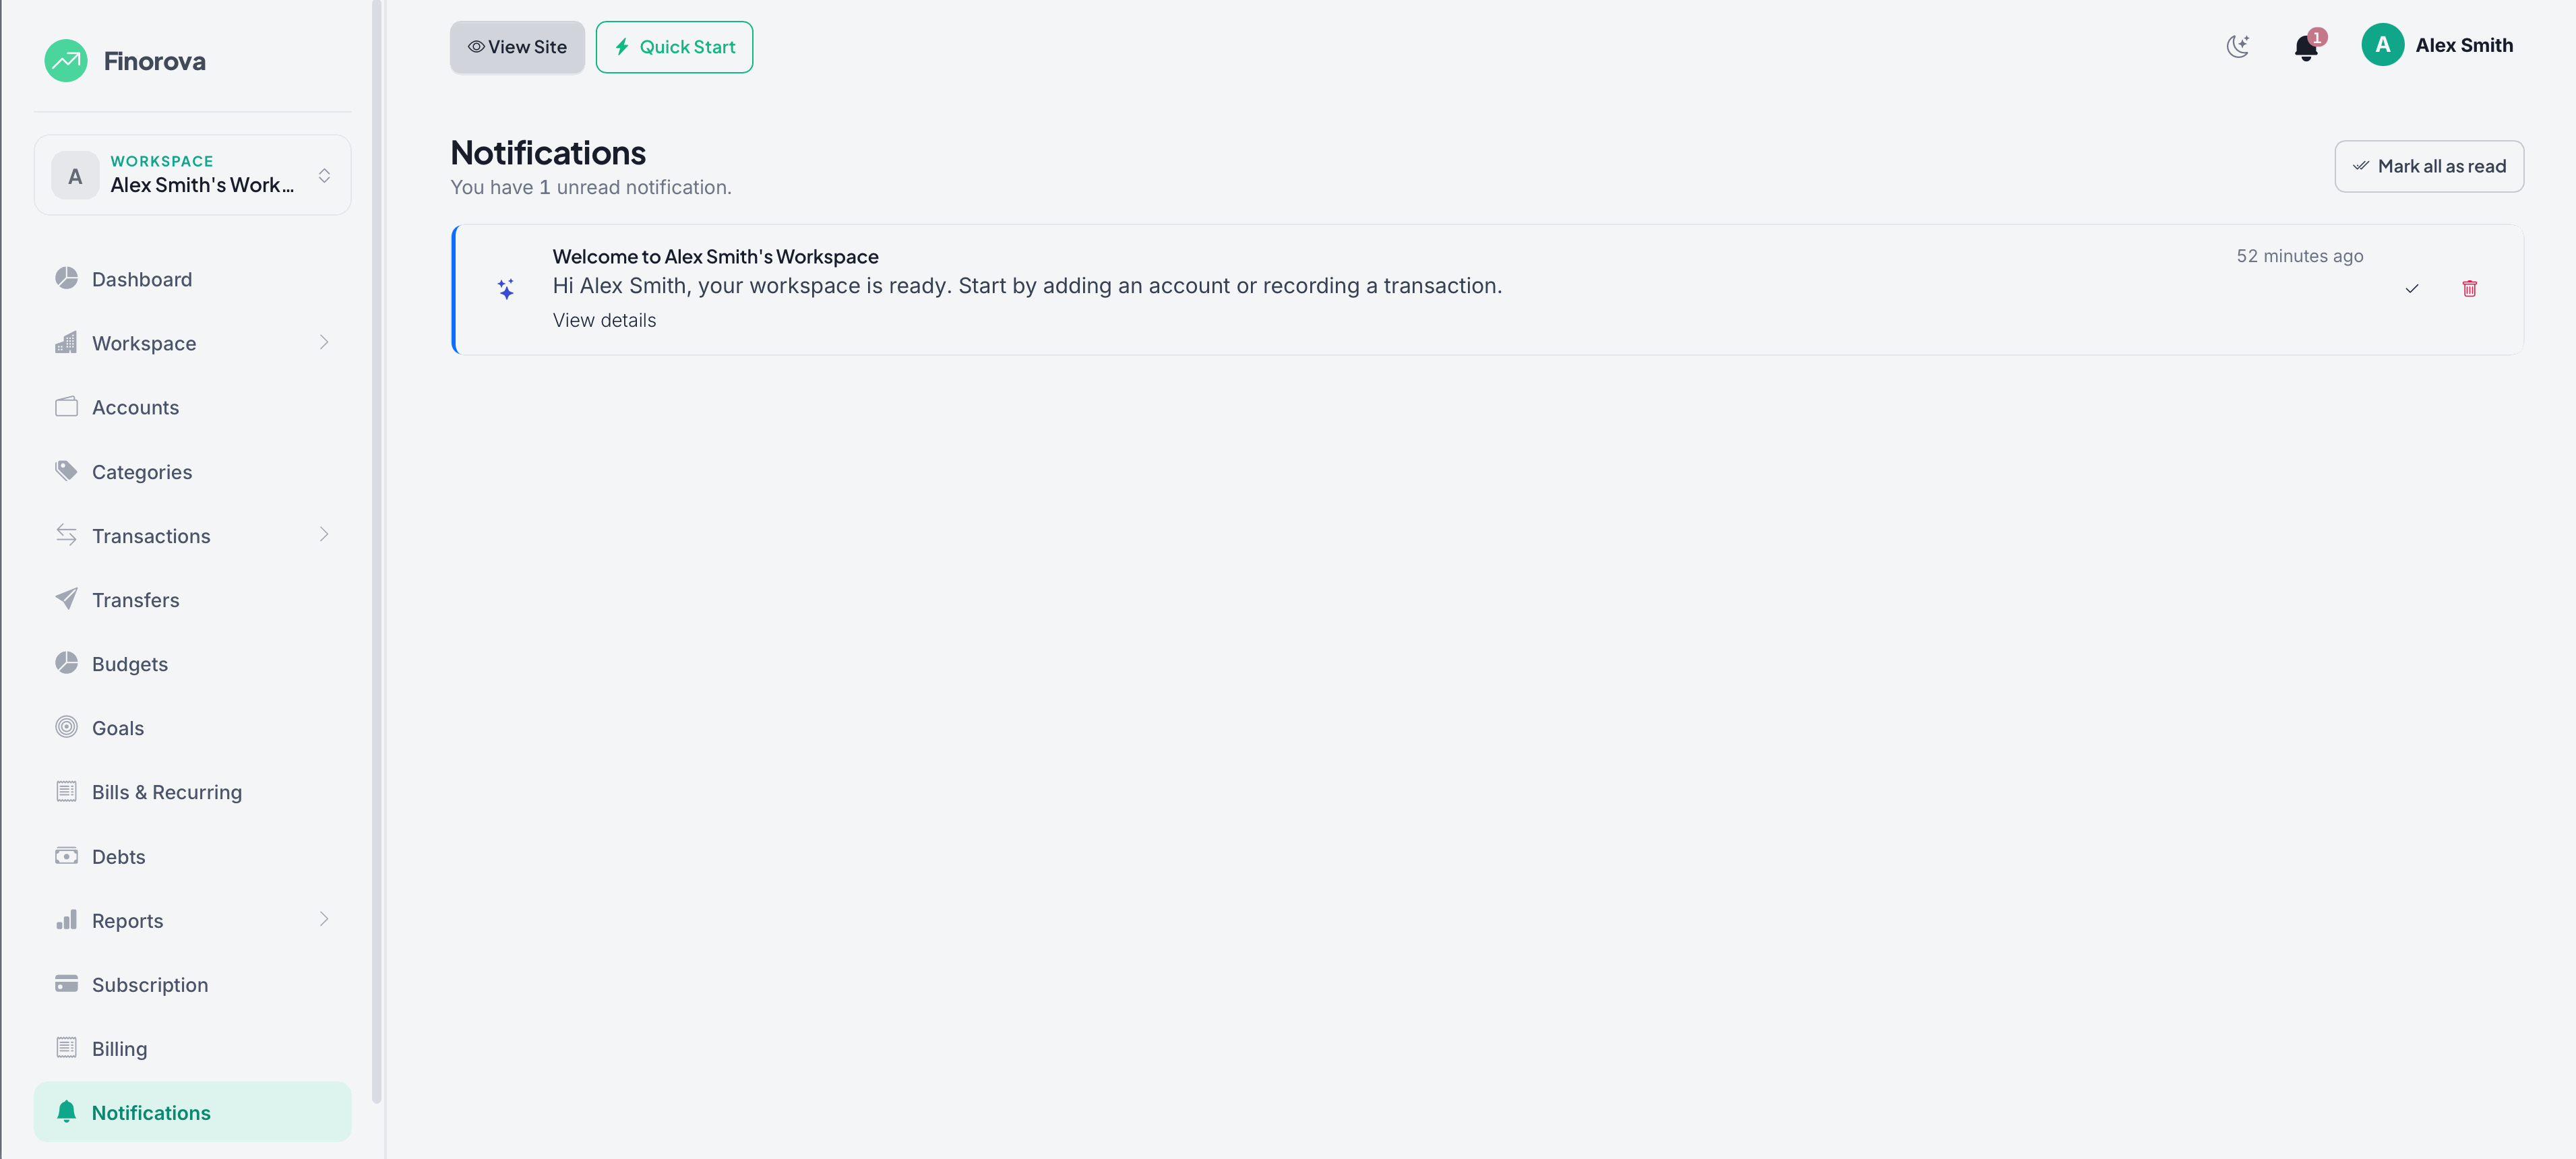
Notifications
In-App Notifications
Stay informed about bill reminders, budget alerts, goal milestones, and team activity. Mark items read or clear all.
User Settings
Profile
Update your name, email, avatar, preferred language and timezone.
Security
Change password and review active sessions. Two-factor authentication can be enabled here.
API Tokens
Generate personal access tokens to integrate Finorova with external tools via the REST API.
Treat API tokens like passwords — never share them publicly or commit them to source control.
Changelog
v1.0.0 — Initial release
- Admin: users, plans, subscriptions, payments, reports, settings
- User: dashboard, workspaces, accounts, transactions, budgets, goals, bills, debts, reports
- Multi-workspace support with role-based permissions
- Light + dark mode dashboard
Support
Need help? Reach out through any of these channels:
- Author: Codericks
- Email: codericks.envato@gmail.com
- Documentation: this guide (you're reading it!)
- Issue tracker: via your CodeCanyon item comments
php artisan about
php artisan migrate --seed
php artisan storage:link
Common artisan commands you may need while troubleshooting.